
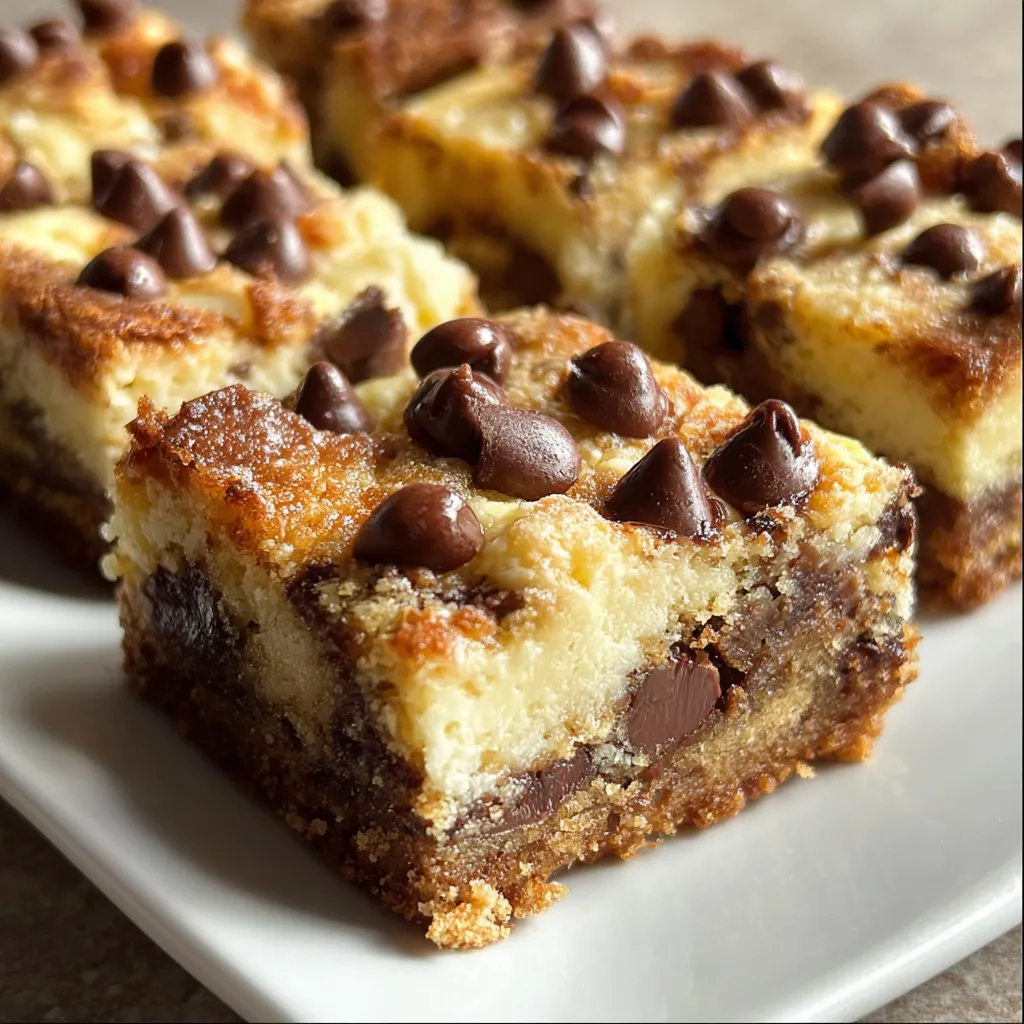
Who can resist Chocolate Chip Cheesecake Bars? A buttery graham cracker crust topped with creamy cheesecake swirled with melty chocolate chips, cut into rich, portable bars. Each bite offers a silky texture, balanced sweetness, and pockets of warm chocolate that make every afternoon feel special. This easy-to-follow recipe will guide you through creating a dessert that’s both decadent and convenient—perfect for sharing (or sneaking!) any time you need a sweet fix.
Before diving in, let’s gather the simple yet flavorful ingredients that come together to make these bars unforgettable:
Mastering these bars is all about simple steps and a bit of patience—baking a sturdy crust, whipping up a smooth cheesecake filling, and letting everything cool and set properly. Follow each instruction below, from pressing that graham crust into the pan to gently folding in chocolate chips, and you’ll be rewarded with perfect bars every time. Don’t rush the cooling stages—they’re key to achieving creamy, crack-free slices.
1. Preheat the oven to 350°F and line an 8-inch square baking pan with parchment paper. This setup ensures easy removal of your bars later.
2. Combine the graham cracker crumbs, granulated sugar, and melted butter in a bowl, stirring until the mixture resembles wet sand. This texture is perfect for a sturdy crust.
3. Press the crumb mixture firmly into the bottom of the prepared pan, creating an even layer to support the cheesecake filling.
4. Bake the crust for 10 minutes, then remove from the oven and set aside to cool slightly before adding the filling.
5. In a large bowl, beat the cream cheese until smooth and creamy, scraping down the sides as needed to avoid lumps.
6. Add the granulated sugar and beat until well combined, then add the eggs one at a time, beating lightly after each addition to maintain a silky texture.
7. Mix in the vanilla extract and sour cream until just combined, being careful not to overmix and introduce too much air.
8. Fold in the semisweet chocolate chips with a spatula, ensuring an even distribution of chocolate in every bite.
9. Pour the cheesecake filling over the warm crust, smoothing the top with the back of a spoon for a uniform surface.
10. Bake for 25 to 30 minutes, until the edges are set and the center is slightly jiggly—this prevents overbaking.
11. Turn off the oven, crack the door, and let the bars cool in the oven for 1 hour to minimize cracks.
12. Refrigerate the bars for at least 4 hours or overnight before cutting into squares, ensuring they set completely.
These Chocolate Chip Cheesecake Bars are phenomenal on their own, but a few smart serving touches can take them to the next level. Whether you’re hosting an afternoon tea, feeding a crowd, or indulging in a solo treat, these bars shine with the right accompaniments. From a dusting of cocoa to a scoop of ice cream, small extras add drama and dimension. You can plate them elegantly or serve them buffet-style for casual fun. Here are four fun ideas to present your bars like a pro and enjoy every creamy, chocolate-studded square.
Turning out flawless Chocolate Chip Cheesecake Bars is all about embracing a few simple tricks that make a huge difference. I learned, sometimes the hard way, that starting with room temperature cream cheese and eggs prevents lumps and ensures a velvety filling. Gentle mixing is key—once you add the eggs, avoid overbeating so you don’t whip extra air into the batter, which can cause unsightly cracks. After baking, a slow, complete cool-down both in the oven and then in the fridge locks in that perfect, creamy texture. Finally, tuck any extras into an airtight container and chill—they stay fresh for up to five days without losing flavor or moisture. Follow these tips, and you’ll have bars that look as good as they taste.
Proper storage is the final piece of the puzzle to keep these Chocolate Chip Cheesecake Bars tasting fresh and delicious. Whether you’re saving leftovers for a midweek treat or prepping a make-ahead dessert for a crowd, following a few smart storage tricks ensures each square maintains its creamy texture and chocolatey goodness. From airtight refrigeration to freezer-friendly tips, these methods preserve the delicate cheesecake layer and melty chips. With these techniques, you’ll have help extending the life of your bars while still enjoying that delightful balance of crunch, cream, and chocolate any time you crave a sweet bite.
Got questions? Let’s clear up some common queries so you can bake with confidence.
You’ll need about 30 minutes of active prep time (including making the crust and mixing the filling), 10 minutes baking the crust, 25–30 minutes baking the filling, 1 hour of cooling in the oven, and at least 4 hours (or overnight) in the refrigerator. In total the process takes around 6 hours, most of which is passive chilling and cooling time.
Room temperature ingredients blend smoothly and reduce lumps in the batter. Cold cream cheese can cause a grainy filling and require overmixing to smooth out, which can introduce air and lead to cracks on top. Room temperature eggs incorporate more evenly, ensuring a consistent, creamy texture.
The edges should look set and the center slightly jiggles when you gently shake the pan. The bars will continue to firm up as they cool. Overbaking can dry out the filling and cause cracks, so aim for a soft but not liquid center before you turn off the oven.
Gradual cooling prevents sudden temperature changes that can cause the cheesecake to sink or crack. Cracking the oven door lets moisture escape slowly, allowing the filling to set gently and maintain a smooth surface.
Yes. You can replace graham cracker crumbs with crushed digestive biscuits, vanilla wafers, or Oreo cookie crumbs (remove filling). Maintain the 1½ cups crumb to 1/4 cup sugar and 6 tablespoons melted butter ratio for a stable base that holds the cheesecake filling.
Once completely cooled, slice and store the bars in an airtight container in the refrigerator for up to 5 days. Serve chilled or allow them to sit at room temperature for 10–15 minutes before serving to soften the texture and enhance the flavors.
Yes. After baking and cooling completely, wrap the pan tightly in plastic wrap and aluminum foil, then freeze for up to 2 months. Thaw in the refrigerator overnight before slicing and serving to maintain the creamy texture.
At its heart, these Chocolate Chip Cheesecake Bars bring together the best of both worlds: a buttery graham foundation and a lusciously creamy cheesecake layer studded with melty chocolate chips. The harmony of textures—from crunchy crust to silky filling—makes every bite a delight, whether you’re sharing with friends or sneaking a late-night snack. Feel free to print this article and save it for your next baking marathon! If you try the recipe or have any fun variations, drop a comment below—I love hearing your kitchen tales and troubleshooting together.
Creamy cheesecake, studded with semisweet chocolate chips, rests atop a crunchy graham cracker base. Each bar offers a silky texture, balanced sweetness, and pockets of warm chocolate, perfect chilled and sliced for a sweet afternoon treat.

Hey there, kitchen adventurers! I'm Annie Parker, and welcome to my cozy corner of the internet where homestyle cooking meets creative twists, and every recipe is designed to make your life a little more delicious.