
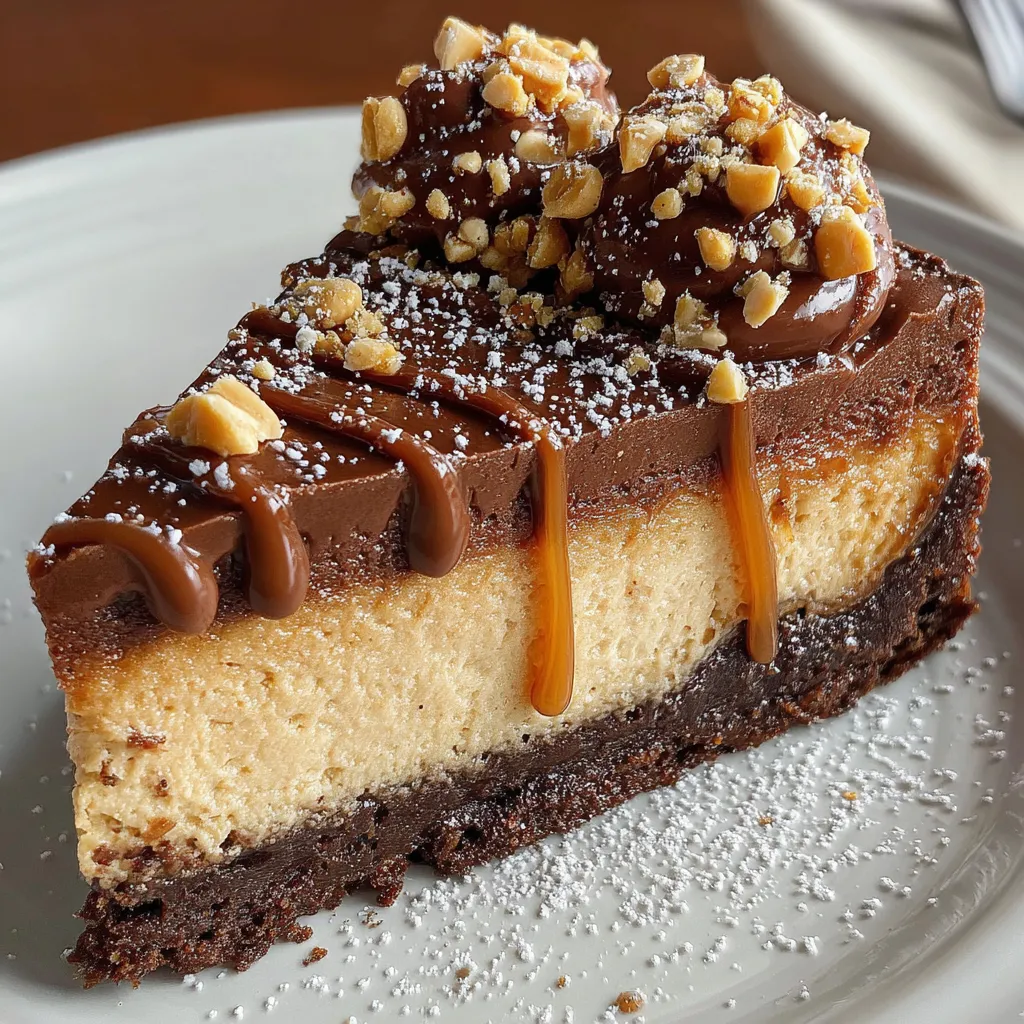
Chocolate Peanut Butter Cheesecake offers swirls of shiny melted chocolate weaving through a silky peanut butter filling, all atop a buttery graham crust. This velvety combo brings balanced bites of sweet, nutty richness and creamy decadence. Give it a whirl for your next dessert night—you’ll fall head over heels for each luscious forkful!
Before diving into the batter, gather these key ingredients to create that perfect balance of crunch, creaminess, and chocolate-peanut butter magic.
Ready to see how this Chocolate Peanut Butter Cheesecake comes together? From crafting the perfect graham cracker base to creating those signature chocolate-peanut butter swirls, this step-by-step guide will walk you through every move. With a gentle bake and clever cooling, you’ll end up with a silky, crack-free cheesecake that dazzles in both taste and appearance. Grab your mixer, springform pan, and let’s dive into the instructions below!
1. Preheat oven to 325°F (163°C) and grease a 9-inch springform pan. This gentle temperature ensures even cooking without cracking, and greasing helps release the cheesecake smoothly.
2. In a bowl, combine graham cracker crumbs, 1/4 cup sugar, and melted butter, then press the mixture firmly into the bottom of the pan to form an even crust base.
3. Bake the crust for 10 minutes, remove from oven, and let it cool slightly to set up before adding the filling so it won’t become soggy.
4. In a large bowl, beat cream cheese and 1 cup sugar until smooth using a hand mixer or stand mixer, then add 1/4 cup creamy peanut butter and mix until fully incorporated.
5. Add eggs one at a time, beating briefly after each addition to maintain a silky texture, then stir in vanilla extract for aromatic depth.
6. Melt semisweet chocolate with heavy cream in a heatproof bowl over simmering water (double boiler), stirring until the ganache is smooth and glossy.
7. Pour half of the peanut butter filling over the crust, drizzle half of the melted chocolate on top, and use a knife to gently swirl the two layers together.
8. Add the remaining filling, drizzle remaining chocolate, and swirl again to create a beautiful marbled effect that shines through after baking.
9. Bake for 45–50 minutes until the edges are set and the center still jiggles slightly to indicate a perfect, creamy doneness.
10. Turn off the oven, leave the cheesecake inside with the door cracked for 1 hour to cool gradually, preventing sudden temperature shifts and cracking.
11. Chill the cheesecake in the refrigerator for at least 4 hours or overnight so it develops its full flavor and a firm, sliceable texture.
12. Before serving, whisk together 1/2 cup creamy peanut butter, powdered sugar, and milk until smooth, then spread over the top of the chilled cheesecake as a luscious finishing touch.
Now that your Chocolate Peanut Butter Cheesecake is perfectly set, let’s talk about how to present it in all its glory. With creamy swirls and a crisp crust, this dessert shines on its own, but a few thoughtful touches can elevate every slice. Whether you’re aiming for a festive flair or a cozy night in, these serving ideas will help you plate like a pro and impress your friends and family. Combine vibrant garnishes and complementary flavors to create a stunning visual and taste experience. These simple additions will add color, texture, and an extra layer of richness to each decadent serving.
Getting a flawless Chocolate Peanut Butter Cheesecake might sound tricky, but a few insider tricks will help you glide through the process like a pro. From achieving that silky-smooth filling to maintaining those jaw-dropping marbled swirls, these tips will keep you on track and your cheesecake crack-free. Stick to room-temperature ingredients, practice gentle handling, and give your creation the time it deserves to chill—your taste buds will thank you later!
Once you’ve savored a few slices of this luscious Chocolate Peanut Butter Cheesecake, you’ll want to keep the rest fresh and delicious. Proper storage techniques will preserve the silky texture of the filling and maintain that buttery crust’s crispness. Whether you’re saving leftovers for the next day or planning ahead for a special event, these methods will help retain flavor and prevent sogginess. A little extra care ensures every slice tastes just as dreamy as right out of the fridge.
Here are some quick answers to common questions about making and storing this cheesecake:
From start to finish, plan on about seven to eight hours. Preparing the crust and filling takes roughly 30 to 40 minutes, baking requires 45–50 minutes, followed by one hour of gradual cooling in the turned-off oven, and at least four hours (or ideally overnight) of refrigeration before serving.
Yes, you can use crunchy peanut butter instead of creamy. The flavor will remain similar, but you’ll notice small peanut pieces in the filling and glaze. Make sure the crunchy peanut butter is well stirred so the oil is incorporated before blending it into the cream cheese mixture to avoid separation.
To minimize cracks, ensure your cream cheese is fully softened before beating, mix just until smooth and avoid overbeating once the eggs are added, and allow the cheesecake to cool gradually by leaving it in the turned-off oven with the door cracked. You can also use a water bath: wrap the springform pan in foil, place it in a larger pan, and pour hot water into the outer pan to create gentle, even heat.
Leaving the cheesecake in the oven with the door cracked for an hour allows it to cool slowly and evenly. This gradual temperature drop helps prevent sudden contractions in the filling that cause cracks and ensures a smooth, creamy texture.
A water bath is optional but recommended if you’re concerned about cracking or want extra moisture. To set one up, wrap the bottom of your greased springform pan tightly in aluminum foil to prevent leaks, place it inside a larger roasting pan, and pour hot water into the larger pan until it reaches halfway up the side of the springform. Then bake as directed.
Store any leftover cheesecake in an airtight container or cover the springform pan tightly with plastic wrap. Keep it refrigerated, and it will stay fresh for up to four days. Allow slices to come to room temperature for about 15 minutes before serving to enhance flavor and texture.
Absolutely. Bake the cheesecake up to two days in advance, follow the cooling and overnight chilling steps, and prepare the peanut butter glaze just before serving. Spread the glaze on top about an hour prior to your event so it remains fresh and glossy.
With its irresistible blend of rich chocolate and creamy peanut butter, this cheesecake proves that classic flavors can join forces for maximum deliciousness. The swirled marbling makes every slice a mini masterpiece, while the buttery graham cracker crust ensures perfect texture contrast. Whether you’re treating yourself or impressing guests, this dessert hits all the right notes without demanding pro-level skills—just some patience and a springform pan. Feel free to print or save this recipe for your next dessert adventure, and let me know in the comments how your cheesecake turned out or if you have any questions!
Swirls of shiny melted chocolate weave through a silky peanut butter cheesecake, all layered atop a crisp graham cracker crust. Each creamy forkful offers a balanced bite of sweet, nutty richness.

Hey there, kitchen adventurers! I'm Annie Parker, and welcome to my cozy corner of the internet where homestyle cooking meets creative twists, and every recipe is designed to make your life a little more delicious.