
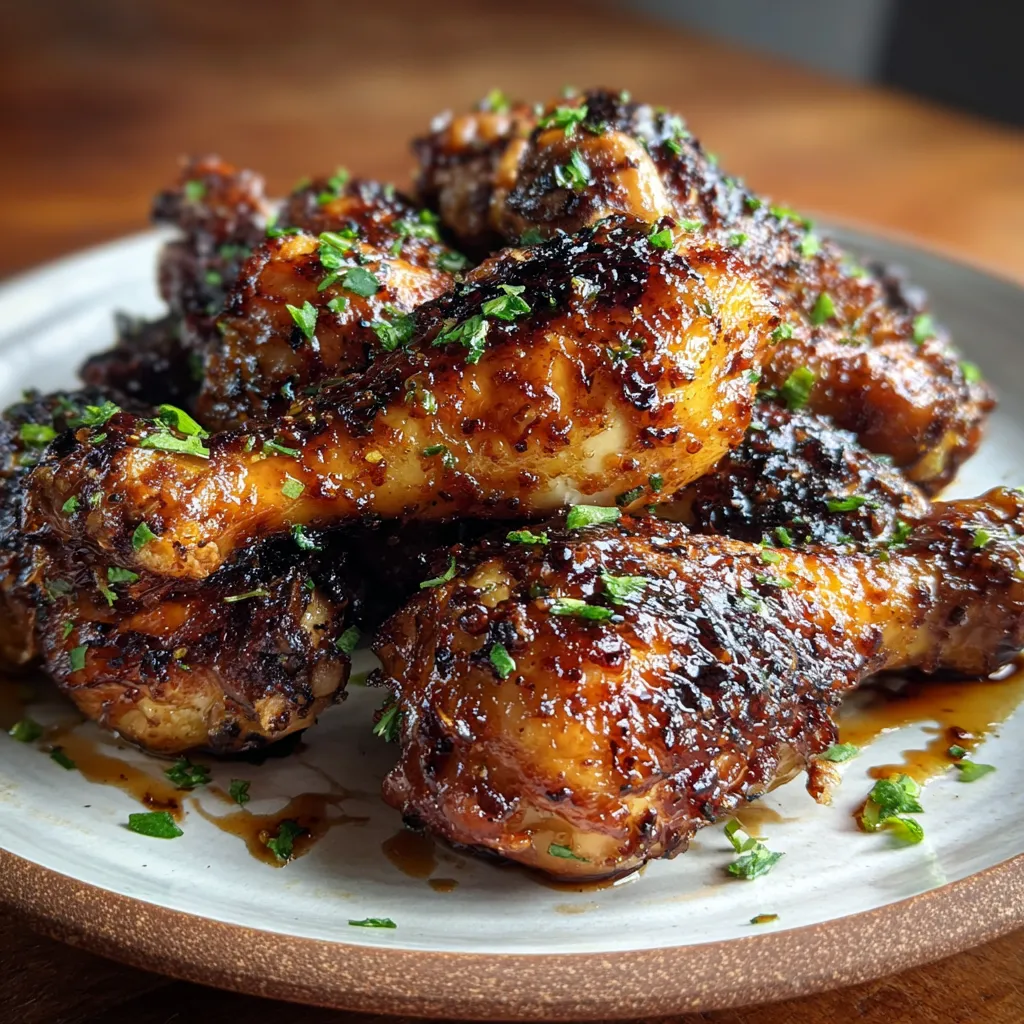
Crispy Baked Honey Garlic Chicken Drumsticks deliver that coveted crunch on the outside and juicy tenderness inside, all glazed in a glossy honey-garlic sauce that perfectly balances sweet, savory, and tangy notes. This intermediate-level dinner favorite combines simple pantry staples with easy oven techniques to transform humble chicken drumsticks into a memorable meal. Whether you’re feeding the family or hosting friends, these golden drumsticks are sure to disappear fast—so grab your baking sheet and let’s get cooking!
Before you dive in, let’s break down the essentials that make this recipe shine:
Getting these drumsticks perfectly crispy and saucy is all about simple steps and timing. You’ll start by creating a dry, seasoned crust that bakes up crackling, then finish with a honey-garlic glaze that caramelizes in the last few minutes. Follow these detailed steps to master both the crunch and the glossy finish:
1. Preheat the oven to 425°F and line a baking sheet with foil. Place a wire rack on top so hot air circulates under the drumsticks for even crisping.
2. Pat the chicken drumsticks dry with paper towels, removing as much moisture as possible to help the skin crisp up. Transfer to a large mixing bowl.
3. Add baking powder, salt, black pepper, and garlic powder to the bowl. Toss vigorously until each drumstick is evenly coated in the dry seasoning mix.
4. Drizzle olive oil over the seasoned drumsticks and toss again to distribute the oil, ensuring each piece will brown beautifully.
5. Arrange the drumsticks in a single layer on the wire rack. Bake for 30 minutes, then flip halfway through to crisp both sides evenly.
6. While the chicken bakes, heat a small saucepan over medium heat. Add minced garlic and sauté for 30 seconds until fragrant. Stir in honey, soy sauce, apple cider vinegar, and melted butter. Simmer for 2–3 minutes until the sauce thickens slightly.
7. Remove the drumsticks from the oven and brush them generously with the honey-garlic sauce. Return to the oven and bake for an additional 5–10 minutes, or until the glaze is sticky and caramelized.
8. Let the drumsticks rest for 5 minutes before serving, allowing the juices to redistribute and keeping the meat extra juicy.
These crispy, honey-garlic drumsticks stand out on their own, but a few tasty sides and pairings will take them over the top:
Whether it’s your first time or you’re after an even crispier finish, these friendly tips will help you nail each step and customize the flavor:
After enjoying your drumsticks, you’ll want to keep any leftovers tasting just as good. Proper storage preserves that crispy skin and sticky glaze:
Got questions about these drumsticks? Let’s clear up the most common curiosities:
A: Total time is about 50–55 minutes. Preparation (drying drumsticks, coating with baking powder, spices, and oil) takes around 10 minutes. The initial bake at 425°F is 30 minutes, flipping halfway, followed by brushing on sauce and baking another 5–10 minutes. Finally, let them rest for 5 minutes before serving.
A: Baking powder raises the pH on the chicken skin’s surface, breaking down peptide bonds and helping moisture escape. This reaction creates tiny bubbles that crisp the skin in the high-heat oven, resulting in extra-crispy drumsticks.
A: Yes. If you need a gluten-free option, swap soy sauce for tamari or coconut aminos. You can replace apple cider vinegar with rice vinegar or lemon juice for a brighter tang. To reduce sweetness, use 2 tablespoons of honey or swap half the honey for brown sugar.
A: Stir in ¼ to ½ teaspoon of red pepper flakes or a dash of sriracha or chili garlic sauce during the simmer step. This adds heat while still allowing the garlic, honey, and soy flavors to shine through.
A: Store leftover drumsticks and any extra honey garlic sauce separately in airtight containers in the refrigerator for up to 3 days. To reheat, place drumsticks on a baking sheet in a 375°F oven for 10–12 minutes until heated through and the skin crisps up again. Warm the sauce on the stovetop over low heat or in the microwave.
A: Absolutely. Make the sauce up to 2 days in advance and refrigerate. Before using, let it come to room temperature or gently reheat on the stovetop to liquefy the butter and meld flavors. Brush on warm sauce for better adhesion and caramelization during the final bake.
A: The wire rack elevates the drumsticks so hot air circulates underneath, preventing the bottom from steaming and ensuring even, all-around crispiness. It also allows excess fat to drip away, reducing sogginess and promoting a uniformly crunchy skin.
Crispy Baked Honey Garlic Chicken Drumsticks stand out because they combine science-backed techniques—like using baking powder and a wire rack—with a sweet-savory glaze that’s pure bliss. The result is drumsticks with crackling, golden skin and a glossy honey-garlic coating that clings to every bite. This recipe works because it balances textures and flavors impeccably, giving you that restaurant-quality crunch at home. Feel free to print and save this guide for later, and drop a comment if you have questions or feedback—I’d love to hear how your drumsticks turn out!
Crunchy-skin chicken drumsticks baked until golden, then drenched in a sticky honey-garlic glaze, releasing a pop of tangy sweetness and garlicky warmth with each bite.

Hey there, kitchen adventurers! I'm Annie Parker, and welcome to my cozy corner of the internet where homestyle cooking meets creative twists, and every recipe is designed to make your life a little more delicious.