
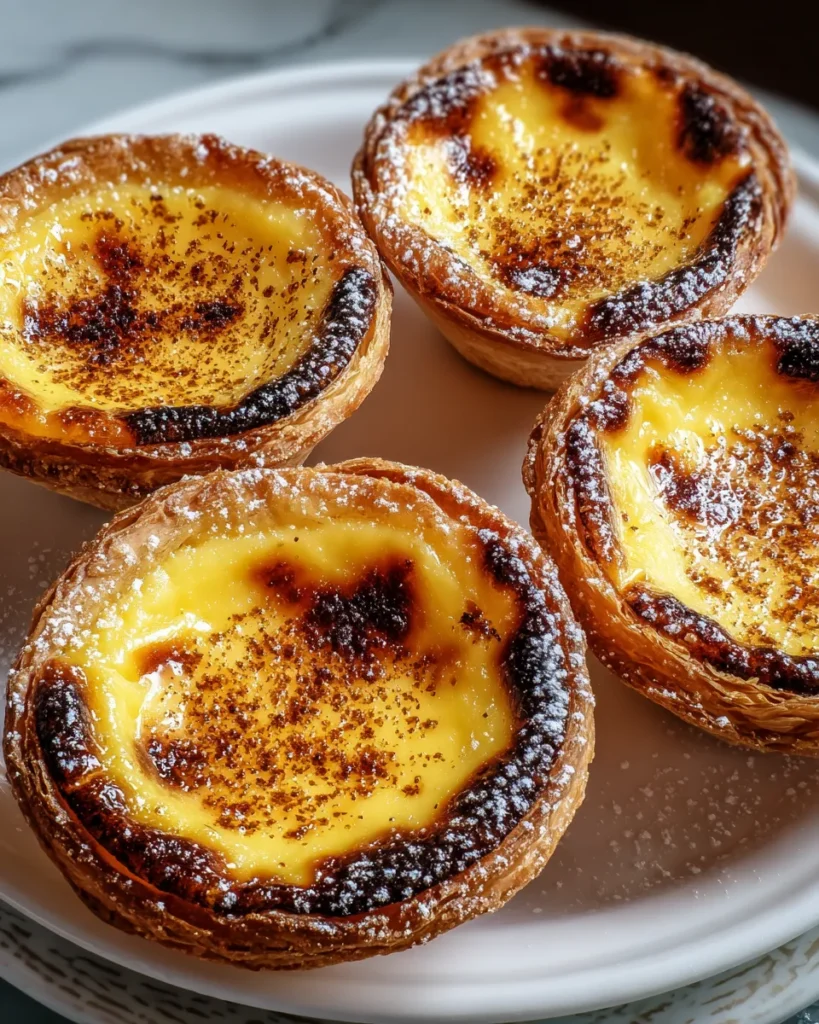
From the very first bite of a Portuguese custard tart, you’ll find yourself swept away by that unmistakable harmony of textures and flavors. The crisp, golden pastry shell shatters delightfully under your teeth, giving way to a luxuriously creamy custard that’s been kissed by caramelized sugar on top. Each mouthful feels like a mini celebration, with sweet notes of vanilla and a whisper of cinnamon dancing around your taste buds. It’s a recipe that has traveled centuries, evolving yet remaining faithful to its roots, and each bite feels like a warm embrace from Portugal’s rich culinary history.
As someone who’s spent countless cozy afternoons in my kitchen, whisking, rolling, and experimenting, these tarts always hold a special spot in my heart. The joy of seeing puff pastry sheets transform into delicate little cups, then filling them with velvety custard that bubbles up and browns in the oven—it never gets old! And with just 30 minutes of prep, 15 minutes in the oven, and a short rest, you’ll have 12 perfectly portioned treats, each about 200 calories, ready to delight family and friends. Whether you’re hosting a weekend brunch or simply craving a sweet escape with your afternoon coffee, mastering these Portuguese custard tarts is a kitchen accomplishment you’ll want to share again and again.
Every great recipe starts with thoughtful ingredients, and these Portuguese custard tarts are no exception. Below you’ll find all the essentials that come together to create that dreamy balance of flaky crust and smooth filling. Grab them from your pantry or local grocery store to make sure you’re set for a baking adventure.
Provides the creamy foundation of the custard. Its mild richness balances the sweetness and helps create that silky texture that hugs the pastry shell.
Adds extra body and a luxurious mouthfeel. It blends with the milk to make the custard exceptionally smooth and indulgent without overpowering the other flavors.
Sweetens the custard and contributes to the signature caramelized spots on top when the tarts bake. It also helps stabilize the texture during cooking.
The yolks are the magic behind the custard’s velvet texture and pale yellow hue. They thicken the mixture naturally and give the filling a rich, custardy flavor.
Combined with extra yolks, a whole egg enhances the structure of the custard, ensuring it sets perfectly without becoming rubbery.
Acts as a natural thickener that helps the custard hold its shape. It guarantees a smooth, lump-free filling once cooked and cooled.
Infuses the custard with a warm, aromatic depth. A teaspoon of real vanilla elevates the flavor profile, making each bite more complex and irresistible.
Sprinkled into the custard mix, it delivers a subtle spice note that complements the sweet and creamy elements, adding character to every mouthful.
The secret to those flaky, golden shells. When rolled thin and baked at high heat, it puffs up into delicate layers that provide a satisfying crunch.
Used for dusting before serving. A light sprinkle enhances sweetness and can help create an extra-crispy top.
A final dusting to accentuate the spice profile and add a decorative touch. Perfect if you love a bit more cinnamon warmth.
Time to bring all those ingredients together into a batch of show-stopping tarts. This process guides you through each step, ensuring your pastry is flaky, your custard is smooth, and your tops are beautifully caramelized.
1. Preheat your oven to 450°F (230°C). Place an empty baking tray on the center rack while the oven heats—this creates an intense burst of heat that helps the pastry puff up and brown from below.
2. In a medium saucepan, combine the whole milk and heavy cream. Warm over medium heat just until tiny bubbles form around the edges. Remove immediately from heat to avoid scalding.
3. In a separate bowl, whisk together the granulated sugar, egg yolks, whole egg, cornstarch, vanilla extract, and ground cinnamon until the mixture is perfectly smooth and well-combined.
4. Slowly pour the hot milk and cream into the egg mixture, whisking continuously to create a custard base without scrambling the eggs. Keep the stream steady and whisk constantly until fully incorporated.
5. Return the mixture to the saucepan and cook over medium heat, stirring constantly with a spatula or wooden spoon. After about 5–7 minutes, it will thicken enough to coat the back of a spoon. Be attentive; do not let it boil.
6. Once the custard is thick, pass it through a fine sieve into a clean bowl. This removes any tiny lumps and ensures an ultra-smooth texture. Let the custard cool to room temperature, stirring occasionally to prevent a skin from forming.
7. While the custard cools, roll out the puff pastry on a lightly floured surface to about 1/8 inch thick. Use a round cutter roughly 4 inches in diameter to cut circles just large enough to line each cup of a greased muffin pan, allowing edges to overhang.
8. Fill each pastry shell with the cooled custard, pouring gently to prevent spills. Aim for about three-quarters full to leave room for that beautiful rise.
9. Bake the tarts on the preheated tray for 12–15 minutes, or until the custard is set and the tops display those coveted dark brown caramelized spots.
10. Remove from the oven and allow them to rest in the pan for about 5 minutes. This helps the custard settle and makes removal easier.
11. Carefully transfer the tarts to a wire rack. Serve warm or at room temperature, dusted with an extra sprinkle of granulated sugar and optional ground cinnamon for a final flourish.
These tarts are delicious on their own, but a thoughtful presentation can transform them into a memorable dessert experience. Whether you’re entertaining guests or treating yourself, here are a few ways to make every tart shine.
A light throw of powdered sugar adds a delicate sweetness and a snowy look. Follow up with a hint of cinnamon for visual appeal and an extra layer of flavor.
Serve the tarts alongside a handful of ripe raspberries or strawberries. Their bright acidity cuts through the richness of the custard, creating a perfect balance.
Warm a bit of caramel syrup or dark chocolate ganache and artistically drizzle it over the tarts. The contrast in color and taste elevates them to gourmet status.
A spoonful of softly whipped, lightly sweetened cream adds an airy counterpoint. Garnish with a mint leaf for a fresh pop of color.
Keeping your tarts tasting fresh is easy when you follow a few key guidelines. Proper storage preserves that flaky crispness of the pastry and the creamy consistency of the custard, so you can enjoy them over several days without compromise.
If you plan to serve within the afternoon, keep the tarts uncovered on a wire rack in a cool, dry spot. This maintains crisp edges while allowing the custard to stay slightly tender.
Place cooled tarts in an airtight container with parchment or wax paper between layers. Storing them this way keeps the custard firm and prevents moisture from making the pastry soggy.
For previously refrigerated tarts, preheat oven to 350°F (180°C), and bake for 3–5 minutes. This revives the puff pastry’s flakiness while gently warming the filling.
Freeze-cooling changes the texture of custard, so it’s best to enjoy these tarts fresh. If you must freeze, wrap each tart tightly in plastic wrap and foil, then thaw overnight in the fridge and reheat gently.
Bringing Portuguese custard tarts into your kitchen is like unlocking a sweet treasure chest of flavors and textures. From mixing the creamy custard base with its whisper of cinnamon and vanilla, to lining those precious cups with layers of puff pastry, you’ll experience joy in every step. The magic truly happens as they bake: that initial rush of steam that puffs up the pastry, the gentle jiggle of the custard as it sets, and finally, the caramelization that crowns each tart with rustic speckles. With an overall preparation time of just 30 minutes, 15 minutes in the oven, and a brief 5-minute rest, you’ll find that making a dozen of these beauties is as efficient as it is satisfying. Whether you’re sharing them at a brunch table, indulging in a solo tea break, or gifting them to friends and family, these tarts are sure to become a cherished recipe in your repertoire.
Feel free to print this article and tuck it into your recipe binder or bookmark it for future baking adventures. You’ll also find a handy FAQ section below to address any questions you might have about techniques, ingredient swaps, or troubleshooting. If you give this recipe a try, I’d love to hear how your tarts turned out! Drop a comment, share your tips, or let me know if you encountered any challenges—I’m always here to help you perfect these flaky, creamy delights. Happy baking!
These Portuguese custard tarts feature a flaky pastry crust and a silky smooth custard filling, perfectly caramelized for that delightful crunch. A true treat for any occasion!

Hey there, kitchen adventurers! I'm Annie Parker, and welcome to my cozy corner of the internet where homestyle cooking meets creative twists, and every recipe is designed to make your life a little more delicious.