
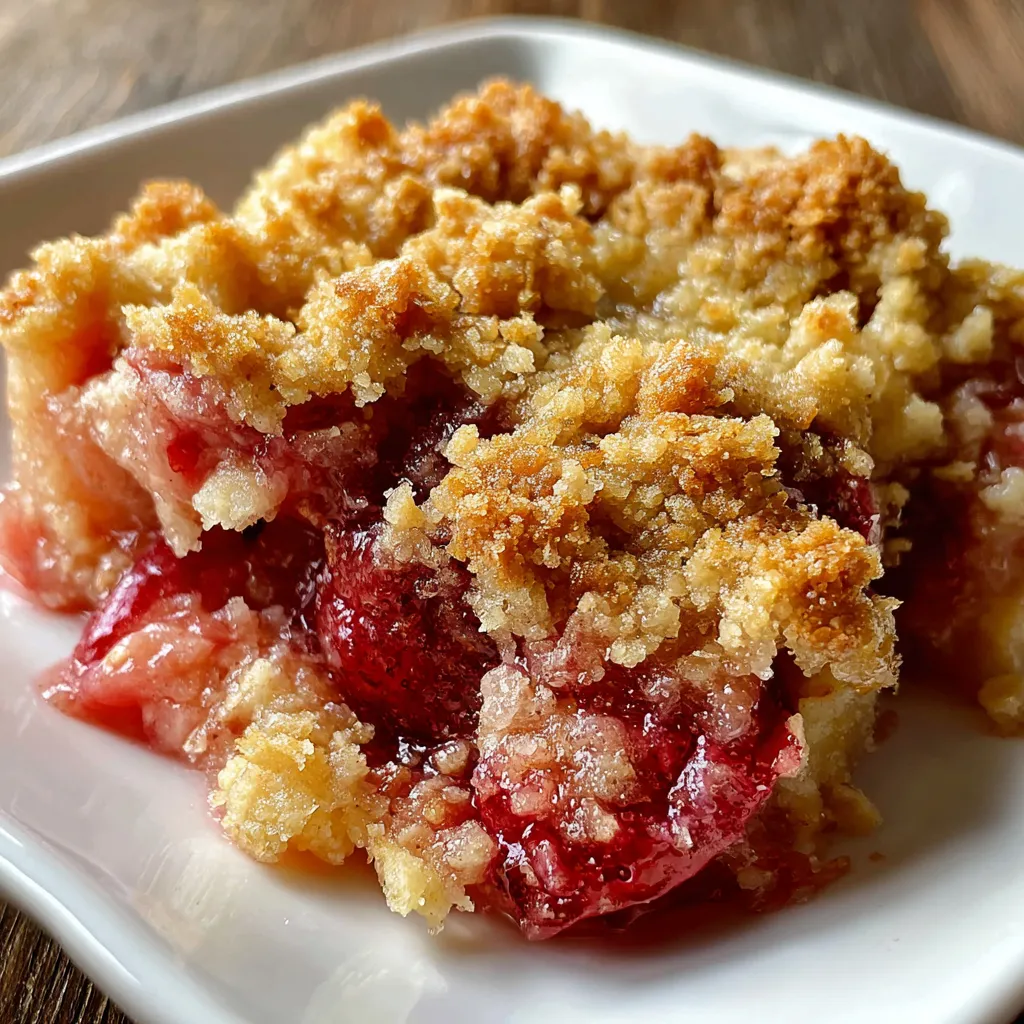
Rhubarb Dump Cake with Buttery Crunchy Topping delivers a fuss-free twist on summer fruit desserts. Tangy, ruby-hued rhubarb simmers beneath a crisp oat-and-brown-sugar crumble, sending sweet-tart juices bubbling through each golden shard. Whether you’re craving a simple baking project or a show-stopping treat for guests, this beginner-friendly dump cake brings buttery richness and crunchy texture in every spoonful. Let’s dive in and create a dessert that marries tangy fruit with a melt-in-your-mouth topping—no fancy tools required!
Before we get started, gather these simple pantry staples to build a sweet-tart filling and that irresistible buttery-crunch topping. Each ingredient plays its part in creating texture and flavor harmony.
This recipe is all about simple steps—layering your tangy fruit base, whisking together an oat-and-sugar crumble, and letting the oven work its magic. You’ll move from preheating to tossing, then to crumbling, and finally to baking. Follow these detailed steps to ensure your dump cake emerges with bubbling filling and a perfectly golden, buttery crust.
1. Preheat your oven to 350°F (175°C) and lightly grease a 9×9-inch baking dish with butter or nonstick spray to prevent sticking.
2. In a bowl, toss the chopped rhubarb with granulated sugar, 2 tablespoons flour, lemon juice, and vanilla extract until each piece is evenly coated and glossy.
3. Spread the rhubarb mixture into an even layer in the prepared baking dish, ensuring the fruit is distributed uniformly for balanced baking.
4. In a separate bowl, combine 1 cup flour, oats, brown sugar, cinnamon, and salt, stirring to blend all dry ingredients.
5. Pour the melted butter over the dry topping and stir just until coarse crumbs form—small clusters are essential for texture.
6. Sprinkle the buttery oat mixture evenly over the rhubarb layer, covering it completely to lock in moisture.
7. Bake for 35 to 40 minutes on the middle rack, or until the topping is a deep golden brown and the filling bubbles around the edges.
8. Allow the dump cake to cool in the dish for at least 15 minutes so the juices thicken slightly, making slicing and serving cleaner.
This Rhubarb Dump Cake shines on its own, but a few creative accompaniments can elevate every spoonful. Whether you want to play up its creamy contrasts or add fresh textures, these serving suggestions will help you present a memorable dessert. From classic ice cream duos to fruit-forward twists, there’s an option here for every taste and occasion. Let’s explore some fun ways to plate and serve this sweet-tart treat.
This dump cake is incredibly forgiving, but these insider tips will ensure consistent success every time you bake. From flavor boosts to smart storage ideas, you’ll be equipped to customize and perfect your dessert.
Storing your Rhubarb Dump Cake correctly ensures you can enjoy its sweet-tart flavors and buttery topping even after the first serving. From quick fridge stints to longer-term freezing, these tips will help maintain the cake’s texture and flavor. Let’s look at a few easy methods to keep your dump cake fresh and ready for reheating when cravings strike.
Here are a few quick answers to your burning questions about this Rhubarb Dump Cake with Buttery Crunchy Topping.
A: Preparation time is about 15 minutes to chop the rhubarb, toss it with sugar, lemon juice, and vanilla, and mix the topping. Baking takes 35 to 40 minutes in a 350°F (175°C) oven, plus at least 15 minutes of cooling time so the filling thickens slightly. Overall, plan for about an hour from start to finish.
A: Yes, you can use frozen rhubarb. Thaw it completely and drain any excess liquid before tossing with sugar, flour, lemon juice, and vanilla. This helps prevent the filling from becoming too watery. You may need to extend the baking time by 5 to 10 minutes if the filling is very moist.
A: For a mixed fruit twist, swap half the rhubarb for strawberries or raspberries. You can also stir a pinch of ground ginger or cardamom into the filling for warm spice notes. Chopped fresh or toasted nuts added to the topping will boost crunch and flavor, and a handful of shredded coconut can add a subtle tropical flair.
A: Store any leftover dump cake in an airtight container in the refrigerator for up to 3 days. To reheat, place individual servings on a baking sheet and warm in a 325°F (160°C) oven for 10 to 12 minutes or microwave for 30 to 45 seconds until heated through. If the topping loses its crispness, a quick broil for 1 to 2 minutes can restore crunch.
A: Absolutely. Substitute the all-purpose flours with a 1-to-1 gluten-free baking flour blend and use certified gluten-free oats. Ensure your baking powder and other ingredients are gluten-free. The texture may be slightly different, but you’ll still achieve a delicious, crunchy topping and bubbling rhubarb filling.
A: Make sure the melted butter is evenly drizzled over the dry topping ingredients before stirring to form coarse crumbs. Don’t overmix; small clusters of flour, oats, and sugar should remain intact. Bake on the middle rack of the oven so the heat circulates evenly, and remove the cake once the topping is a deep golden brown to avoid burning.
A: Cooling the dump cake for at least 15 minutes allows the rhubarb juices to thicken and set, preventing a runny filling. This resting period helps the layers settle so each slice holds together nicely, and it also makes it safer and more comfortable to serve and eat.
There you have it—a Rhubarb Dump Cake with Buttery Crunchy Topping that’s as easy as “dump, bake, and dive in.” With tangy-ruby rhubarb bubbling beneath a golden oat crumble, this dessert works because it combines simple pantry staples into a showstopper that everyone will love. Feel free to print and save this recipe for later, and drop a comment below if you give it a try or need any help perfecting that buttery crunch!
A simple 9×9 dump cake where ruby-hued rhubarb simmers under a crisp oat-and-brown-sugar topping, its bubbling juices peeking through a golden crust that snaps with buttery richness.

Hey there, kitchen adventurers! I'm Annie Parker, and welcome to my cozy corner of the internet where homestyle cooking meets creative twists, and every recipe is designed to make your life a little more delicious.