
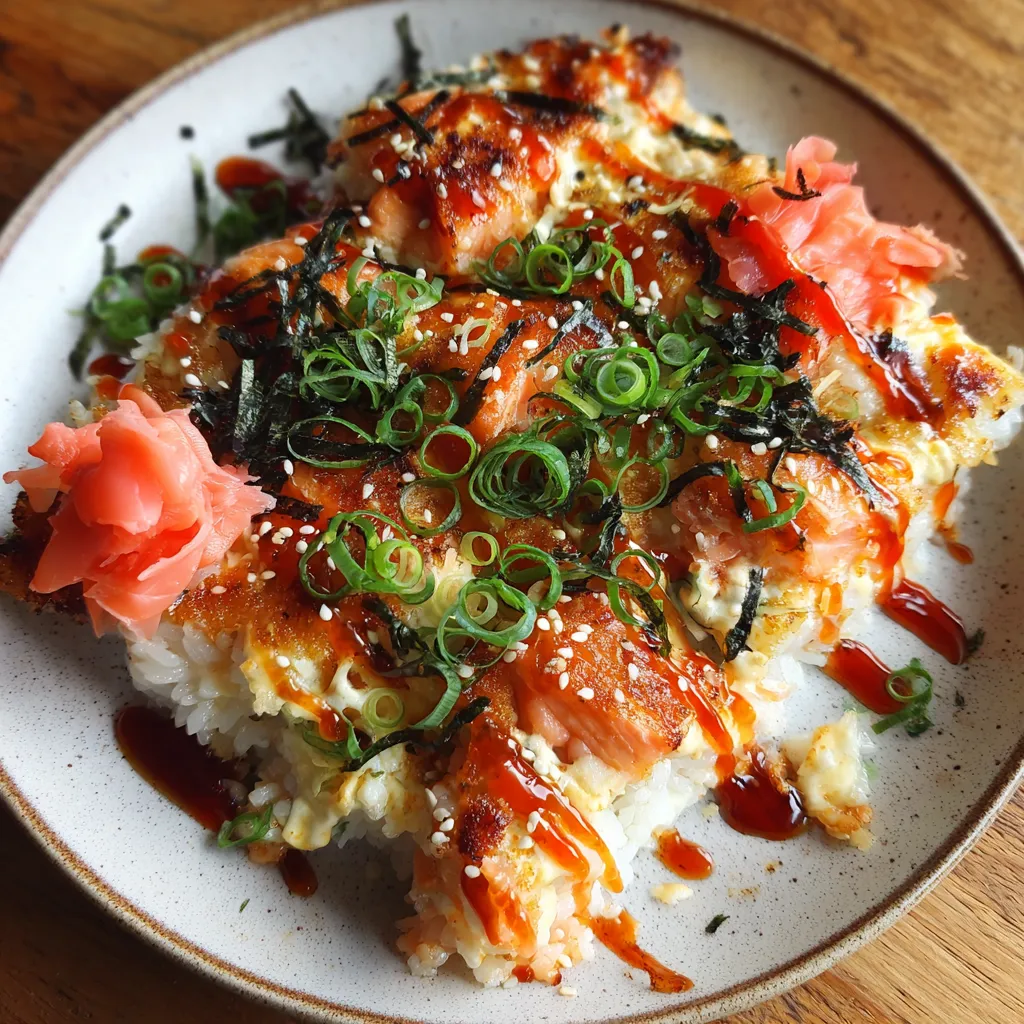
Salmon Sushi Bake delivers creamy layers of sushi rice and spicy salmon mingling under a golden broiled top, turning dinner into an indulgent umami feast. Each forkful brings tender, soy-brushed fish, tangy rice, and fiery mayo in one cozy casserole. It’s a fun twist on classic sushi—ideal for sharing with friends or treating yourself to mini celebrations all week long. Ready to bake up your new favorite comfort dish? Let’s dive in!
Gather the essentials to build your Salmon Sushi Bake: every component plays a delicious role in bringing those creamy, spicy, and savory layers together.
This recipe comes together in a few simple stages: cooking and seasoning the rice, baking and flaking the salmon, mixing a creamy Sriracha mayo topping, assembling the layers, and giving the whole dish a final bake for a bubbly, golden finish. Set aside about an hour from start to finish, and you’ll be rewarded with a restaurant-style casserole that’s surprisingly straightforward.
1. Preheat your oven to 375°F (190°C) and line a baking dish with foil or parchment to prevent sticking and simplify cleanup.
2. Rinse the sushi rice under cold water until the water runs clear; this removes excess starch. Combine the rice and 2.5 cups water in a rice cooker and cook according to the manufacturer’s instructions until tender.
3. In a small bowl, whisk together the rice vinegar, sugar, and salt until fully dissolved. Gently fold this seasoning into the warm rice, then spread it out to cool slightly.
4. Place the salmon fillet on a baking sheet and brush evenly with soy sauce. Bake for 12–15 minutes or until it just flakes. Let it cool briefly, then use forks to flake into bite-size pieces.
5. In a medium bowl, mix the flaked salmon with mayonnaise and Sriracha until every piece is coated in creamy, spicy goodness.
6. Spread the seasoned sushi rice evenly in the bottom of the prepared baking dish, then carefully lay the nori sheet over the rice to create a barrier.
7. Spoon the salmon–mayo mixture over the nori, using the back of the spoon to smooth it into an even layer.
8. Bake the assembled dish at 375°F (190°C) for 10–12 minutes or until the top is lightly golden and bubbling.
9. Remove from the oven and immediately sprinkle with sesame seeds and thinly sliced green onion to add crunch and freshness.
10. Serve warm with pickled ginger and wasabi on the side for that authentic sushi experience.
Elevate your Sushi Bake with these fun ideas that play up the flavors and textures of each slice.
Ready to nail this bake? These friendly pointers help ensure your layers turn out picture-perfect—creamy, spicy, and bursting with umami.
Storing your Salmon Sushi Bake properly keeps it fresh and flavorful for next-day enjoyment. Follow these simple methods to hold onto the creamy, spicy goodness without any sogginess or loss of texture.
Curious about timing, swaps, or spice levels? Here’s what home cooks often ask about this bake:
The total time is approximately 45 to 60 minutes, including cooking the rice (about 30 minutes in a rice cooker), baking the salmon (12–15 minutes), assembling the layers, and the final bake (10–12 minutes).
While sushi rice gives the best sticky texture, you can substitute with short-grain or medium-grain rice. Rinse thoroughly until water runs clear and mix with the vinegar-sugar-salt seasoning to mimic sushi rice flavor and stickiness.
Choose sushi-grade salmon, brush it with soy sauce before baking to lock in moisture and add umami. Bake at 375°F (190°C) for 12–15 minutes until just cooked through. Overbaking can dry it out, so remove when it flakes easily but remains slightly translucent inside.
The default recipe uses 2 tablespoons of Sriracha, which gives a medium heat. For milder flavor, reduce to 1 tablespoon or omit entirely. For more heat, increase to 3 tablespoons or drizzle extra Sriracha on top before serving.
Store any leftover sushi bake in an airtight container in the refrigerator for up to 2 days. To reheat, bake in a 350°F (175°C) oven for 8–10 minutes or microwave individual portions for 1–2 minutes until warmed through. Top again with sesame seeds and green onions after reheating.
Yes, use gluten-free soy sauce (tamari). Ensure that your Sriracha, rice vinegar, and mayonnaise are also certified gluten-free to keep the dish safe for those with gluten sensitivities.
Serve warm with pickled ginger and wasabi on the side to emulate classic sushi flavors. For extra crunch, add crispy seaweed snacks or thinly sliced cucumber. You can also garnish with avocado slices or tobiko (flying fish roe) for added texture and color.
What makes this Salmon Sushi Bake truly stand out is the harmony of textures and flavors: tangy, seasoned sushi rice; flaky, soy-brushed salmon; and a creamy, spicy mayo topping that bubbles to golden perfection. It’s a clever mashup of sushi and casserole that’s perfect for entertaining or weeknight feasts. Be sure to print this recipe and save it—your future self will thank you! If you give it a whirl, drop a comment below with your tweaks, triumphs, or any questions. Enjoy every delicious bite!
A comforting bake where tender flakes of soy-brushed salmon meet tangy sushi rice, all laced with fiery Sriracha mayo. Crisp golden edges marry a creamy center, garnished with sesame seeds and green onion for pops of crunch and color.

Hey there, kitchen adventurers! I'm Annie Parker, and welcome to my cozy corner of the internet where homestyle cooking meets creative twists, and every recipe is designed to make your life a little more delicious.