

Bright layers of creamy coconut-lime chia pudding atop a nutty oat-and-almond flour crust make these Refreshing No-Bake Chia Pudding Bars with Zesty Coconut Lime a vibrant, no-bake treat you’ll crave. A crunchy oat-coconut crust gives way to a silky chia pudding infused with coconut milk, tangy lime juice, and honey. These bars require zero baking and just a little chilling, making them the perfect healthy snack or light breakfast that’s ready in under 20 minutes of hands-on time. Give them a try—you’ll be hooked on that tropical zing!
Key Ingredients
Before you dive in, let’s round up everything you need. Each ingredient brings its own magic to the layers of these bars:
- 1 cup rolled oats: Provides a hearty, chewy base with whole-grain goodness.
- 1/2 cup almond flour: Adds a subtle nutty flavor and helps bind the crust.
- 1/2 cup unsweetened shredded coconut: Infuses tropical coconut notes and extra texture.
- 1/4 cup chia seeds: Absorbs liquid to create the creamy pudding layer.
- 1/2 cup full fat coconut milk: Contributes rich, luscious coconut creaminess.
- 1/4 cup Greek yogurt: Brings tangy creaminess that balances the lime zest.
- 1/4 cup honey: Sweetens naturally while enhancing the tropical flavors.
- 2 tablespoons fresh lime juice: Delivers bright, zesty citrus punch.
- 1 tablespoon lime zest: Intensifies lime aroma with concentrated oils.
- 1 teaspoon vanilla extract: Rounds out flavors with a warm, sweet depth.
- pinch salt: Elevates all flavors and balances sweetness.
How To Make Refreshing No-Bake Chia Pudding Bars with Zesty Coconut Lime
Let’s walk through the simple steps to build these dreamy bars, layer by layer. You’ll start with a sturdy oat-coconut crust, then whisk up the chia pudding topping before a chill in the fridge transforms it into firm, sliceable bars.
1. Line an 8-inch square pan with parchment paper, leaving an overhang for easy removal, and set aside.
2. In a medium bowl, combine the rolled oats, almond flour, and shredded coconut until evenly mixed.
3. Press the oat mixture firmly into the bottom of the prepared pan using the back of a measuring cup to create a compact, even crust.
4. In another bowl, whisk together the chia seeds, coconut milk, Greek yogurt, honey, lime juice, lime zest, vanilla extract, and salt until the mixture starts to thicken and chia seeds are well distributed.
5. Pour the chia pudding mixture over the pressed base and spread into an even layer using a silicone spatula.
6. Sprinkle extra shredded coconut on top for a decorative finish, if desired.
7. Cover the pan with plastic wrap or foil and refrigerate for at least 4 hours or until the bars are completely firm.
8. Using the parchment overhang, lift the chilled slab from the pan and cut into bars, wiping your knife between slices for clean edges.
Serving Suggestions
These bars shine on their own, but a few thoughtful pairings can turn snack time into a mini celebration. Crisp, cool accompaniments accentuate the tropical lime-coconut duo and elevate your presentation for any occasion.
- Top each bar with a spoonful of mango salsa for vibrant color and a hint of sweetness contrast.
- Add a dollop of whipped coconut cream and a sprinkle of lime zest for an indulgent finish.
- Garnish with a thin lime wheel and a few fresh mint leaves to amp up the freshness.
- Pair with a tall glass of iced green tea or a refreshing mint-infused water for balanced, hydrating notes.
Tips For Perfect Refreshing No-Bake Chia Pudding Bars with Zesty Coconut Lime
These bars are so simple, a few small tweaks can make them even more foolproof and fun. Here are some reader-approved ideas:
- Use gluten free oats for a gluten free version
- Substitute maple syrup for honey to make it vegan
- Bars keep well in the refrigerator for up to five days
- Add fresh berries or mint leaves for extra flavor and color
How To Store It
Once your bars are set, proper storage keeps them tasting fresh and firm for days. Follow these methods to maintain that silky-crunchy balance:
- Refrigerate in an airtight container for up to five days—this preserves both texture and flavor.
- Freeze individual bars by wrapping each one in plastic wrap and placing them in a freezer-safe bag; they’ll last up to two months.
- When ready to enjoy, thaw frozen bars in the refrigerator for a few hours to retain their creamy consistency.
- Keep extra shredded coconut in a sealed jar at room temperature to sprinkle just before serving, preventing it from absorbing moisture.
Frequently Asked Questions
Here are quick answers to the top questions about these no-bake chia pudding bars:
- How long does it take to prepare and set these chia pudding bars?
The active preparation time is about 15 minutes—5 minutes to mix and press the oat-coconut base and another 10 minutes to whisk and pour the chia pudding topping. After assembling, you’ll need to refrigerate the bars for at least 4 hours or until they are firm before cutting.
- Can I make the bars gluten free?
Yes. Simply substitute certified gluten-free rolled oats in place of regular rolled oats to ensure the bars remain safe for those with gluten sensitivities or celiac disease.
- How can I adapt this recipe to be fully vegan?
Replace the honey with an equal amount of maple syrup and use a plant-based coconut or almond yogurt instead of Greek yogurt. Keep the full-fat coconut milk as is to maintain creaminess and flavor.
- What’s the best way to store these bars, and how long will they last?
Store the bars in an airtight container in the refrigerator for up to five days. For longer storage, wrap individual bars in plastic wrap and freeze for up to two months—thaw in the fridge for a few hours before enjoying.
- Can I customize the toppings or add fresh fruit?
Absolutely. You can sprinkle extra shredded coconut on top as instructed, or layer fresh berries, lime slices, or chopped mint leaves before refrigeration for added color and flavor. Add them just before serving if you want the fruit to stay bright and fresh.
- My chia pudding layer seems too runny. How can I firm it up?
If the pudding is too loose, stir in an extra tablespoon of chia seeds to help absorb more liquid. Also ensure you’ve refrigerated the bars for at least 4 hours—sometimes a longer chill of 6–8 hours yields a firmer texture.
- How do I ensure the oat-coconut base holds together well when cutting the bars?
Press the base mixture very firmly into the pan using the back of a measuring cup or a flat spatula to compact it evenly. Chilling the assembled bars fully before cutting also helps the base hold its shape during slicing.
What Makes This Special
These no-bake chia pudding bars bring together the best of both worlds: a crunchy, nutty crust and a luscious, zesty coconut-lime layer that’s as fun to make as it is to devour. The simplicity of no-bake prep means you’re just minutes away from a snack that feels gourmet, yet requires zero oven time. Go ahead and print this article to save it for your next snack craving—then drop a comment below with your favorite topping combos or any questions you have. Happy chilling and slicing!
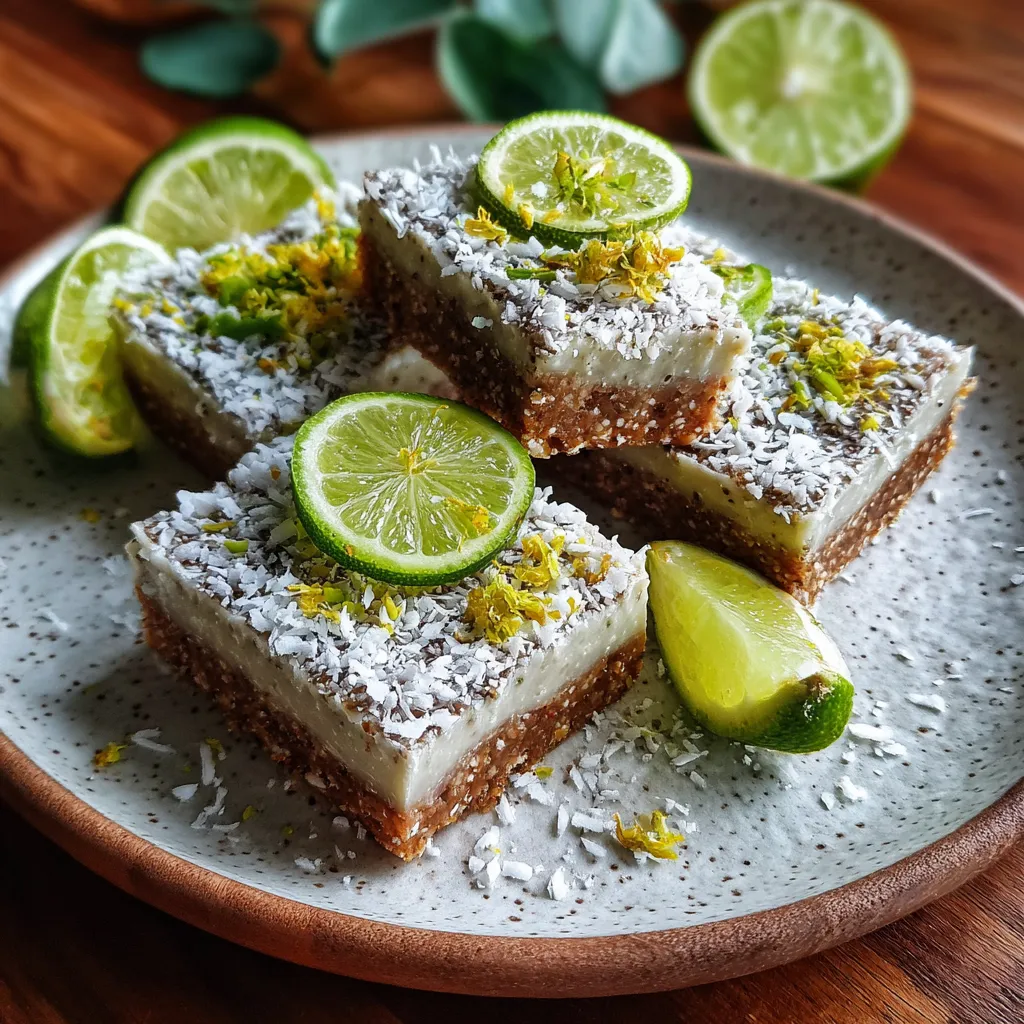

Refreshing No-Bake Chia Pudding Bars with Zesty Coconut Lime
Description
A crunchy oat-coconut crust gives way to a silky chia pudding infused with coconut milk, tangy lime juice, and honey. These no-bake bars chill to firm perfection, ready to brighten any snack time with a burst of tropical zing.
Ingredients
Instructions
-
Line an 8 inch square pan with parchment paper and set aside.
-
In a medium bowl combine rolled oats almond flour and unsweetened shredded coconut.
-
Press the oat mixture firmly into the bottom of the prepared pan.
-
In another bowl whisk together chia seeds coconut milk Greek yogurt honey lime juice lime zest vanilla extract and salt until well combined.
-
Pour the chia pudding mixture over the pressed base and spread evenly with a spatula.
-
Sprinkle extra shredded coconut on top if desired.
-
Cover and refrigerate for at least 4 hours or until firm.
-
Remove from the pan using the parchment paper and cut into bars.
Note
- Use gluten free oats for a gluten free version
- Substitute maple syrup for honey to make it vegan
- Bars keep well in the refrigerator for up to five days
- Add fresh berries or mint leaves for extra flavor and color

