

There’s something magical about pulling a steaming loaf of sourdough from the oven, especially when it’s infused with fragrant garlic and fresh herbs. As the crust crackles under your fingertips and that first slice reveals a tender crumb dotted with flecks of rosemary and thyme, you know you’ve created more than just bread—you’ve crafted an edible moment of pure joy. Every time I bake this Garlic and Herb Sourdough Bread, my kitchen transforms into a cozy haven, filled with comforting warmth and savory whispers of olive oil and garlic. It’s the kind of loaf that brings people together, encouraging heartfelt conversations over buttery slices and generous pats of melting butter.
Even before the first peek through the oven door, the anticipation builds. The process itself is a labor of love: from nurturing a bubbly sourdough starter to gently folding in minced garlic, freshly chopped rosemary, and thyme, every step invites you to slow down and savor the art of baking. The tangy sourdough base harmonizes beautifully with the earthy herbs, creating layers of flavor that unfold with each bite. Whether you’re a seasoned bread baker or embarking on your first artisanal loaf, this recipe strikes the perfect balance between technique and soul-satisfying simplicity. By the time you’re ready to slice into your creation, you’ll not only have a stunning centerpiece for dinner but also a newfound appreciation for the time-honored craft of making bread from scratch.
KEY INGREDIENTS IN GARLIC AND HERB SOURDOUGH BREAD
Every great recipe starts with quality components, and this Garlic and Herb Sourdough Bread is no exception. Each ingredient plays a vital role in developing texture, flavor, and structure, turning simple pantry staples into a truly artisan loaf.
- Bread flour
Provides the high protein content needed to develop strong gluten networks, giving the loaf its characteristic chewiness and open crumb.
- Lukewarm water
Activates the sourdough starter and helps hydrate the flour, ensuring an even fermentation process and creating a supple dough.
- Active sourdough starter
Delivers natural leavening power, tangy flavor, and that signature sourdough aroma. A mature starter ensures a lively rise and a depth of taste.
- Salt
Regulates yeast activity, strengthens gluten formation, and enhances overall flavor. Properly distributed, it prevents flat spots and promotes a crisp crust.
- Garlic
Infuses the bread with pungent, savory notes that mellow during baking, weaving warmth into every bite. Minced garlic melds seamlessly into the dough.
- Fresh rosemary
Delivers woodsy, pine-like aromas that complement the garlic. Chopped finely, it distributes flavor without overwhelming the delicate crumb.
- Fresh thyme
Offers a subtle earthiness and slight lemony undertone, adding complexity and balance to the herb blend.
- Olive oil
A touch of richness that softens the crumb, helps bind the herbs, and contributes to a glossy interior texture.
- Additional flour for dusting
Prevents sticking during kneading and shaping, ensuring clean work surfaces and a tidy loaf exterior.
HOW TO MAKE GARLIC AND HERB SOURDOUGH BREAD
This section guides you through every step of transforming individual ingredients into a beautiful, aromatic loaf. From combining dry and wet components to the final bake, each stage builds upon the last, demanding patience and care for the best results.
1. In a large mixing bowl, combine the bread flour and salt, ensuring the salt is evenly dispersed throughout the flour to prevent uneven fermentation.
2. In a separate bowl, mix the lukewarm water, active sourdough starter, minced garlic, chopped rosemary, chopped thyme, and olive oil. Stir until the mixture is completely homogeneous, allowing flavors to mingle before they meet the flour.
3. Make a well in the center of the flour mixture and pour in the wet ingredients, creating a shallow crater that collects all the moisture.
4. Use a wooden spoon or your hands to gently mix the ingredients until a shaggy dough forms, with loose strands but no large pockets of dry flour.
5. Once the dough begins to come together, turn it out onto a lightly floured surface and knead for about 10 minutes, folding and pressing until it becomes smooth, elastic, and slightly tacky.
6. Transfer the kneaded dough into a lightly greased bowl, cover it with a damp cloth or plastic wrap, and let it rest at room temperature for 4 to 6 hours, or until it has doubled in size.
7. After the first rise, gently deflate the dough and turn it out onto a floured surface. Shape it into a round or oval loaf, sealing seams with gentle tucks.
8. Place the shaped loaf into a floured proofing basket or a bowl lined with a floured kitchen towel. Cover and let it proof for an additional 2 to 3 hours until the dough has puffed noticeably.
9. Preheat your oven to 450°F (232°C) about 30 minutes before baking. Position a Dutch oven (with lid) inside the oven to heat thoroughly.
10. When the dough is fully proofed, carefully remove the hot Dutch oven. Gently flip the loaf onto a piece of parchment paper and use a sharp knife to score the top, allowing controlled expansion.
11. Transfer the loaf (with parchment) into the Dutch oven, cover with the lid, and bake for 30 minutes to trap steam for a crisp crust.
12. After 30 minutes, remove the lid and bake for an additional 15–20 minutes, or until the loaf is a deep golden brown and sounds hollow when tapped on the bottom.
13. Once baked, transfer the bread to a wire rack and let it cool completely for at least 30 minutes before slicing, ensuring the crumb finishes setting.
SERVING SUGGESTIONS FOR GARLIC AND HERB SOURDOUGH BREAD
There’s something deeply satisfying about serving a loaf of garlic and herb sourdough at the table. Whether you’re hosting a casual dinner or whipping up a quick midweek meal, this bread elevates every dish it accompanies. The rustic, golden crust and fragrant crumb make it a versatile star of the show—ideal for soaking up savory sauces, layering with your favorite spreads, or standing solo with just a drizzle of olive oil. Let’s explore a few of my favorite ways to present this artisan bread at its flavorful peak.
- Buttery garlic toast: Slice the loaf about half an inch thick, brush each piece with melted butter, then broil until the edges are golden. Finish with a sprinkle of fresh parsley for a crunchy, herbaceous snack.
- Hearty soup side: Tear the bread into chunky pieces and serve alongside a steaming bowl of tomato bisque or mushroom soup. Its robust crust stands up to broths while infusing every spoonful with herbal goodness.
- Bruschetta base: Toast thin slices until crisp, then top with diced tomatoes, basil, a drizzle of balsamic glaze, and a light scatter of sea salt for an elegant appetizer.
- Cheese board centerpiece: Place thick wedges on a serving platter with assorted cheeses, cured meats, olives, and jam. Let guests create their own gourmet bites, highlighting the loaf’s natural tang and herb-infused layers.
HOW TO STORE GARLIC AND HERB SOURDOUGH BREAD
Storing your freshly baked bread properly ensures you enjoy every crumb at its best. While nothing beats the first-day crunch, a few simple techniques can preserve flavor and texture for days. Whether you plan to finish the loaf within 48 hours or want to save portions for later, these tips will keep your Garlic and Herb Sourdough Bread tasting just as delightful as the moment it emerged from the oven.
- Store at room temperature: Keep the cooled loaf in a paper bag or loosely wrapped in a clean kitchen towel. This allows the crust to breathe, maintaining its crispness while preventing excessive drying. Consume within 2 to 3 days.
- Use refrigeration sparingly: If your kitchen is very warm and you need a bit more longevity, place the bread in an airtight container in the fridge. Note that the crust will soften, but the interior crumb will stay moist for up to a week.
- Freeze for long-term storage: Slice the loaf before freezing so you can pull out individual portions. Wrap slices tightly in plastic wrap and store them in a labeled freezer bag. They’ll keep for up to 3 months. Thaw slices overnight in the fridge or toast directly from frozen.
- Revive a stale loaf: Refresh the crust by lightly misting the bread with water and heating it in a 350°F (175°C) oven for 5–7 minutes. This simple trick brings back that fresh-baked crispness and warms the herb-infused crumb.
CONCLUSION
This Garlic and Herb Sourdough Bread recipe offers more than just a loaf—it’s an invitation to slow down, connect with cherished traditions, and savor the rewards of patience and craftsmanship. From the careful blending of herbs and garlic to the satisfying spring of a well-proofed dough, every aspect of this recipe is designed to deliver both rustic charm and gourmet flair. You’ll find that the crunchy, golden crust and pillowy interior combine harmoniously, creating a versatile bread that complements meals, elevates appetizers, and stands proudly on any table. Best of all, once you master this technique, you can customize your loaf with different herbs, cheeses, or even sun-dried tomatoes, making the recipe uniquely your own. Feel free to print this article or save it for later use—you’ll want to revisit this method whenever you crave a warm, fragrant slice of homemade sourdough.
I’m genuinely excited for you to give this recipe a try, and I can’t wait to hear how it turns out in your kitchen. Below, you will find a FAQ section addressing common questions and troubleshooting tips. If you have any comments, questions, or feedback—whether it’s about shaping the dough, tweaking the herb combination, or achieving the perfect crust—please share your thoughts. Your experiences help build our community of home bakers, and I’m always here to help guide you toward your best bake yet. Happy baking!
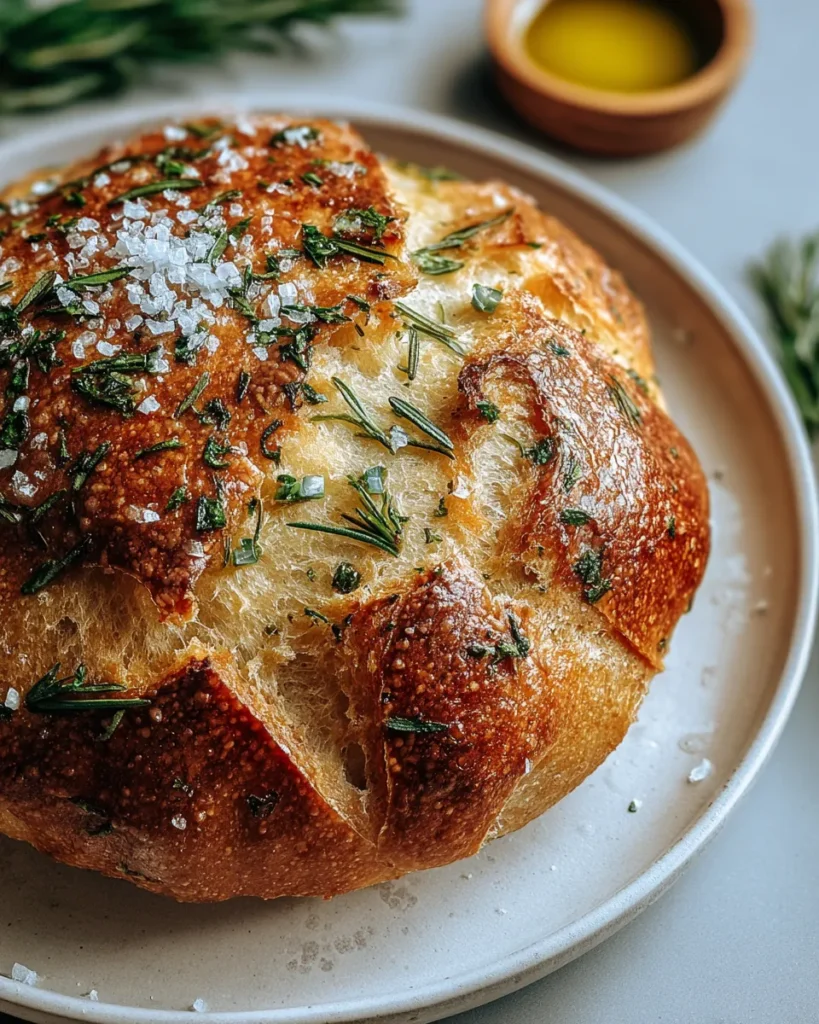

Garlic and Herb Sourdough Bread
Description
This Garlic and Herb Sourdough Bread boasts a crunchy crust and a soft, flavorful interior infused with garlic, rosemary, and thyme. Perfect for any meal!
Ingredients
Instructions
-
In a large mixing bowl, combine the bread flour and salt, ensuring that the salt is evenly distributed throughout the flour.
-
In a separate bowl, mix the lukewarm water, active sourdough starter, minced garlic, chopped rosemary, chopped thyme, and olive oil. Stir until well combined.
-
Make a well in the center of the flour mixture and pour in the wet ingredients.
-
Use a wooden spoon or your hands to mix the ingredients together until a shaggy dough forms.
-
Once the dough starts to come together, turn it out onto a lightly floured surface. Knead the dough for about 10 minutes until it becomes smooth and elastic.
-
Place the kneaded dough into a lightly greased bowl, cover it with a damp cloth or plastic wrap, and let it rest at room temperature for about 4 to 6 hours, or until it has doubled in size.
-
After the first rise, gently deflate the dough and turn it out onto a floured surface. Shape the dough into a round or oval loaf.
-
Place the shaped loaf on a floured proofing basket or a bowl lined with a floured kitchen towel. Cover it again and let it rise for another 2 to 3 hours until it has puffed up.
-
Preheat your oven to 450°F (232°C) about 30 minutes before baking. Place a Dutch oven (with lid) inside the oven to heat up.
-
Once the dough has proofed, carefully remove the hot Dutch oven from the oven. Gently flip the loaf onto a piece of parchment paper and score the top with a sharp knife.
-
Transfer the loaf on the parchment paper into the Dutch oven. Cover with the lid and bake for 30 minutes.
-
After 30 minutes, remove the lid and bake for an additional 15-20 minutes until the loaf is golden brown and sounds hollow when tapped on the bottom.
-
Once baked, let the bread cool on a wire rack for at least 30 minutes before slicing.
Note
- This bread can be customized with different herbs like basil or parsley for varied flavors.
- For a crispier crust, place a pan of water in the oven while baking.
- Store the bread at room temperature in a paper bag to maintain its crustiness.
- Leftover bread can be used for garlic bread or croutons, maximizing use.
- Experiment with adding cheese, olives, or sun-dried tomatoes for more complex flavors.

