

Bright pineapple and toasted coconut meet hearty oats in these chewy Pineapple Bliss Bars, offering a sun-kissed burst of tangy sweetness in every bite. Tangy crushed pineapple blends with honey-sweetened oats and coconut, then bakes until golden around the edges to reveal chewy centers studded with pineapple bits and a gentle coconut crunch. Perfect for a quick Breakfast boost or a tropical snack, these beginner-friendly bars come together in under an hour—grab your mixing bowl and let the sunshine into your kitchen!
Key Ingredients
Every great bar starts with simple pantry staples that pack loads of tropical flavor and texture:
- 2 cups rolled oats: The hearty base that provides chewiness and fiber.
- 1 cup shredded coconut: Adds tropical crunch and toasty sweetness.
- 1/2 cup granulated sugar: Sweetens the bars and helps achieve golden edges.
- 1/2 teaspoon salt: Balances sweetness and boosts all the flavors.
- 1/2 teaspoon baking powder: Gives a light lift for a tender bite.
- 1 cup crushed pineapple (drained): Brings tangy moisture and bright fruit flavor.
- 1/4 cup honey: Natural sweetener that helps bind the oats.
- 1 large egg: Provides structure and holds the mixture together.
- 1 teaspoon vanilla extract: Infuses warm, aromatic notes.
- 1/4 cup melted butter: Adds richness and ensures a tender crumb.
How To Make Pineapple Bliss Bars
Baking these Pineapple Bliss Bars is a breeze—once you master the simple assembly of mixing your dry and wet ingredients, layering, and baking, you’ll be rewarded with golden, chewy bars that are out of this world. Let’s break down each step to keep things easy and fun in the kitchen!
1. Preheat your oven to 350°F (175°C) and grease an 8×8-inch baking pan with butter or nonstick spray to ensure easy release.
2. Combine dry ingredients: In a large bowl, add rolled oats, shredded coconut, granulated sugar, salt, and baking powder. Stir with a spatula until evenly distributed.
3. Whisk wet mixture: In a separate bowl, whisk together crushed pineapple, honey, egg, vanilla extract, and melted butter until smooth and well blended.
4. Mix everything: Pour the wet mixture into the dry ingredients bowl and stir gently until just combined—avoid overmixing for tender bars.
5. Press the base: Transfer half of the mixture into the prepared pan, pressing firmly into an even layer using your fingers or the back of a spoon.
6. Layer pineapple bits: Spread any remaining pineapple over the base, then crumble the leftover oat mixture on top and gently press down for a rustic finish.
7. Bake for 20 to 25 minutes, until the edges turn golden brown and the center feels set to the touch.
8. Cool completely: Allow the bars to cool in the pan on a wire rack before cutting into squares—carryover heat will finish firming them up.
Serving Suggestions
These Pineapple Bliss Bars shine solo or dressed up for any occasion. Whether you’re brunching with friends or need a midday pick-me-up, try these ideas to showcase their tropical charm:
- With Greek yogurt: Top each bar with a dollop of creamy Greek yogurt and a sprinkle of toasted coconut.
- Iced tea pairing: Serve alongside a tall glass of mint-infused iced tea for a refreshing combo.
- Fruit salad match: Plate bars with a side of fresh mango and berries to echo the tropical theme.
- Lunchbox treat: Wrap individual bars in parchment for an easy on-the-go snack that stays chewy.
Tips For Perfect Pineapple Bliss Bars
Making these bars with confidence is all about managing moisture and maximizing flavor. Keep your kitchen vibes positive and follow these friendly pointers to get bakery-worthy results every time!
- Store bars in an airtight container at room temperature for up to three days
- Toast coconut lightly before mixing for extra flavor
- For a sweeter bar increase honey or sugar to taste
- Ensure crushed pineapple is well drained to prevent soggy bars
How To Store It
Once cooled, proper storage will keep your bars lively and fresh so you can savor every bite throughout the week. Here’s how to preserve that tropical goodness:
- Room Temperature: Store in an airtight container on the counter for up to three days to maintain chewiness.
- Refrigeration: Transfer to a sealed container and chill for up to one week—bars will firm up nicely.
- Freezing: Wrap individual bars in plastic wrap, place in a freezer-safe bag, and freeze for up to two months.
- Thawing & Reheating: Let frozen bars thaw at room temperature or microwave briefly for that fresh-baked feel.
Frequently Asked Questions
Curious minds, gather ’round—here are answers to your top Pineapple Bliss Bars queries:
- Q: How long does it take to prepare and bake Pineapple Bliss Bars?
A: Preparation takes about 15 minutes, including measuring ingredients, draining pineapple, and pressing the mixture into the pan. Baking requires 20 to 25 minutes in a 350°F oven, so plan for roughly 40 minutes from start to finish, plus cooling time.
- Q: What is the best way to ensure the crushed pineapple doesn’t make the bars soggy?
A: Drain the crushed pineapple thoroughly by placing it in a fine-mesh sieve or cheesecloth and pressing out excess liquid. Let it sit for a few minutes before measuring one cup. This prevents excess moisture from weakening the oat structure.
- Q: Can I customize the flavor or sweetness of these bars?
A: Yes. For extra sweetness, increase honey or granulated sugar to your taste. You can also swap the granulated sugar for light brown sugar for a deeper caramel note. Lightly toasting the shredded coconut in a dry skillet until golden will add a nutty, toasted flavor as well.
- Q: How should I store leftover Pineapple Bliss Bars and how long do they last?
A: Store fully cooled bars in an airtight container at room temperature for up to three days. For extended freshness, refrigerate for up to one week. To freeze, wrap individual bars in plastic wrap, place them in a freezer-safe bag, and store for up to two months.
- Q: What variations can I make without compromising texture?
A: Fold in ¼ to ½ cup of chopped nuts such as macadamia or almonds for crunch, stir in 2 tablespoons of flaxseed or chia seeds for added nutrition, or mix in ¼ cup of mini chocolate chips after the bars have cooled slightly to prevent melting. These additions won’t affect baking time.
- Q: How do I know when the bars are fully baked?
A: The edges should turn golden brown and begin to pull slightly away from the sides of the pan. The center will feel set to the touch but still a bit soft—carryover heat will firm it up as the bars cool in the pan.
- Q: What’s the best way to cut neat squares?
A: Allow the bars to cool completely in the pan, ideally for at least one hour or until room temperature. Run a sharp knife under hot water, dry it off, and then make clean, confident cuts. Repeat heating and wiping the knife between cuts for perfect edges.
What Makes This Special
These Pineapple Bliss Bars hit the sweet spot between chewy oats, tangy fruit, and toasty coconut, delivering a tropical escape right from your oven. They’re beginner-friendly, use simple ingredients, and bake up in under an hour—what’s not to love? Feel free to print this page and tuck it into your recipe binder for sunshine on demand. If you give them a whirl, drop a comment below or shout out with any questions—I’m here to help you achieve that blissful bar perfection!
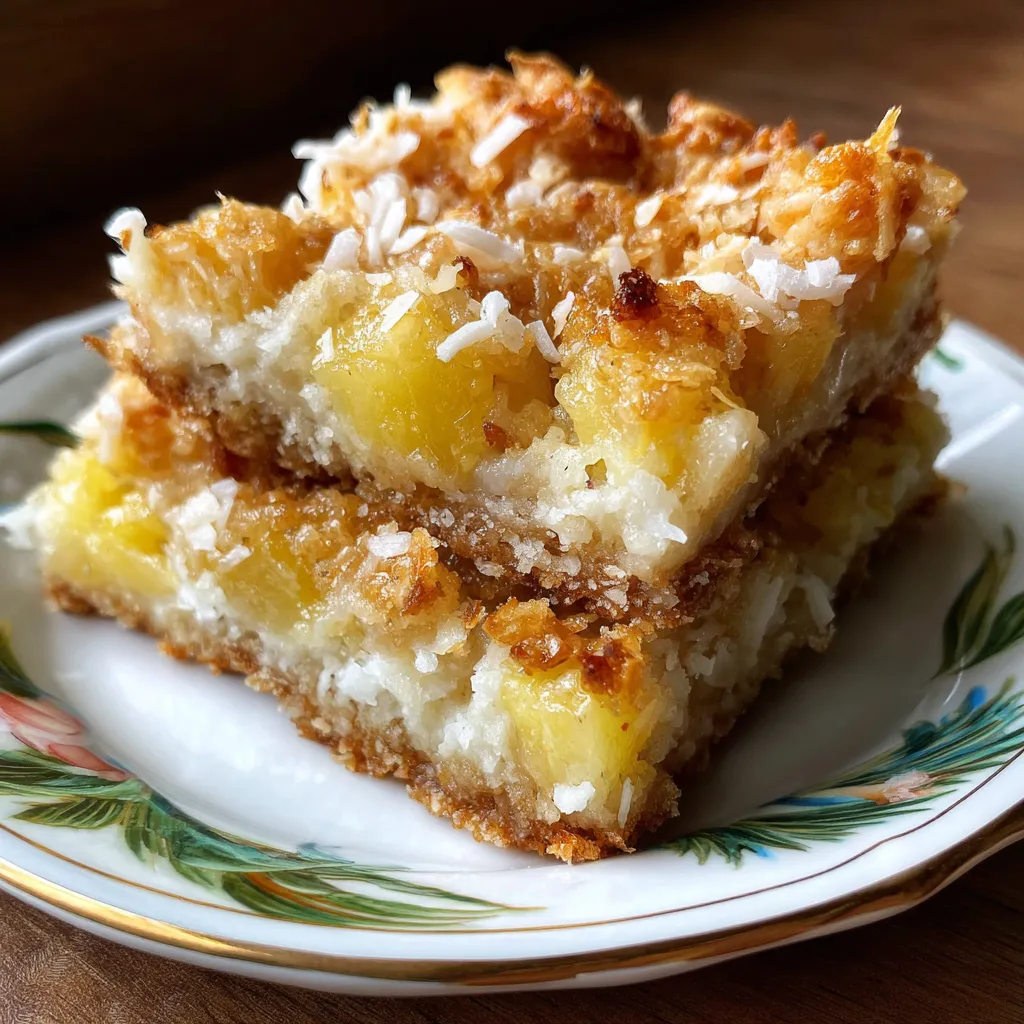

Pineapple Bliss Bars
Description
Tangy crushed pineapple blends with honey-sweetened oats and coconut, baked until golden around the edges. Each bar reveals chewy centers studded with pineapple bits and a gentle coconut crunch.
Ingredients
Instructions
-
Preheat oven to 350°F and grease an 8x8-inch baking pan.
-
In a large bowl combine rolled oats shredded coconut sugar salt and baking powder.
-
In a separate bowl whisk together crushed pineapple honey egg vanilla extract and melted butter.
-
Pour wet mixture into dry ingredients and stir until just combined.
-
Press half of the mixture firmly into the prepared pan.
-
Spread any remaining pineapple bits evenly over the base then crumble remaining oat mixture on top and gently press down.
-
Bake for 20 to 25 minutes until golden brown around the edges.
-
Allow bars to cool completely in the pan before cutting into squares.
Note
- Store bars in an airtight container at room temperature for up to three days
- Toast coconut lightly before mixing for extra flavor
- For a sweeter bar increase honey or sugar to taste
- Ensure crushed pineapple is well drained to prevent soggy bars

