

No-bake Lemon Cheesecake is the ultimate easy dessert that combines creamy, tangy filling with a crunchy graham cracker base—all without turning on your oven. This zesty treat brings together velvety cream cheese, fresh lemon zest, and a hint of vanilla in a buttery crust that’s chilled to perfection. Ideal for beginners and perfect for make-ahead entertaining, you’ll be slicing into citrusy bliss in just a few simple steps.
Key Ingredients
To whip up this No-bake Lemon Cheesecake, you’ll just need a handful of simple ingredients that come together for that perfect citrus tang on a buttery base.
- 200 g graham crackers, crushed: provides a crunchy, buttery base that pairs beautifully with the tangy filling.
- 50 g granulated sugar: adds sweetness to the crust and helps bind the crumbs together.
- 100 g unsalted butter, melted: ensures the crust sticks in place and delivers a rich flavor.
- 300 g cream cheese, softened: the creamy foundation of the filling, offering a smooth texture.
- 200 g sour cream: contributes tanginess and creaminess for a light, balanced filling.
- 100 g powdered sugar: sweetens and stabilizes the cheesecake filling without grittiness.
- 1 unit lemon, zested: infuses bright citrus oils for a refreshing zing.
- 60 ml lemon juice: adds vibrant acidity that cuts through the richness.
- 1 teaspoon vanilla extract: enhances the flavor profile with warm, sweet notes.
- 1 tablespoon powdered gelatin: helps the filling set firmly without baking.
- 60 ml cold water: hydrates the gelatin for proper blooming and setting.
How To Make No-bake Lemon Cheesecake
Creating this No-bake Lemon Cheesecake is as simple as building two layers: a crisp graham cracker crust and a luscious lemon-infused filling. First you'll press and chill the buttery crumb base, then bloom and dissolve the gelatin, whip up the tangy cream cheese mixture, and finally fold everything together. A few hours in the fridge and you'll have a perfectly set dessert that's refreshingly zesty and wonderfully creamy. Let’s dive into the step-by-step process to get you slicing into this citrusy delight.
1. Combine crushed graham crackers and granulated sugar in a bowl. Stir vigorously so that every crumb is evenly sweetened, forming the foundation for the crust.
2. Stir in melted butter until the mixture resembles wet sand. The melted butter should coat each grain, helping the crumbs bind when pressed.
3. Press the mixture firmly into the bottom and up the sides of a 20 cm springform pan. Use the bottom of a glass or measuring cup for an even, compact layer.
4. Refrigerate the crust while preparing the filling. Chilling for at least 10 minutes sets the butter and prevents the filling from seeping.
5. Sprinkle gelatin over cold water in a small bowl and let it bloom for 5 minutes. This blooming process hydrates the gelatin for a smooth finish.
6. Gently heat the bloomed gelatin until fully dissolved, then let it cool slightly. Warmth should be low to prevent cooking the gelatin too quickly or causing lumps.
7. In a large bowl beat cream cheese, sour cream, powdered sugar, lemon zest, lemon juice, and vanilla extract until smooth. Beat on medium speed to eliminate lumps and achieve a silky texture.
8. Slowly add the dissolved gelatin to the cream cheese mixture and beat until well incorporated. Pour in a thin stream to avoid shock-cooling and ensure even setting.
9. Pour the filling into the chilled crust and smooth the top with a spatula. Swipe the spatula in long strokes for a flawless, level surface.
10. Refrigerate the cheesecake for at least 4 hours or until fully set before serving. A longer chill (up to overnight) enhances flavor melding and ensures a firm slice.
Serving Suggestions
Once your No-bake Lemon Cheesecake is perfectly set, it’s time to think about presentation and extra flavor boosters. Whether you’re celebrating a special occasion or craving a simple afternoon treat, these serving ideas will highlight the citrusy zing and creamy texture. From colorful fruit toppings to elegant drizzles, you’ll find inspiration to elevate each slice and make your dessert shine. Grab your freshest ingredients, some decorative touches, and get ready to serve a cheesecake that’s as beautiful as it is delicious. Here are four of my favorite ways to garnish and serve.
- Fresh berries: Top with a mix of strawberries, raspberries, and blueberries to add a burst of color and natural sweetness.
- Whipped cream dollop: Pipe or spoon a swirl of airy whipped cream on each slice for extra creaminess and an elegant look.
- Candied lemon slices: Thin lemon rounds simmered in sugar syrup for a glossy, tart-sweet garnish that complements the cheesecake.
- Mint leaves: Add a sprig of fresh mint for a pop of green and a refreshing aroma that balances the rich filling.
Tips For Perfect No-bake Lemon Cheesecake
Let’s talk about how to make your No-bake Lemon Cheesecake shine every time. With a few friendly tricks up your sleeve, you can achieve a silky-smooth filling, a rock-solid crust, and beautiful presentation that will have everyone asking for seconds. From temperature tweaks to make-ahead strategies and serving flair, these notes will ensure you breeze through the process and end up with a dessert that’s as stunning as it is delicious.
- Let your cream cheese reach room temperature before mixing to guarantee a smooth, lump-free filling.
- Swap the sour cream for an equal amount of lightly whipped heavy cream if you prefer an extra-firm texture.
- Prepare the cheesecake up to 24 hours ahead and keep it chilled in the fridge to let flavors meld and save time on serving day.
- Garnish just before serving with fresh berries or thin lemon slices to enhance the citrus notes and add a pop of color.
How To Store It
After serving your No-bake Lemon Cheesecake, you’ll likely have leftovers begging to be enjoyed later. Proper storage helps maintain that perfect creamy texture and vibrant lemon flavor. Whether you’re keeping it chilled in the fridge or stashing slices in the freezer for an impromptu dessert, these tips will guide you through the best methods to preserve freshness, texture, and taste. Let’s explore a few reliable ways to store your cheesecake.
- Refrigerator storage: Keep the cheesecake in its springform pan covered loosely with plastic wrap or in an airtight container to prevent moisture loss. It stays fresh for up to 4 days.
- Individual slices: Wrap each slice tightly in plastic wrap, then place in a sealed bag to minimize air exposure and maintain creamy texture for easy grab-and-go treats.
- Long-term freezer: For extended storage, freeze whole or portioned cheesecake (without toppings) for up to 1 month. Wrap in two layers of plastic wrap followed by aluminum foil to prevent freezer burn.
- Thawing tips: Move frozen slices to the fridge and let them thaw overnight for a slow, even defrost that preserves the cheesecake’s structure and flavor.
Frequently Asked Questions
Have questions about making or serving this No-bake Lemon Cheesecake? Here are the answers to some of the most common queries from home bakers.
- How long does it take to prepare and set this no-bake lemon cheesecake?
Preparing the crust and filling takes about 20–25 minutes total (5 minutes mixing crust, 10 minutes chilling crust, and 10–15 minutes beating the filling). After assembly, you must refrigerate the cheesecake for at least 4 hours (or up to overnight) for it to fully set, bringing the total time to around 4½ hours.
- Why do I need to refrigerate the crust before adding the filling?
Chilling the crust firm-ups the melted butter so the graham cracker base holds its shape. A cold, set crust creates a stable foundation and prevents the filling from seeping into it, ensuring crisp edges and a clean release from the springform pan.
- My cheesecake filling has small lumps. How can I achieve a completely smooth texture?
Start with room-temperature cream cheese to prevent clumps. Beat the cream cheese and powdered sugar until silky before adding sour cream, lemon, and vanilla. Dissolve the bloomed gelatin completely over low heat and let it cool slightly before drizzling it in while continuing to beat. This gradual incorporation yields a lump-free filling.
- Can I substitute or omit any ingredients for dietary preferences?
For a firmer texture, replace the 200 g sour cream with 200 g lightly whipped heavy cream. If you don’t have graham crackers, you can use digestive biscuits or any plain, crisp cookies. For a dairy-free version, use vegan cream cheese, coconut cream in place of sour cream, and a plant-based butter alternative.
- How should I store leftover cheesecake and how long will it keep?
Store the cheesecake in its springform pan or an airtight container, lightly covered with plastic wrap, in the refrigerator. It will stay fresh for up to 3–4 days. For best flavor and texture, consume it within 2 days or make it a day in advance.
- What is the purpose of blooming gelatin and how do I know it’s ready?
Blooming gelatin hydrates the powder in cold water, allowing it to swell evenly. After 5 minutes, you’ll see a spongy texture. Gently heat the bloomed gelatin until fully dissolved (no granules or cloudiness), then cool slightly before adding it to the cream cheese mixture. Properly dissolved gelatin ensures a stable, set filling.
- What are some serving and garnish suggestions for this cheesecake?
Top slices with fresh berries (strawberries, raspberries, or blueberries), thin lemon slices, or a spoonful of berry compote. A dollop of whipped cream or a dusting of extra lemon zest adds brightness and an elegant touch to each serving.
What Makes This Special
This No-bake Lemon Cheesecake stands out thanks to its effortless two-layer construction: a buttery graham crust and a tangy, gelled lemon filling that sets without ever heating your oven. The key is blooming gelatin for a firm but tender texture, paired with fresh lemon zest and juice for that bright citrus pop. It’s beginner-friendly, make-ahead capable, and endlessly adaptable—just fold in berries, swap in whipped cream, or garnish with candied lemon for a personal twist. Feel free to print and stash this guide for when you need a quick, crowd-pleasing dessert. I’d love to hear how your cheesecake turns out or help troubleshoot any hiccups—drop me a comment below!
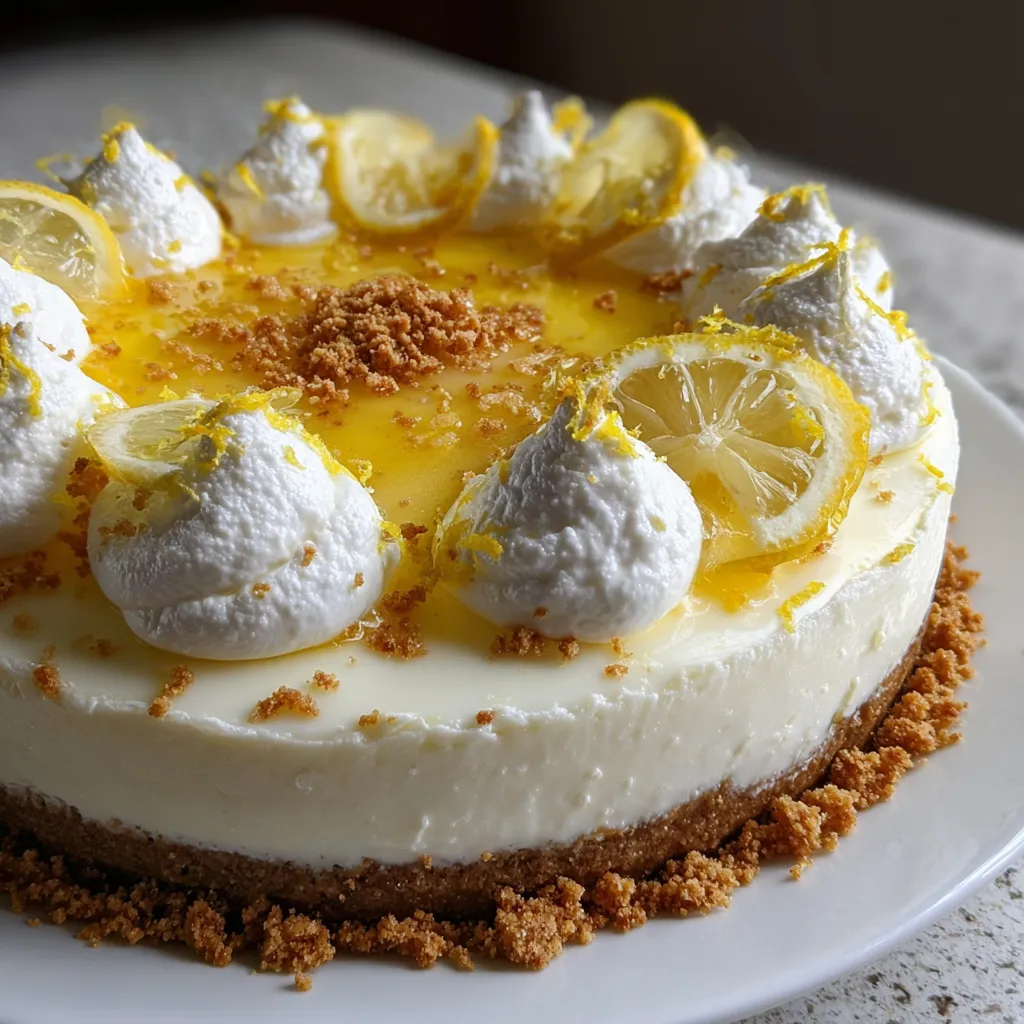

No-bake Lemon Cheesecake
Description
This smooth and tangy cheesecake blends velvety cream cheese with fresh lemon zest, all nestled in a crunchy graham crust. Perfectly chilled and bursting with citrus aroma in every bite.
Ingredients
Instructions
-
Combine crushed graham crackers and granulated sugar in a bowl.
-
Stir in melted butter until the mixture resembles wet sand.
-
Press the mixture firmly into the bottom and up the sides of a 20 cm springform pan.
-
Refrigerate the crust while preparing the filling.
-
Sprinkle gelatin over cold water in a small bowl and let it bloom for 5 minutes.
-
Gently heat the bloomed gelatin until fully dissolved, then let it cool slightly.
-
In a large bowl beat cream cheese, sour cream, powdered sugar, lemon zest, lemon juice, and vanilla extract until smooth.
-
Slowly add the dissolved gelatin to the cream cheese mixture and beat until well incorporated.
-
Pour the filling into the chilled crust and smooth the top with a spatula.
-
Refrigerate the cheesecake for at least 4 hours or until fully set before serving.
Note
- Use room temperature cream cheese for a lump-free filling.
- For a firmer texture replace sour cream with whipped heavy cream.
- Cheesecake can be made a day in advance and stored in the refrigerator.
- Serve with fresh berries or lemon slices for a bright garnish.

