

Crispy Chicken Romano is a crunchy Parmesan-crusted chicken with a punch of garlic and paprika, perfect for a cozy dinner that balances crisp edges with juicy tender meat. The golden brown crust gives way to chicken infused with savory Parmesan and warm spices, making each bite crackle with flavor. Give your weeknight meals a tasty upgrade and dive into this easy yet impressive recipe.
Key Ingredients
Before you start cooking, gather these simple components that create our signature Crispy Chicken Romano crust and tender interior.
- 4 boneless skinless chicken breasts: Uniform cuts that ensure even cooking and tender, juicy meat.
- 1 cup all-purpose flour: Forms a light base layer that helps the egg and breadcrumb coatings adhere.
- 1 teaspoon salt: Enhances overall flavor by seasoning both the flour mix and the chicken.
- 1 teaspoon black pepper: Adds a sharp, slightly spicy note to balance the rich Parmesan.
- 1 teaspoon garlic powder: Infuses each bite with a warm, savory garlic undertone.
- 1 teaspoon paprika: Delivers a subtle smokiness and vibrant color to the crust.
- 1 cup grated Parmesan cheese: Provides salty, nutty flavor and contributes to a golden, crispy coating.
- 2 large eggs: Bind the flour layer to the breadcrumbs, creating a sturdy crust.
- 2 tablespoons milk: Lightens the egg wash for easier, even coating.
- 2 cups breadcrumbs: Build the crunchy exterior that locks in juices.
- 2 cups vegetable oil: For shallow frying, ensuring an evenly crisp, golden finish.
How To Make Crispy Chicken Romano
Let’s walk through the steps to transform simple chicken breasts into a golden-crisp, Parmesan-packed delight. We’ll start by prepping the chicken to an even thickness, move through the classic dredging method in three bowls, and finish with perfectly fried cutlets.
1. Place each chicken breast between sheets of plastic wrap and use a meat mallet or rolling pin to pound them to an even ½-inch thickness, which ensures consistent cooking.
2. In a shallow dish, whisk together flour, salt, black pepper, garlic powder, and paprika until well combined for a seasoned flour dredge.
3. In a second shallow dish, beat the eggs with milk until smooth to create the egg wash that helps the coating stick.
4. In a third shallow dish, stir breadcrumbs with grated Parmesan cheese, forming a savory, crunchy breadcrumb mixture.
5. Dredge each chicken breast in the seasoned flour, shaking off any excess, then dip into the egg mixture, and firmly press into the breadcrumb-Parmesan mix to coat evenly.
6. Heat vegetable oil in a large skillet over medium-high heat until it shimmers and an inserted piece of breadcrumb sizzles upon contact.
7. Fry chicken breasts in batches for 3 to 4 minutes per side, or until the crust turns deep golden brown and the internal temperature reaches 165°F.
8. Transfer cooked chicken to a paper towel–lined plate to drain excess oil and rest briefly for maximum juiciness.
9. Serve hot with lemon wedges or your favorite dipping sauce to complement the rich, savory crust.
Serving Suggestions
When it’s time to plate your Crispy Chicken Romano, these ideas will take your meal from great to unforgettable.
- Serve with lemon wedges to brighten and cut through the richness, squeezing fresh juice just before eating.
- Pair with a side of garlic mashed potatoes for creamy, comforting contrast against the crisp coating.
- Offer a small bowl of marinara sauce for dunking, adding an Italian-style tangy tomato twist.
- Garnish with fresh parsley or basil for a pop of color and herbal freshness that complements the Parmesan.
Tips For Perfect Crispy Chicken Romano
Nailing the perfect crunchy crust with tender meat is easier than you think! Follow these friendly tips to elevate your Crispy Chicken Romano every single time:
- You can substitute panko breadcrumbs for extra crunch.
- For a lighter version, bake the coated chicken at 400°F for 20 minutes, flipping halfway.
- Let the chicken rest a few minutes before serving to retain juiciness.
- Freshly grated Parmesan yields the best flavor and helps the crust adhere better.
How To Store It
Planning ahead or saving leftovers? Proper storage keeps your Crispy Chicken Romano as tasty as day one by preserving its crunch and flavor.
- Store in an airtight container in the refrigerator for up to three days to maintain moisture and prevent sogginess.
- For longer storage, tightly wrap cooled pieces in plastic and place in a freezer-safe bag for up to one month.
- To thaw frozen chicken, move it to the refrigerator overnight, allowing gentle, even thawing.
- Reheat on a wire rack set over a baking sheet at 350°F for about 10 minutes to restore crispiness without drying out.
Frequently Asked Questions
Here are quick answers to common questions about making and enjoying Crispy Chicken Romano:
- Q: Why is it important to pound the chicken breasts to an even thickness?
A: Pounding to about ½ inch ensures even cooking, prevents thinner edges from overcooking, and helps tenderize the meat for consistent crispiness and juiciness.
- Q: Can I substitute panko breadcrumbs or use other types of cheese?
A: Yes, substituting panko enhances the crunch with its flakier texture. For cheese, freshly grated Parmesan gives authentic flavor, but you can also use Pecorino Romano—just adjust salt levels since it’s saltier.
- Q: How do I know when the vegetable oil is hot enough for frying?
A: The oil should shimmer and flow smoothly when you tilt the pan. A thermometer reading of 350°F–375°F is ideal, or test with a breadcrumb—it should sizzle and rise immediately.
- Q: What is the best way to bake the coated chicken for a lighter version?
A: Preheat the oven to 400°F, arrange the coated breasts on a greased sheet or wire rack, and bake 20 minutes, flipping once halfway, until the coating is golden and the chicken cooked through.
- Q: How should I store leftovers and reheat them to maintain crispiness?
A: Cool slightly, then refrigerate in an airtight container for up to three days. To reheat, use a 350°F oven on a wire rack for about 10 minutes until crunchy and warmed.
- Q: What dipping sauces or accompaniments pair well with Crispy Chicken Romano?
A: Lemon wedges add bright acidity; marinara sauce gives Italian flair; garlic aioli brings richness; ranch or honey mustard add creamy or sweet-tangy contrasts.
What Makes This Special
Crispy Chicken Romano nails the balance between a golden, crunchy Parmesan shell and tender, juicy chicken, all amped up by garlic and paprika. It’s a crowd-pleaser that feels fancy and is surprisingly simple—perfect for weeknights or casual entertaining. Don’t forget to print and tuck this recipe into your collection for those “I want something special” moments. Have questions, tweaks, or rave reviews? Share your thoughts—I love hearing how your Crispy Chicken Romano turns out!
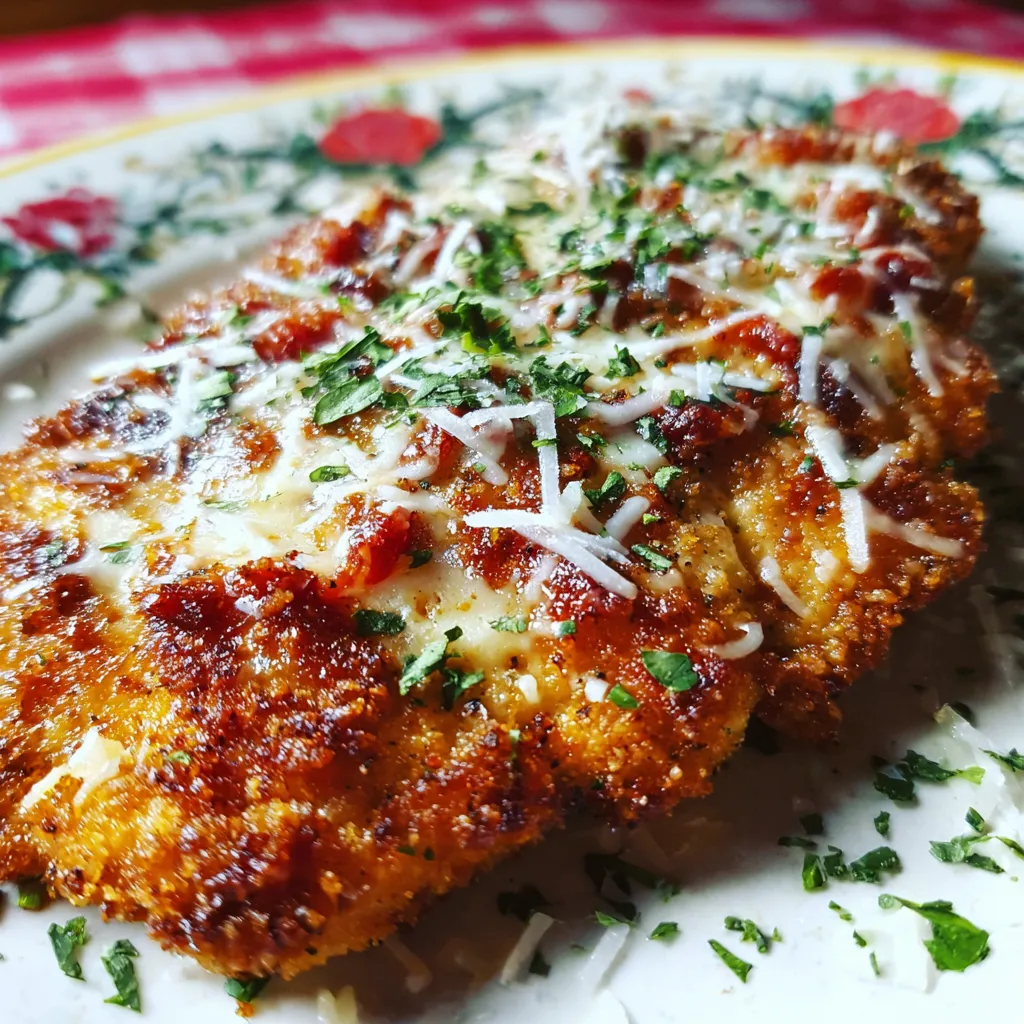

Crispy Chicken Romano
Description
Golden brown crust gives way to tender chicken infused with savory Parmesan and warm spices. Each bite crackles with flavor, making dinner feel like a special celebration at home.
Ingredients
Instructions
-
Place each chicken breast between sheets of plastic wrap and pound to an even thickness of about ½ inch.
-
In a shallow dish, combine flour, salt, black pepper, garlic powder, and paprika.
-
In a second shallow dish, beat eggs with milk.
-
In a third shallow dish, mix breadcrumbs with grated Parmesan cheese.
-
Dredge each chicken breast in the seasoned flour, shaking off excess, then dip into the egg mixture, and press into the breadcrumb mixture to coat evenly.
-
Heat vegetable oil in a large skillet over medium-high heat until it shimmers.
-
Fry chicken breasts in batches for 3 to 4 minutes per side, or until golden brown and cooked through.
-
Transfer cooked chicken to a paper towel–lined plate to drain excess oil.
-
Serve hot with lemon wedges or your favorite dipping sauce.
Note
- You can substitute panko breadcrumbs for extra crunch.
- For a lighter version, bake the coated chicken at 400°F for 20 minutes, flipping halfway.
- Let the chicken rest a few minutes before serving to retain juiciness.
- Freshly grated Parmesan yields the best flavor.

