

These Cherry Pie Bars are the kind of dessert that brings together the most delightful dance of sweet and tart in every single bite. From the moment you spread that buttery, tender crust into the pan, you know something special is about to happen. When the cherries bubble up through the golden top, you can’t help but feel a little spark of excitement—like you’re capturing summer in a simple square of pastry. Every layer works in harmony: the crust offers a gentle support, the cherry filling bursts with juiciness, and the drizzle of glaze ties everything together in a sweet finish.
When you pull these bars from the oven, the contrast between the warm cherries and the cool glaze is simply irresistible. It’s a dessert that feels fancy enough for a dinner party yet easy enough to whip up on a lazy afternoon. Whether you’re baking for a crowd or indulging in a quiet moment with coffee, these bars hit that perfect balance of comfort and celebration. And trust me, once you taste how the flavors meld, you’ll find yourself coming back to this recipe again and again.
KEY INGREDIENTS IN CHERRY PIE BARS
Every great recipe starts with quality ingredients, and these Cherry Pie Bars are no exception. By focusing on pantry staples and a few star components, you can create a dessert that looks and tastes like it took you hours—without all the fuss.
- Unsalted butter
This brings a rich, creamy foundation to the crust. When creamed with sugar, it creates air pockets that make the base tender and slightly flaky.
- Granulated sugar
Beyond sweetness, granulated sugar helps achieve that light and fluffy texture when beaten with butter. It also promotes even browning in the crust.
- Vanilla extract
A splash of vanilla elevates the flavor profile, adding warm, floral notes that layer beautifully with the cherry filling and the glaze.
- Eggs
Eggs are the binding agent that holds the crust together, providing structure and a smooth, cohesive batter.
- All-purpose flour
This versatile flour forms the backbone of the bars, giving you the right balance of softness and stability.
- Baking powder
A little lift from baking powder ensures your crust has just the right amount of springiness and doesn’t feel too dense.
- Salt
Even in sweet recipes, salt is crucial for enhancing flavor. It balances the sweetness and deepens the overall taste.
- Cherry pie filling
The star of the show, this filling offers that classic sweet-tart cherry flavor without the hassle of pitting fruit. It adds vibrant color and joyful bursts of juice.
- Powdered sugar
Used in the glaze, it dissolves easily to form a smooth, glossy topping that adds a final touch of sweetness.
- Milk
Just a bit of milk thins out the powdered sugar in the glaze, making it easy to drizzle and stick to the cooled bars.
HOW TO MAKE CHERRY PIE BARS
Baking these Cherry Pie Bars is a breeze, even for beginners. You’ll combine simple steps to build layer upon layer of flavor, finishing with a gorgeous drizzle that makes each bar look like it came from a bakery.
1. Preheat your oven to 350°F (175°C). Grease a 15×10-inch baking pan or line it with parchment paper.
2. In a large mixing bowl, cream together the softened butter and granulated sugar until light and fluffy, about 3 to 5 minutes.
3. Add in the vanilla extract and eggs, one at a time, beating well after each addition to ensure a silky-batter consistency.
4. In a separate bowl, whisk together the flour, baking powder, and salt to distribute the leavening agent evenly.
5. Gradually add the dry ingredients to the wet mixture, mixing until just combined—overmixing can lead to a tougher crust.
6. Spread about two-thirds of the batter evenly into the prepared baking pan, using a spatula to smooth the surface.
7. Spread the cherry pie filling evenly over the batter layer, ensuring each bite will have juicy cherries.
8. Drop the remaining batter by teaspoonfuls over the cherry pie filling, creating a rustic, patchwork top.
9. Bake in the preheated oven for 40 to 45 minutes or until a toothpick inserted into the center comes out clean and the bars are lightly golden brown.
10. Allow the bars to cool completely in the pan on a wire rack, which helps the crust set and makes cutting easier.
11. For the glaze, in a small bowl, mix together the powdered sugar, vanilla extract, and milk until smooth and pourable.
12. Drizzle the glaze over the cooled bars, letting it pool in the nooks for that picture-perfect finish.
13. Cut into bars and serve, enjoying how each square is a symphony of buttery crust, tangy cherries, and sweet glaze.
SERVING SUGGESTIONS FOR CHERRY PIE BARS
When it comes time to present your Cherry Pie Bars, a few simple touches can elevate them from kitchen treat to show-stopping dessert. Whether you’re hosting book club or just craving a sweet pick-me-up, these ideas will make every serving feel special.
- Serve warm with a scoop of vanilla ice cream on top, allowing the melting cream to mingle with the juicy cherries for a blissful contrast of temperatures.
- Garnish with a light dusting of powdered sugar and a few fresh cherries for a pop of color and extra tartness against the sweet glaze.
- Pair each bar with a steaming mug of freshly brewed coffee or herbal tea to balance the sweetness and bring out the cherry notes.
- Pack bars in a decorative treat box layered with parchment paper for edible gifts that are as charming to give as they are to receive.
HOW TO STORE CHERRY PIE BARS
Proper storage ensures your Cherry Pie Bars stay moist, flavorful, and ready to enjoy whenever the craving strikes. Learn how to keep them fresh without sacrificing that tender crust or glossy glaze.
- Store at room temperature in an airtight container for up to two days. Place parchment paper between layers to prevent sticking and maintain the glaze’s neat finish.
- For longer life, keep bars in the refrigerator for up to five days. Press plastic wrap directly onto the glaze to protect against moisture loss and staleness.
- To freeze, wrap individual bars in plastic wrap and then in a layer of foil. Arrange them in a freezer-safe bag for up to two months. Thaw overnight in the fridge before serving.
- If you’ve drizzled on that sweet glaze, allow bars to cool completely and harden before stacking. This step prevents the glaze from smudging and keeps each bar looking as beautiful as it tastes.
CONCLUSION
These Cherry Pie Bars are more than just another dessert—they’re a celebration of flavor, texture, and simple baking joy. From the buttery, soft crust to the bright tang of cherry pie filling and the delicate sweetness of the glaze, every bite feels like a hug for your taste buds. Whether you’re an experienced baker or a first-timer, this beginner-friendly recipe guides you through each step, ensuring success and smiles around the dessert table. With a total preparation time of 20 minutes, plus 45 minutes in the oven and a 30-minute rest period, you can whip these up in no time—just enough effort for maximum reward.
Feel free to print this article and save it for later, tucking it into your recipe binder or pinning it on the fridge. Below, you’ll also find a handy FAQ section to troubleshoot any questions you might have. If you give these bars a spin, I’d love to hear how they turned out! Drop a comment, share your tweaks, or ask for help if you hit any bumps along the way. Happy baking, and here’s to many sweet moments with these irresistible Cherry Pie Bars!
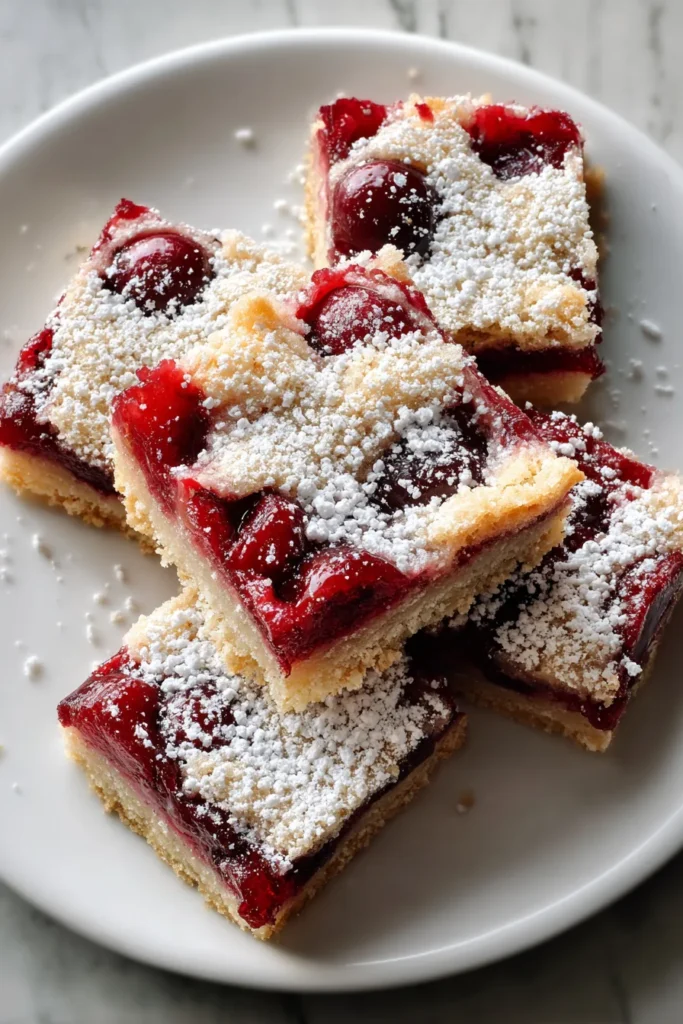

Cherry Pie Bars
Description
These Cherry Pie Bars boast a buttery, soft crust encasing a luscious cherry filling, topped with a sweet glaze that ties all the flavors together beautifully.
Ingredients
Instructions
-
Preheat your oven to 350°F (175°C). Grease a 15x10-inch baking pan or line it with parchment paper.
-
In a large mixing bowl, cream together the softened butter and granulated sugar until light and fluffy, about 3 to 5 minutes.
-
Add in the vanilla extract and eggs, one at a time, beating well after each addition.
-
In a separate bowl, whisk together the flour, baking powder, and salt.
-
Gradually add the dry ingredients to the wet mixture, mixing until just combined.
-
Spread about two-thirds of the batter evenly into the prepared baking pan.
-
Spread the cherry pie filling evenly over the batter layer.
-
Drop the remaining batter by teaspoonfuls over the cherry pie filling.
-
Bake in the preheated oven for 40 to 45 minutes or until a toothpick inserted into the center comes out clean and the bars are lightly golden brown.
-
Allow the bars to cool completely in the pan on a wire rack.
-
For the glaze, in a small bowl, mix together the powdered sugar, vanilla extract, and milk until smooth.
-
Drizzle the glaze over the cooled bars.
-
Cut into bars and serve.
Note
- Ensure the butter is softened to room temperature for easier mixing.
- You can use different fruit pie fillings if you prefer variations.
- Allow bars to cool completely before drizzling the glaze for a neat finish.
- Glazed bars can become slightly sticky, so store them with parchment paper between layers.

