

If you’re looking for a dessert that dazzles guests and satisfies every chocolate craving, you’ve landed in the right place. This layered masterpiece, lovingly dubbed Layered Chocolate Bliss: A Decadent Oreo Cheesecake Brownie Trifle, blends fudgy brownie squares, luscious cheesecake clouds, and crunchy Oreo bits into one stunning showstopper. It’s an intermediate-level creation that takes about 30 minutes to prep, another 30 minutes in the oven, and then a restful 2 to 3 hours in the fridge. Each serving clocks in around 450 calories, so you’ll want to plan accordingly—but trust me, every heavenly bite is worth it.
When I first put this trifle together, I was hosting a small brunch for friends and wanted something both dramatic and effortless. The clear glass bowl reveals each irresistible layer, and watching their eyes light up as I revealed it was pure joy. Whether you’re treating family on a lazy Sunday or dazzling coworkers at a potluck, this treat stands out. The creamy cheesecake layer mellows the rich brownie, while crushed Oreos and chocolate syrup add delightful texture contrasts. Grab your spatula and let’s get ready to assemble a dessert that’s as fun to make as it is to devour!
KEY INGREDIENTS IN CHOCOLATE OREO CHEESECAKE BROWNIE TRIFLE
Before we roll up our sleeves, let’s talk about the stars of the show. Each component brings its own magic, so having everything prepped will make assembly a breeze.
- Brownie Mix
A convenient base that bakes into dense, fudgy squares. This trusty mix saves time and ensures consistently rich chocolate flavor.
- Cream Cheese
Softens to a silky texture and adds that signature tangy note you love in cheesecake. It’s the heart of the creamy layer.
- Powdered Sugar
Blends smoothly with cream cheese to sweeten without any graininess, creating a perfectly balanced cheesecake filling.
- Vanilla Extract
A dash of this brightens and deepens the flavor profile, rounding out the richness of the cream cheese and brownies.
- Heavy Whipping Cream
Whipped into stiff peaks, it lightens the cheesecake layer, giving it cloud-like loft and a melt-in-your-mouth finish.
- Oreo Cookies
Crushed into crunchy bits, they add texture and playful bursts of chocolate-and-cream goodness between those creamy layers.
- Chocolate Syrup
Drizzled between layers for extra decadence and glossy ribbons of sweetness that tie every component together.
- Semi-Sweet Chocolate
Shaved or grated on top, it provides elegant curls and a touch of bittersweet contrast to the overall sweetness.
- Mini Chocolate Chips
Sprinkled for a final pop of texture, they create little chocolate surprises with every forkful.
HOW TO MAKE CHOCOLATE OREO CHEESECAKE BROWNIE TRIFLE
Now that our ingredients are ready, let’s bring this trifle to life step by step. Each layer builds upon the last, resulting in a dessert that’s as beautiful as it is delicious.
1. Begin by preparing the brownies according to package instructions. Pour the batter into your pan, bake until a toothpick comes out with moist crumbs, then let the brownies cool completely in the pan so they hold their shape when cut.
2. While the brownies are cooling, prepare the cheesecake layer. In a medium bowl, beat the softened cream cheese with powdered sugar and vanilla extract until the mixture is smooth and free of lumps.
3. In a separate bowl, whip the heavy cream until stiff peaks form. Gently fold the whipped cream into the cream cheese mixture until fully incorporated, taking care to keep the mixture light and airy. Set this luscious filling aside.
4. Once the brownies have cooled, carefully cut them into small squares or bite-sized pieces that will fit neatly into your trifle dish.
5. To assemble the trifle, position a large trifle dish or glass bowl on your countertop. Start by placing an even layer of brownie pieces at the bottom, creating a firm foundation.
6. Spread a generous layer of the cheesecake mixture on top of the brownies, ensuring you cover every nook and cranny.
7. Sprinkle a generous layer of crushed Oreo cookies over the cheesecake filling, letting some bits tumble over the edges for that rustic look.
8. Drizzle several spoonfuls of chocolate syrup over the Oreos, weaving glossy ribbons that will peek through the next layer.
9. Repeat the layers—brownies, cheesecake filling, crushed Oreos, chocolate syrup—until all components are used, finishing with a final layer of cheesecake on top.
10. For the finishing touch, sprinkle the surface with shaved semi-sweet chocolate and a shower of mini chocolate chips for extra texture and visual appeal.
11. Refrigerate the completed trifle, covered loosely with plastic wrap, for at least 2 to 3 hours until it’s well chilled and the flavors have melded beautifully.
SERVING SUGGESTIONS FOR CHOCOLATE OREO CHEESECAKE BROWNIE TRIFLE
Serving this trifle is just as fun as making it! When you’re ready to unveil your masterpiece, slice down through the layers with a long, sharp knife or spoon out individual portions with a wide serving spoon. The contrast of textures—fudgy brownie, creamy cheesecake, crunchy Oreos—will shine in every bite. Here are some ideas to elevate your presentation:
- Garnish with fresh berries such as raspberries or strawberries for a pop of color and a bright, fruity counterpoint to the rich chocolate flavors.
- Serve in individual dessert glasses or glass jars so each guest gets a perfect view of the layers, making it feel extra special and personalized.
- Pair with a light espresso or a frothy cappuccino to cut through the sweetness and complement the deep cocoa notes of the trifle.
- Top each serving with a mint sprig or a dusting of unsweetened cocoa powder for an elegant finish that adds a hint of freshness.
HOW TO STORE CHOCOLATE OREO CHEESECAKE BROWNIE TRIFLE
Proper storage ensures your trifle stays as delicious as the moment you served it. Since this is a creamy, multi-layered dessert, keeping it chilled and well-covered is key. Follow these methods to maintain its texture and flavor for up to three days:
- Refrigerator Storage
Cover the trifle bowl tightly with plastic wrap or an airtight lid to prevent fridge odors from seeping in and to keep the layers pristine. Store on a middle shelf where the temperature is most consistent.
- Airtight Container
If you’ve portioned the trifle into individual cups, transfer each to a sealed container. This locks in moisture and prevents the whipped cream layer from absorbing any fridge scents.
- Freezer Option
For longer-term storage, freeze individual servings in freezer-safe jars. Wrap the top with plastic wrap and a layer of aluminum foil. Thaw in the refrigerator for several hours before serving.
- Avoid Room Temperature
Due to the dairy and whipped cream, never leave the trifle out at room temperature for more than two hours to ensure food safety and maintain texture.
CONCLUSION
Bringing together fudgy brownies, tangy cheesecake, and crunchy Oreos, this Chocolate Oreo Cheesecake Brownie Trifle truly lives up to its name: a dazzling display of Layered Chocolate Bliss. From the moment you start mixing the cream cheese filling to that final sprinkle of shaved chocolate, each step is an invitation to have fun in the kitchen. You’ll love how the individual layers nestle against each other, creating a treat that’s as pleasing to the eye as it is to the palate. With just 30 minutes of prep time and a brief bake, followed by a 2 to 3 hour chill, you can easily plan this dessert ahead for parties, holidays, or any day that calls for a special indulgence.
Feel free to print this article or save it for later when you’re ready to wow your friends and family. Below, you’ll also find a handy FAQ section to answer any lingering questions about customization, substitutions, or troubleshooting tips. If you give this recipe a try, I’d love to hear how it turned out! Drop your comments, share your favorite twist on the layers, or ask for help if you get stuck at any point. Your feedback makes this kitchen conversation even sweeter and helps fellow home cooks enjoy every bite of this decadent trifle. Happy layering!
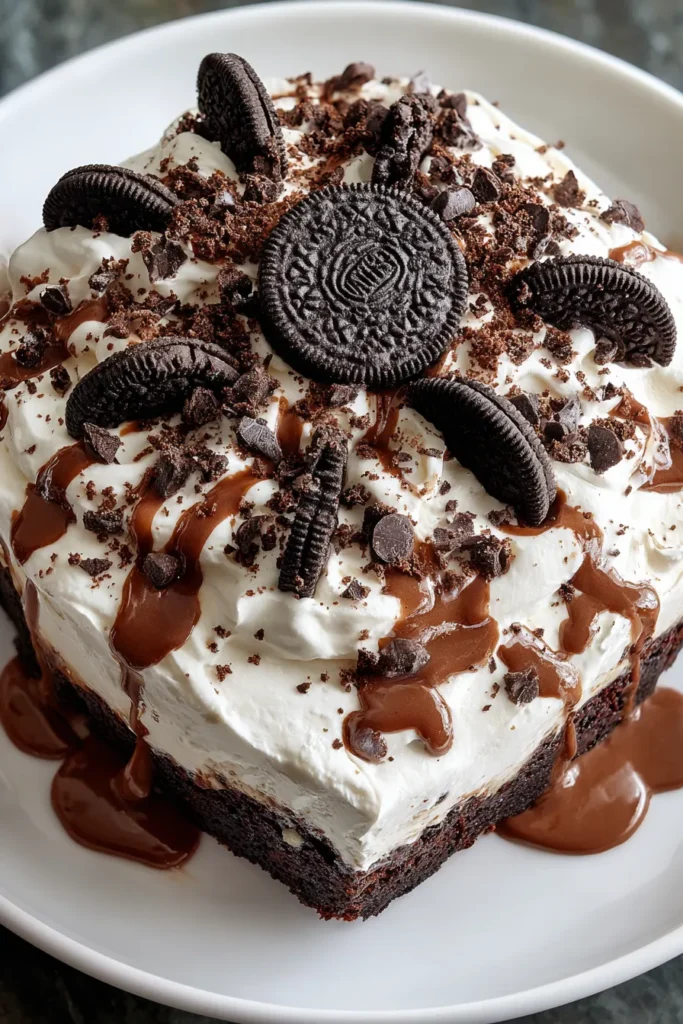

Chocolate Oreo Cheesecake Brownie Trifle
Description
Experience a heavenly fusion of rich chocolate brownies, creamy cheesecake, and crunchy Oreos in this stunning trifle that's perfect for any occasion!
Ingredients
Instructions
-
Begin by preparing the brownies according to package instructions. Once baked, let them cool completely in the pan.
-
While the brownies are cooling, prepare the cheesecake layer. In a medium bowl, beat the softened cream cheese with powdered sugar and vanilla extract until smooth and well combined.
-
In a separate bowl, whip the heavy cream until stiff peaks form. Gently fold the whipped cream into the cream cheese mixture until fully incorporated. Set aside.
-
Once the brownies have cooled, cut them into small squares or bite-sized pieces.
-
To assemble the trifle, take a large trifle dish or glass bowl. Start by placing a layer of brownie pieces at the bottom of the dish.
-
Spread a layer of the cream cheese mixture on top of the brownies.
-
Sprinkle a generous layer of the crushed Oreo cookies over the cream cheese mixture.
-
Drizzle a few spoonfuls of chocolate syrup over the Oreos.
-
Repeat the layers: brownies, cream cheese mixture, crushed Oreos, and chocolate syrup until all components are used, ending with cream cheese mixture on top.
-
For the finishing touch, sprinkle the top layer with shaved semi-sweet chocolate and mini chocolate chips.
-
Refrigerate the trifle for at least 2 to 3 hours, or until well chilled, before serving.
Note
- For extra flavor, try adding a layer of sliced strawberries or raspberries.
- The trifle can be made a day in advance and stored in the refrigerator covered with plastic wrap.
- Consider using a clear glass trifle bowl for a stunning visual effect as the layers are beautifully showcased.
- If you love a deeper chocolate flavor, add some cocoa powder to the cream cheese mixture.
- The mini chocolate chips add a delightful texture contrast.

