

Classic Strawberry Rhubarb Pie turns bright red strawberries and tangy rhubarb into a sun-kissed mosaic nestled in flaky, golden pastry. Each juicy slice is lifted by a whisper of vanilla and lemon juice, creating a mouthwatering summer classic that balances tangy and sweet in every bite. Whether you’re a seasoned baker or trying your hand at homemade pie for the first time, this recipe promises a buttery crust and bubbling filling that’s impossible to resist—so grab your apron and let’s dive into pie perfection!
Key Ingredients
Gathering the right ingredients is key to this Classic Strawberry Rhubarb Pie. Each element plays a vital role in balancing sweetness, tartness, and that flaky crust we all adore:
- 1 double pie crust: Provides a sturdy, buttery base and top that bakes to golden perfection.
- 2 cups strawberries hulled and sliced: Sweet, juicy berries that offer vibrant color and summer flavor.
- 2 cups rhubarb chopped into 1/2-inch pieces: Tangy stalks that contrast perfectly with strawberries for that signature zing.
- 3/4 cup granulated sugar: Sweetens the filling and balances the rhubarb’s tartness.
- 1/4 cup brown sugar packed: Adds a hint of caramel depth and rich sweetness.
- 3 tablespoons cornstarch: Thickens the juices into a luscious, sliceable filling.
- 1/4 teaspoon salt: Enhances and rounds out all the flavors.
- 1 teaspoon vanilla extract: Infuses a warm, aromatic note into the fruit mix.
- 1 tablespoon lemon juice: Brightens the filling with a citrusy lift.
- 1 tablespoon butter cut into small pieces: Melts into the filling for extra richness.
- 1 egg beaten: Combines with water to create a glossy egg wash for a beautiful crust.
- 1 tablespoon water: Thins the egg for an even, golden finish.
How To Make Classic Strawberry Rhubarb Pie
Baking this pie is straightforward, and we’ll walk through each step from mixing the filling to letting it cool for perfect slices. Keep your tools at the ready and pay special attention to techniques like tossing gently and crimping the crust for that picture-perfect finish.
1. Preheat your oven to 400°F (200°C), positioning the rack in the center for even heat distribution.
2. In a large bowl, combine strawberries, rhubarb, granulated sugar, brown sugar, cornstarch, salt, vanilla extract, and lemon juice. Toss gently until the fruit is evenly coated and the mixture glistens.
3. Place one pie crust in a 9-inch pie dish and trim edges flush with the rim, ensuring a neat appearance.
4. Pour the fruit filling into the crust and dot with small butter pieces so they melt into pockets of richness.
5. Lay the second crust over the filling, trim excess, then crimp edges to seal. Use a sharp knife to cut slits in the top for steam to escape.
6. In a small bowl, whisk the beaten egg with water, then brush the mixture evenly over the top crust for a shiny, golden finish.
7. Bake for 20 minutes at 400°F (200°C), then reduce heat to 350°F (175°C) and bake an additional 30–35 minutes until the crust is deeply golden and the filling is bubbling through the vents.
8. Let pie cool on a wire rack for at least 2 hours before slicing—this rest time allows the filling to set for clean, beautiful slices.
Serving Suggestions
Once your Classic Strawberry Rhubarb Pie is golden and bubbly, it’s ready to impress. Whether you’re celebrating a summer gathering or enjoying a cozy night in, these serving ideas will take each slice to the next level:
- Warm with vanilla ice cream: Place a scoop of creamy ice cream on a hot slice so it slowly melts into sweet rivers.
- Dust with powdered sugar: A light snowfall of sugar adds a delicate sweetness and photo-ready finish.
- Top with whipped cream and mint: Whipped cream brings an airy lift, while fresh mint leaves add a pop of color and freshness.
- Pair with herbal tea or coffee: Balance the pie’s sweetness with a cup of chamomile tea or a robust morning coffee for a perfectly rounded treat.
Tips For Perfect Classic Strawberry Rhubarb Pie
Even a tried-and-true recipe benefits from a few insider insights. These friendly tips will help you achieve a flaky, golden crust and a luscious, well-set filling every time:
- Use fruits chopped to similar sizes for even cooking.
- A lattice top crust adds a decorative touch and allows steam to escape.
- For a crisper bottom crust, bake the pie on a preheated baking sheet.
- Store any leftovers covered in the refrigerator for up to 3 days.
How To Store It
After all the baking fun, proper storage keeps your pie tasting its best. Follow these methods to maintain freshness, texture, and flavor:
- Refrigerate leftovers loosely covered with foil or plastic wrap for up to 3 days, preserving that buttery crust and firm filling.
- Reheat slices in a 350°F oven for about 10 minutes to restore crispness before serving.
- Freeze slices individually wrapped in plastic wrap and foil for up to one month; thaw overnight in the fridge before reheating.
- Freeze unbaked assembled pie by wrapping in two layers of plastic wrap and one layer of foil; bake from frozen following adjusted bake times for a freshly baked feel.
Frequently Asked Questions
Here are some quick answers to common pie queries:
- How can I prevent a soggy bottom crust when baking this pie?
To prevent a soggy bottom crust, bake the pie on a preheated baking sheet so the heat from below helps crisp the bottom. Make sure the filling fruits are well coated with cornstarch to thicken excess juices. You can also blind-bake the bottom crust for 10 minutes at 400°F before adding the filling, then reduce heat as directed for the rest of the bake.
- Can I use frozen strawberries or rhubarb instead of fresh?
Yes, you can use frozen strawberries and rhubarb, but do not thaw them completely before mixing the filling. Keeping them slightly frozen will reduce excess liquid release. Increase the cornstarch by an additional tablespoon if the fruit seems particularly juicy. Add the filling directly to the crust as instructed and follow the same baking times.
- What’s the best way to achieve a decorative lattice top crust?
For a lattice top, roll out both crusts evenly and trim the edges. Cut the top crust into 1/2- to 3/4-inch strips. Lay half the strips vertically across the pie, then weave the remaining strips horizontally, lifting alternate vertical strips to create the lattice pattern. Trim and crimp edges as usual, brush with egg wash, and bake following the recipe instructions.
- Why do I need to reduce the oven temperature after 20 minutes?
The initial high temperature (400°F) helps set the crust quickly and cooks the fruit at high heat for an initial burst, ensuring the bottom crust starts to crisp. Lowering the oven to 350°F after 20 minutes prevents the crust edges from overbrowning and allows the filling to bubble and thicken gently without burning the top.
- How can I tell when the pie filling is fully cooked and set?
The filling is done when you see thick, bubbly juices peeking through the slits or lattice and the juices no longer look runny. The cornstarch will turn translucent as it thickens. The crust should be golden brown all over, including the bottom if you slide a thin spatula underneath.
- Can I prepare the filling or crust in advance?
Yes. You can make the crust dough up to two days ahead, wrap it tightly in plastic wrap, and refrigerate. The fruit filling can also be mixed and refrigerated for a few hours. Assemble and bake the pie just before serving for best texture and flavor.
- How should I store leftovers, and how long will they keep?
Cover the cooled pie loosely with foil or plastic wrap and store it in the refrigerator for up to three days. Reheat individual slices in a 350°F oven for about 10 minutes to restore crispness. Avoid leaving it at room temperature for more than two hours to maintain food safety.
- Is it possible to freeze this pie, and how do I reheat it?
You can freeze the assembled, unbaked pie by wrapping it in two layers of plastic wrap and one layer of foil. Freeze for up to two months. When ready to bake, place the frozen pie on a baking sheet, bake at 400°F for 25 minutes, then lower to 350°F and bake an additional 45–50 minutes until golden and bubbly. Let it cool slightly before serving.
What Makes This Special
This Classic Strawberry Rhubarb Pie is a delightful dance of sweet and tart, thanks to the perfect fruit pairing and that buttery, flaky crust. It works every time because the cornstarch thickens just right, the sugar balance is spot on, and the vanilla-lemon duo brightens each bite. Whether you opt for a traditional top or a lattice masterpiece, you’ll end up with a pie that’s as fun to make as it is to eat. Don’t forget to print and save this recipe for sunny days ahead—and drop a comment or question below if you try it or need a hand perfecting your crust!
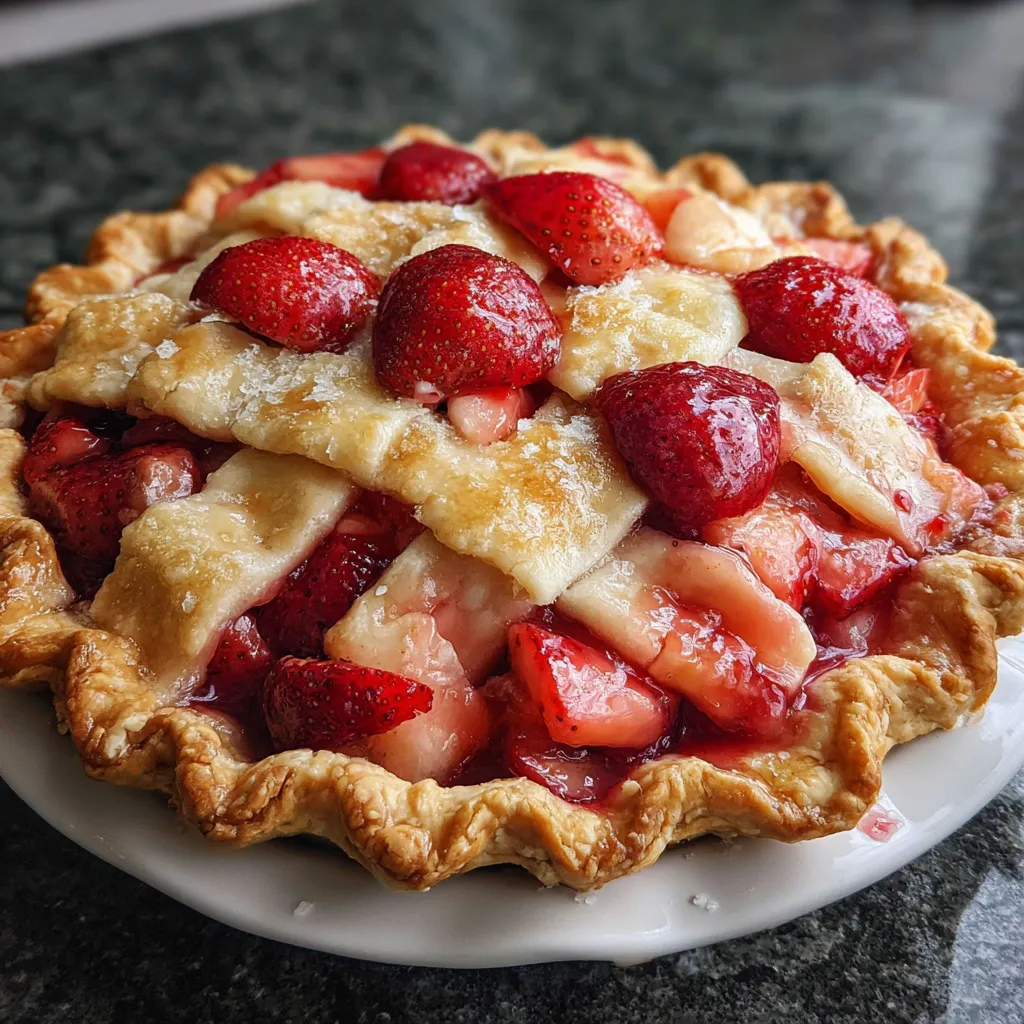

Classic Strawberry Rhubarb Pie
Description
Bright red strawberries and tangy rhubarb marry under a buttery, flaky crust that turns golden crisp. A whisper of vanilla and lemon juice lifts each juicy slice into a mouthwatering summer classic.
Ingredients
Instructions
-
Preheat oven to 400°F (200°C).
-
In a large bowl combine strawberries, rhubarb, granulated sugar, brown sugar, cornstarch, salt, vanilla extract and lemon juice. Toss gently until fruit is evenly coated.
-
Place one pie crust in a 9-inch pie dish and trim edges flush with the rim.
-
Pour fruit filling into crust and dot with butter pieces.
-
Place second crust over filling, trim excess, and crimp edges to seal. Cut slits in the top crust to vent steam.
-
In a small bowl whisk egg and water, then brush evenly over the top crust.
-
Bake for 20 minutes at 400°F (200°C), then reduce heat to 350°F (175°C) and bake an additional 30 to 35 minutes until crust is golden and filling is bubbly.
-
Let pie cool on a wire rack for at least 2 hours before slicing and serving.
Note
- Use fruits chopped to similar sizes for even cooking.
- A lattice top crust adds a decorative touch and allows steam to escape.
- For a crisper bottom crust, bake the pie on a preheated baking sheet.
- Store any leftovers covered in the refrigerator for up to 3 days.

