

Extra-Crispy Smashed Potatoes with Garlic Herb Butter bring smashed baby potatoes an ultra-crispy makeover and a shower of garlic herb butter. These little rounds boast crackling edges and pillowy centers in every bite as they roast to golden crisp, then get luxuriously coated in warm garlic herb butter brightened with a hint of lemon. Perfect for beginners looking to impress, they’re the simplest side dish to elevate weeknight dinners or add flair to your next gathering—trust me, you’ll be making these on repeat.
Key Ingredients
Before we dive in, let’s meet the stars of the show—every ingredient earns its place on this platter.
- 1.5 pounds baby potatoes: tender waxy potatoes that hold their shape when smashed, giving a creamy interior under the crisp exterior.
- 3 tablespoons olive oil: coats the potatoes for even roasting and helps achieve those extra-crispy edges.
- 1 teaspoon kosher salt: enhances the potato’s natural flavors and cuts through the richness.
- 1/2 teaspoon black pepper: adds a gentle heat and earthy spice to each bite.
- 4 tablespoons unsalted butter: forms the base of the garlic herb sauce, adding richness and a silky mouthfeel.
- 4 cloves garlic, minced: infuses the butter with aromatic pungency and depth.
- 2 tablespoons fresh parsley, chopped: brightens the dish with a fresh, herbaceous note.
- 1 tablespoon fresh chives, chopped: lends a mild oniony flavor and fresh green color.
- 1 teaspoon fresh thyme leaves: introduces earthy herbal tones that complement the garlic.
- 1 teaspoon lemon juice: adds a zesty pop of acidity to balance the richness of the butter.
How To Make Extra-Crispy Smashed Potatoes with Garlic Herb Butter
Let’s turn humble baby potatoes into an irresistibly crunchy side that practically melts in your mouth. From a quick boil to a high-heat roast and a final broil, each step layers on flavor and texture so you end up with spud perfection every time.
1. Preheat your oven to 450°F (230°C) and line a baking sheet with parchment paper for easy cleanup.
2. Place potatoes in a large pot and cover with cold water, add a pinch of salt, then bring to a rolling boil and cook until potatoes are just tender, about 15 minutes.
3. Drain the potatoes and let them sit in the colander for 2 to 3 minutes to release steam and dry out completely.
4. Arrange the potatoes on the prepared baking sheet and gently smash each one with the bottom of a glass or a potato masher until about 1/2 inch thick.
5. Drizzle the smashed potatoes with olive oil, then sprinkle evenly with kosher salt and black pepper.
6. Bake for 20 to 25 minutes or until the edges turn deep golden brown and extra crispy.
7. Meanwhile, melt the butter in a small saucepan over medium heat, add minced garlic and thyme, and cook for 1 to 2 minutes until fragrant.
8. Remove the pan from heat, then stir in parsley, chives, lemon juice, a pinch of salt, and a dash of pepper to create the garlic herb butter.
9. Brush the garlic herb butter generously over the baked potatoes to coat every crevice.
10. Return the potatoes to the oven or switch to broil for 2 to 3 minutes to achieve a final crisp on top, then transfer to a serving platter.
Serving Suggestions
These extra-crispy smashed potatoes are versatile enough for any table. Whether you’re hosting a casual dinner or layering up Sunday brunch, they play well with so many flavors. Here are four fun ways to serve them:
- Pair with a crisp green salad tossed in a light vinaigrette to cut through the butter’s richness.
- Offer alongside grilled chicken or steak for a hearty main course that soaks up every flavor.
- Serve as part of a brunch spread with poached eggs and avocado for a weekend treat.
- Add a dollop of sour cream or crème fraîche and a sprinkle of chives for a tangy twist.
Tips For Perfect Extra-Crispy Smashed Potatoes with Garlic Herb Butter
Getting those Extra-Crispy Smashed Potatoes just right every time is easier than you might think—it just takes a little planning and a couple of smart hacks. First, boil your potatoes a day ahead and chill them in the fridge; the extra dry-out time makes smashing simpler and helps wick away moisture, so your edges turn out unbeatable. Craving a flavor kick? Sprinkle smoked paprika or chili flakes over the oiled taters before they bake to dial up the heat. After dinner, stash any leftovers in an airtight container in the fridge; they’ll stay fresh for up to 3 days. When you’re ready to reheat, arrange them in a single layer on a baking sheet and slide under the broiler for a few minutes to restore that legendary crispness. Trust these tips, and you’ll never look back!
- Potatoes can be boiled a day ahead and stored in the fridge to make smashing easier.
- For a spicy kick, sprinkle smoked paprika or chili flakes before baking.
- Leftovers keep in an airtight container in the fridge for up to 3 days.
- Reheat on a baking sheet under the broiler for a few minutes to restore crispiness.
How To Store It
Once the party’s over, you’ll want to preserve every bit of that crispiness and buttery flavor. Proper storage keeps your smashed potatoes tasting fresh even a few days later.
- Cool completely: let the potatoes reach room temperature before packing to prevent condensation.
- Use an airtight container: layer parchment paper between potatoes to avoid sogginess and seal in freshness.
- Refrigerate up to 3 days: store in the coolest part of your fridge to maintain texture and flavor.
- Avoid overcrowding: keep them in a single layer when possible, so the edges stay crisp rather than steamed.
Frequently Asked Questions
Here are some quick answers to the most common questions about these irresistible smashed potatoes:
- Q: How do I ensure my smashed potatoes turn out extra crispy every time?
A: Begin by boiling the potatoes until just tender, then drain and let them steam-dry for a few minutes so excess moisture evaporates. Smash each potato to about ½ inch thickness, drizzle generously with olive oil, and season before baking on a preheated 450°F oven. Bake until the edges are deep golden brown, then finish under the broiler for 2 to 3 minutes. The high heat at each stage and fully drying the potatoes are key to maximum crispiness.
- Q: Can I prepare the potatoes ahead of time, and if so, how do I store them without losing quality?
A: Yes. After boiling and cooling, transfer the potatoes to an airtight container and refrigerate for up to 24 hours. Before smashing, let them sit at room temperature for 10 to 15 minutes and gently pat them dry with a kitchen towel. This reduces condensation and helps them crisp up properly when baked.
- Q: What seasoning variations can I try to customize the flavor?
A: For a spicy twist, sprinkle smoked paprika or chili flakes over the oiled potatoes before baking. You can also add grated Parmesan along with the olive oil or finish with a pinch of flaky sea salt after the garlic herb butter is brushed on. Fresh rosemary or a dash of cumin can be mixed into the butter for an aromatic variation.
- Q: How should I reheat leftover smashed potatoes to restore their crispiness?
A: Preheat your oven to 400°F or switch your broiler on high. Arrange the potatoes on a baking sheet in a single layer and heat for 5 to 10 minutes in the oven or 2 to 3 minutes under the broiler, watching carefully so they crisp up without burning. Avoid reheating in the microwave, which can make them soggy.
- Q: What potatoes work best if I can’t find baby potatoes?
A: Small Yukon Gold or red potatoes make excellent substitutes. Cut them into uniform 1½- to 2-inch pieces so they cook in the same time as baby potatoes. The waxy texture of these varieties helps them hold shape when smashed and yields a creamy interior with a crispy exterior.
What Makes This Special
These Extra-Crispy Smashed Potatoes with Garlic Herb Butter hit all the right notes—super-crunchy edges, soft smoky interiors, and that buttery-garlicky drizzle that keeps you coming back for more. It works thanks to a high-heat bake, a quick steam-dry step, and a dreamy herb-infused butter finish. Feel free to print and tuck this recipe into your kitchen binder for easy reference; I guarantee it’ll become your go-to side dish. Tried it at home? Drop a comment below to share your tweaks or ask me anything if you need a hand perfecting your smash!
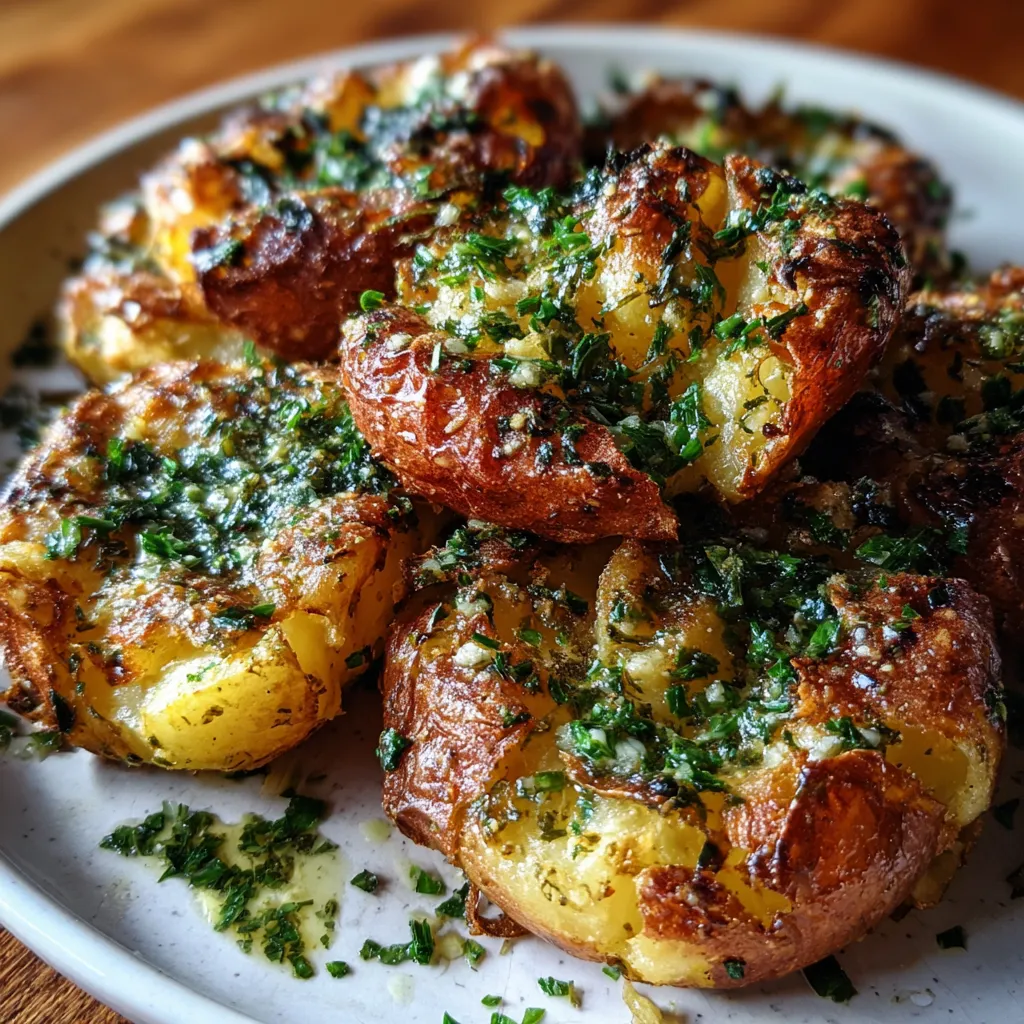

Extra-Crispy Smashed Potatoes with Garlic Herb Butter
Description
Experience crackling edges and pillowy centers in every bite as these potatoes roast to golden crisp, then get luxuriously coated in warm garlic herb butter and bright citrus notes.
Ingredients
Instructions
-
Preheat oven to 450°F (230°C) and line a baking sheet with parchment paper.
-
Place potatoes in a large pot and cover with cold water, add a pinch of salt, then bring to a boil and cook until potatoes are just tender, about 15 minutes.
-
Drain potatoes and let them sit in the colander for 2 to 3 minutes to release steam and dry out.
-
Arrange potatoes on the prepared baking sheet and gently smash each one with the bottom of a glass or a potato masher until about 1/2 inch thick.
-
Drizzle olive oil over the smashed potatoes, then sprinkle with kosher salt and black pepper.
-
Bake for 20 to 25 minutes or until the edges are golden brown and extra crispy.
-
Meanwhile, melt the butter in a small saucepan over medium heat, add minced garlic and thyme, and cook for 1 to 2 minutes until fragrant.
-
Remove the pan from heat, then stir in parsley, chives, lemon juice, a pinch of salt, and a dash of pepper to create the garlic herb butter.
-
Brush the garlic herb butter generously over the baked potatoes.
-
Return the potatoes to the oven or switch to broil for 2 to 3 minutes to achieve a final crisp on top, then transfer to a serving platter.
Note
- Potatoes can be boiled a day ahead and stored in the fridge to make smashing easier.
- For a spicy kick, sprinkle smoked paprika or chili flakes before baking.
- Leftovers keep in an airtight container in the fridge for up to 3 days.
- Reheat on a baking sheet under the broiler for a few minutes to restore crispiness.

