

From the moment you roll out that vibrant dough and spot those semi-sweet chocolate chips peeking through in Halloween colors, you know you’re in for a treat. These cookies bring together the perfect chew from brown sugar, a hint of crisp from granulated sugar, and the buttery backbone that makes every bite melt in your mouth. Each batch takes just a few minutes to mix up—the kind of recipe that feels like old friends gathered in your kitchen, swapping stories while the sweet aroma drifts through the air. Whether you’re baking with kids who giggle as they swirl orange and black dough into spooky marbled patterns or sneaking a warm cookie straight from the sheet, it’s impossible not to smile at how a simple cookie can turn your home into a festive haunted bakery.
Beyond the lively colors and gooey pockets of chocolate, these cookies are versatile enough to become a new seasonal staple. You can sprinkle them with playful confetti of bats and pumpkins, add a pinch of warming cinnamon or nutmeg for that cozy autumn twist, or even sandwich them with a layer of buttercream for a hauntingly decadent twist. They’re beginner-friendly—no fancy techniques or equipment required—yet the result is so eye-catching and flavorful that your guests will swear you’re moonlighting as a professional baker. With just 15 minutes of prep, 12 minutes in the oven, and a quick 10-minute rest before diving in, these treats fit perfectly into a busy October afternoon. Each cookie clocks in at about 150 calories, which means you can indulge in one (or two!) without feeling guilty—and who can resist when holiday cheer is on the line?
KEY INGREDIENTS IN HALLOWEEN CHOCOLATE CHIP COOKIES
Before we dive into the mixing bowls and baking sheets, let’s take a peek at the stars of this recipe. Each ingredient plays its own role in building texture, flavor, and that irresistible festive flair.
- Unsalted butter
Adds rich creaminess and moisture, creating the tender crumb that makes these cookies melt in your mouth. Using unsalted butter lets you control the overall saltiness for balanced sweetness.
- Granulated sugar
Provides classic sweetness and helps develop crisp edges as it caramelizes in the oven. It also ensures a light texture that contrasts beautifully with the chewiness of brown sugar.
- Brown sugar
Brings in moisture and a subtle caramel note thanks to its molasses content. This is the secret to achieving that soft, chewy center that everyone goes crazy for.
- Large eggs
Act as a binding agent, giving the dough structure and helping the cookies hold their shape during baking. They also add richness and a subtle lift.
- Vanilla extract
Infuses the dough with a warm, aromatic depth, rounding out the sweetness and complementing the chocolate chips in every bite.
- All-purpose flour
Serves as the foundation, providing structure and the right amount of density. It transforms liquids and fats into a cohesive, scoopable dough.
- Baking soda
Works as a leavening agent, ensuring the cookies spread just enough and develop a slight lift for that perfect edge-to-center ratio.
- Baking powder
Gives an extra boost of rise and tenderness, helping balance the chemical reactions and keeping the texture light.
- Salt
Enhances all the flavors, cutting through the sweetness and accentuating the buttery and chocolate notes.
- Semi-sweet chocolate chips
Offer pockets of gooey, melt-in-your-mouth chocolate that deliver a hit of sweetness and richness in every bite.
- Orange and black food coloring (optional)
Transforms your dough into vibrant Halloween hues. Gel-based colors are best to avoid altering dough consistency.
- Halloween-themed sprinkles (optional)
Add a playful crunch and festive look—think bats, pumpkins, ghosts—to amp up the fun factor.
HOW TO MAKE HALLOWEEN CHOCOLATE CHIP COOKIES
Ready to bake? This section will guide you through each step with extra tips so your cookies come out just right—spooky, chewy, and delicious.
1. Preheat your oven to 350°F (175°C) and line baking sheets with parchment paper to ensure even baking and easy cleanup. This also prevents sticking and promotes a uniform golden edge.
2. In a large mixing bowl, use an electric mixer or sturdy wooden spoon to cream together the softened butter, granulated sugar, and brown sugar until the mixture is light, fluffy, and pale in color—about 2 to 3 minutes. This step incorporates air for optimal texture.
3. Beat in the eggs one at a time, making sure each is fully incorporated before adding the next. Stir in the vanilla extract until the batter looks smooth and glossy.
4. In another bowl, whisk together the all-purpose flour, baking soda, baking powder, and salt. This ensures the leavening agents are evenly distributed to avoid pockets of rising or dense spots.
5. Gradually blend the dry ingredients into the wet mixture, mixing just until you no longer see streaks of flour. Overmixing can activate gluten and make cookies tough, so stop once it’s combined.
6. Fold in the semi-sweet chocolate chips with a spatula, distributing them evenly throughout the dough for the perfect chocolate-to-cookie ratio.
7. For the festive twist, divide the dough into two equal portions. Add orange food coloring to one half and black food coloring to the other, kneading until each section reaches your desired shade.
8. Optional: Gently swirl the colored doughs together for a marbled effect, taking care not to overmix. Alternatively, keep them separate for distinct orange and black cookies.
9. Drop rounded tablespoons of cookie dough onto the prepared baking sheets, spacing them about 2 inches apart to allow for spreading.
10. Sprinkle each dough mound with Halloween-themed sprinkles to lock them in before baking and add a festive, colorful topping.
11. Bake in your preheated oven for 10–12 minutes, or until the edges are lightly browned and the centers are set but still soft.
12. Allow the cookies to cool on the baking sheets for a few minutes before transferring them to wire racks to cool completely. This resting period helps them finish setting and makes them easier to move.
SERVING SUGGESTIONS FOR HALLOWEEN CHOCOLATE CHIP COOKIES
Once these bites of spooky sweetness come out of the oven, you’ll want creative ways to serve and enjoy them. Whether hosting a haunted gathering or enjoying a cozy night in, these ideas will help you elevate the presentation and pairings for maximum festive fun.
- Decorate a spooky dessert table by arranging cookies on a tiered platter alongside mini pumpkins, fake spiderwebs, and flickering LED candles. The contrast of orange and black cookies against a white or silver stand really pops.
- Serve them warm with a side of spiced apple cider or pumpkin spice latte for a seasonal pairing that complements the chocolate’s richness. Pour cups of steaming cider into mason jars or Halloween mugs for a picture-perfect fall spread.
- Create DIY treat bags by placing three to four cookies in clear cellophane, tying them with black and orange ribbon, and adding a handwritten tag. They make delightful party favors or classroom handouts that are almost too cute to eat (almost!).
- Build a monster cookie sandwich by spreading a layer of whipped cream or marshmallow fluff between two cookies. Press crushed candy corn or mini chocolate chips into the edges for an extra dimension of flavor and texture.
HOW TO STORE HALLOWEEN CHOCOLATE CHIP COOKIES
To keep these festive treats tasting fresh, you’ll want to store them carefully. Whether you plan to bake ahead for a party or save leftovers for snacking all week, these storage tips will preserve texture, flavor, and that vibrant Halloween look.
- Store at room temperature in an airtight container with layers separated by parchment paper. This prevents sticking and maintains the perfect balance of crisp edges and chewy centers for up to five days.
- For longer storage, place cookies in a zip-top freezer bag or sealed container with parchment between layers, then freeze for up to three months. Thaw at room temperature on the counter to restore their tender texture.
- If you prefer a cooler, slightly firmer bite, keep the cookies in the refrigerator in a well-sealed container for up to seven days. Let them sit at room temperature for five minutes before serving to soften slightly.
- Refresh cookies that have lost a bit of their chewiness by popping them in a preheated 300°F oven for 3–4 minutes, or microwaving a single cookie for 10 seconds. This revives that just-baked warmth and gooey chocolate charm.
CONCLUSION
Thank you for joining me on this festive baking adventure! We’ve covered everything from the rich, buttery dough and semi-sweet chocolate chips to those eye-catching orange and black swirls that turn simple cookies into spooktacular delights. You now have a clear roadmap to whip up a batch in just 15 minutes of prep, 12 minutes of baking, and a brief cooling time—making these beginner-friendly treats perfect for last-minute gatherings or cozy kitchen crafts. Whether you’re sliding a baking sheet into a preheated oven or sneaking a warm cookie off the tray, you’ll be conjuring smiles and happy memories with every bite. Feel free to print this article or save it for later so you can revisit these tips and tricks whenever Halloween spirit strikes. And don’t forget, there’s an FAQ section below that tackles any lingering questions you might have about substitutions, troubleshooting, or creative twists.
I’d love to hear how your cookies turned out! Leave a comment if you tried the marbled technique, swapped in a pinch of cinnamon, or decorated with your favorite sprinkles. Have questions about achieving that perfect chew or want advice on flavor variations? Drop a note below—your feedback, tips, and spooky stories are always welcome. Happy baking, and here’s to a Halloween filled with deliciously haunting treats!
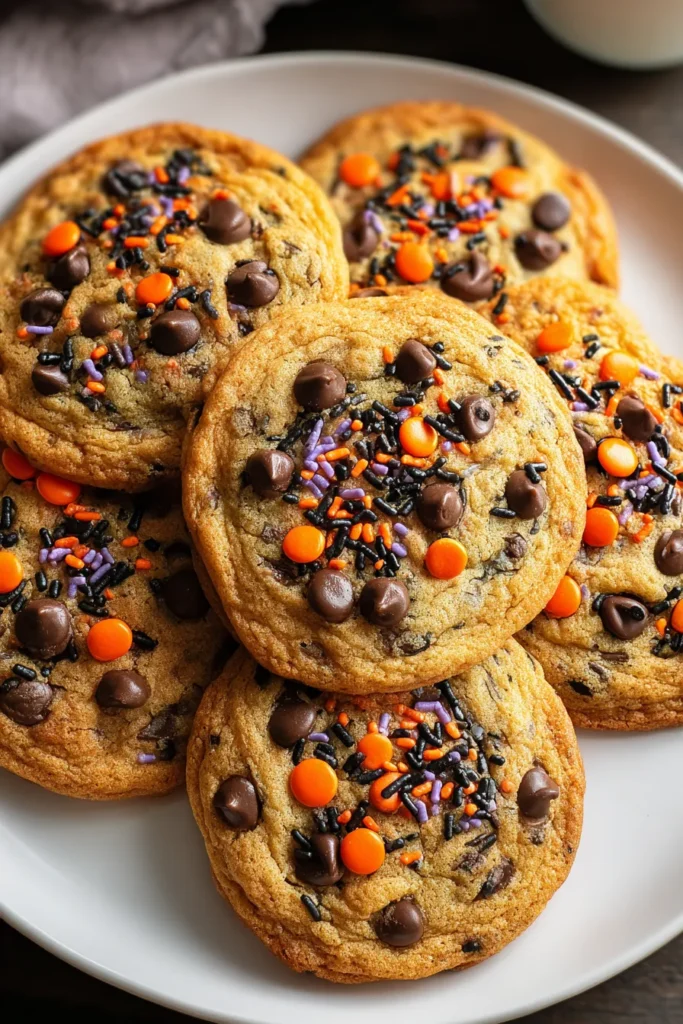

Halloween Chocolate Chip Cookies
Description
These Halloween Chocolate Chip Cookies are rich, chewy, and perfectly festive with their vibrant colors and gooey chocolate chips. Perfectly spooky and delicious!
Ingredients
Instructions
-
Preheat your oven to 350°F (175°C). Line baking sheets with parchment paper.
-
In a large mixing bowl, cream together the softened butter, granulated sugar, and brown sugar until smooth and creamy.
-
Beat in the eggs one at a time, then stir in the vanilla extract.
-
In another bowl, whisk together the flour, baking soda, baking powder, and salt.
-
Gradually blend the dry ingredients into the wet mixture until just combined.
-
Fold in the chocolate chips.
-
For Halloween colors, divide the dough in half, add orange food coloring to one half and black food coloring to the other, mixing until desired color is achieved.
-
Optional: Gently swirl the two colors together for a marbled effect or keep them separate for varied cookies.
-
Drop rounded tablespoons of cookie dough onto prepared baking sheets, leaving space for spreading.
-
Add Halloween-themed sprinkles on top of the cookies for extra festive flair.
-
Bake in preheated oven for 10-12 minutes or until edges are lightly browned.
-
Allow cookies to cool on baking sheets for a few minutes before transferring to wire racks to cool completely.
Note
- For a chewier cookie, reduce baking time slightly and let cookies cool on the baking sheet.
- Adding a pinch of cinnamon or nutmeg can give these cookies a unique seasonal twist.
- Make sure to use gel food coloring to avoid adding extra liquid to the dough.

