

I love transforming pantry staples into something extraordinary, and this Homemade Hamburger Helper is no exception. Make dinner a breeze with this Homemade Hamburger Helper – a creamy, cheesy delight everyone will love! In under 30 minutes (with only 10 minutes of prep and 20 minutes of stovetop time), you’ll create a hearty, satisfying meal that’s perfect for lunch or dinner. This beginner-friendly comfort food clocks in at around 600 calories per serving, making it a balanced option for hungry families or friends craving that classic boxed flavor—but way better. Whether you’re a seasoned home cook or just stepping into the kitchen, this dish requires no fancy techniques—just straightforward steps that lead to a rich, flavorful one-pot wonder.
My first memory of Hamburger Helper as a kid involves mixing that powdery sauce packet into hot pasta—but something about the store-bought version always felt a tad too salty and artificial. That’s why I set out to create a homemade version that boasts real ingredients and no mystery additives. Packed with flavors from ground beef, spices, and melty cheddar, this homemade recipe gives you all the comfort of the classic in just 30 minutes! By simmering the pasta right in the beef broth and milk, you end up with velvety sauce that clings perfectly to each elbow macaroni, making every bite pure bliss.
You can easily swap in lean turkey, toss in extra veggies like bell peppers or peas, or even double up the cheese for an extra gooey experience. Best of all, this recipe freezes beautifully for up to three months, making it an ideal meal-prep star for busy evenings when time is short but appetites are big. So grab your skillet and let’s dive into a crowd-pleasing, kitchen-friendly treat that’s as fun to cook as it is to eat!
KEY INGREDIENTS IN HOMEMADE HAMBURGER HELPER
Each ingredient in this Homemade Hamburger Helper plays a crucial part in building layers of flavor and comfort. From the savory base to the melty finish, you’ll see how these pantry heroes work together seamlessly.
- Ground beef: Provides a rich, meaty foundation and packs in protein, giving the dish its hearty character.
- Olive oil: Acts as a cooking medium that prevents sticking and helps gently brown the beef, releasing savory juices.
- Onion: Brings a touch of sweetness and depth when sautéed until tender, creating a flavorful base for the sauce.
- Garlic: Adds aromatic warmth and a gentle kick that elevates the overall savoriness of the skillet.
- Paprika: Infuses a subtle smokiness and vibrant color, tying the beef and sauce flavors together.
- Salt: Enhances all the natural flavors, making each bite taste bold and well-rounded.
- Black pepper: Contributes a mild heat and sharpness to the mix, balancing the creamy elements.
- Beef broth: Builds the savory sauce, adding depth and umami richness that melds with the meat.
- Milk: Creates a creamy consistency, transforming the broth into a luscious medium for the pasta.
- Elbow macaroni: Absorbs the sauce as it simmers, offering a tender, chewy texture that holds onto every drop of flavor.
- Cheddar cheese: Melts into the dish, providing gooey, tangy goodness and that unforgettable cheesy pull.
- Cornstarch: Acts as a thickening agent to ensure the sauce coats the pasta without becoming runny.
- Cold water: Helps dissolve the cornstarch into a smooth slurry before blending it into the hot mixture.
- Fresh parsley: (optional) Adds a pop of color and a hint of herbal brightness when sprinkled on top.
HOW TO MAKE HOMEMADE HAMBURGER HELPER
Let’s walk through each step to build this creamy, cheesy skillet meal from scratch. You’ll see how simple techniques like browning, simmering, and stirring can transform basic ingredients into an unforgettable, one-pan dinner.
1. In a large skillet or pot, heat the olive oil over medium heat. Once the oil shimmers, add the ground beef and cook until it’s browned, breaking it apart with a spatula into small crumbles, about 5 minutes. This ensures even cooking and maximum flavor development.
2. Add the onion and garlic to the skillet with the beef. Cook for another 2–3 minutes, stirring occasionally, until the onion is soft and translucent and the garlic releases its fragrant aroma.
3. Stir in the paprika, salt, and black pepper, coating the beef and aromatics with warm, spicy notes that will flavor every bite.
4. Pour in the beef broth and milk, then increase the heat until the mixture reaches a gentle boil. This creates the creamy cooking liquid for the pasta.
5. Add the uncooked elbow macaroni to the pot, stirring to ensure the pasta is fully submerged. Reduce the heat to low, cover the skillet, and let it simmer for 10 minutes, or until the pasta is al dente. Stir once halfway through to prevent sticking.
6. In a small bowl, whisk the cornstarch together with the cold water until smooth. Pour this slurry into the skillet and stir for 1–2 minutes, allowing the sauce to thicken and cling beautifully to the pasta.
7. Remove the lid and stir in the cheddar cheese until it’s completely melted and creates a velvety, cheesy coating around each macaroni piece.
8. Serve hot, garnished with fresh parsley if desired, for a burst of vibrant color and a hint of herbal freshness.
SERVING SUGGESTIONS FOR HOMEMADE HAMBURGER HELPER
Once your Homemade Hamburger Helper is bubbling and the cheese is melted to perfection, serving it just right can elevate the experience even more. Whether you’re plating this for a weeknight family dinner or bringing it to a potluck, these tips will help you present your one-pan wonder in style and maximize flavor in every bite.
- Garnish with fresh parsley: Sprinkle chopped parsley over the top just before serving. The bright green flecks not only look beautiful against the golden cheese but also add a light, herbal contrast to the rich flavors.
- Serve alongside a crisp salad: Pair with a simple mixed-green salad dressed in lemon vinaigrette. The acidity and crunch of fresh veggies balance the creamy, savory skillet.
- Add a squeeze of hot sauce: Offer chili sauce or sriracha at the table for guests who love a little extra heat. A few dashes cut through the richness and bring an exciting kick.
- Offer crusty bread or garlic toast: Place warm slices of bread or garlic-buttered toast on the side to mop up any leftover sauce. It’s the perfect way to ensure none of that cheesy goodness goes to waste.
HOW TO STORE HOMEMADE HAMBURGER HELPER
If you find yourself with leftovers (or want to meal-prep ahead), proper storage will keep your Homemade Hamburger Helper tasting just as delicious as day one. Cooling, portioning, and freezing with care will help maintain that creamy texture and robust flavor, ready for reheating whenever hunger strikes.
- Refrigerator storage: Allow the dish to cool to room temperature, then transfer into an airtight container. Store in the fridge for up to 3 days, ensuring the cheese and pasta retain their creamy consistency.
- Freezer method: Portion the cooled Hamburger Helper into freezer-safe containers or resealable bags. Remove as much air as possible, label with the date, and freeze for up to 3 months. Thaw overnight in the refrigerator before reheating.
- Reheating tips: Gently reheat individual portions in a covered skillet over low heat, stirring occasionally. Add a splash of milk or broth to revive the creamy sauce and prevent drying out.
- Portion control: Freeze or refrigerate in single-serving sizes for quick lunches. This makes it easy to grab a container, heat it up, and enjoy a satisfying meal with minimal effort.
CONCLUSION
We’ve taken a nostalgic boxed favorite and turned it into a homemade superstar that’s creamy, cheesy, and bursting with real-food flavors. From browning the beef and toasting spices to simmering pasta right in the sauce, each step builds on the last to deliver a comforting, all-in-one skillet meal. With just 10 minutes of prep, 20 minutes of cooking, and zero minutes of resting time, this beginner-friendly dish is ideal for busy weeknights or casual weekend lunches. You can print this article and save it in your recipe binder for future reference—perfect for when you need a quick, crowd-pleasing dinner. And don’t forget: below you’ll find a handy FAQ section to address any last-minute questions or tweaks.
Now it’s your turn to bring this Homemade Hamburger Helper to life in your kitchen. I’d love to hear how it turns out—any substitutions you tried, tips you discovered, or personal twists you added. Please leave a comment, share your questions, or let me know if you need any help recreating this creamy, cheesy delight. Your feedback helps me improve and inspires others to dive into the joys of homemade comfort food. Happy cooking!
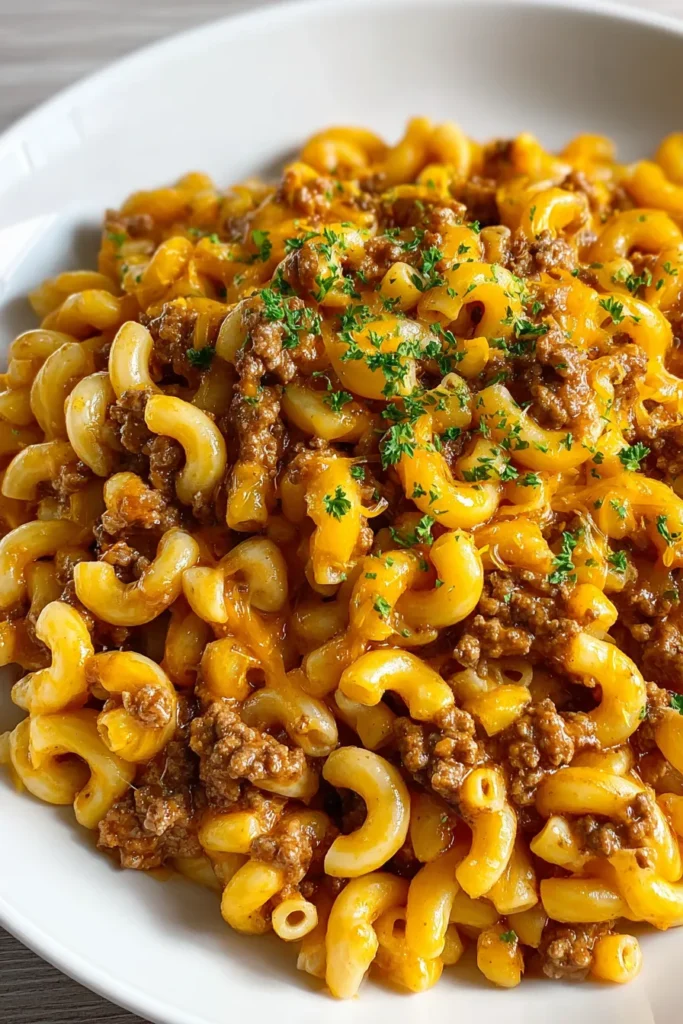

Homemade Hamburger Helper
Description
Packed with flavors from ground beef, spices, and melty cheddar, this homemade version gives you all the comfort of the classic in just 30 minutes!
Ingredients
Instructions
-
In a large skillet or pot, heat the olive oil over medium heat. Add the ground beef and cook until it's browned, breaking it apart with a spatula, about 5 minutes.
-
Add the chopped onion and minced garlic to the skillet with the beef. Cook for another 2-3 minutes, until the onion is soft and translucent.
-
Stir in the paprika, salt, and black pepper.
-
Pour in the beef broth and milk, and bring the mixture to a gentle boil.
-
Add the uncooked elbow macaroni to the skillet. Stir everything together, ensuring that the pasta is fully submerged in the liquid. Reduce the heat to low, cover, and let it simmer for 10 minutes, or until the pasta is al dente.
-
In a small bowl, mix the cornstarch with the cold water until it's smooth. Stir the cornstarch mixture into the pasta and beef, allowing it to thicken, about 1-2 minutes.
-
Stir in the shredded cheddar cheese until melted and well combined.
-
Serve hot, garnished with fresh parsley if desired.
Note
- This dish is quick and only takes about 30 minutes from start to finish, making it perfect for a busy weeknight.
- Using freshly shredded cheese rather than pre-shredded enhances flavor and meltability.
- For a healthier option, substitute ground beef with ground turkey or chicken.
- Add vegetables such as bell peppers or peas for more flavor and nutrition.
- This recipe can be frozen for up to 3 months, making it great for meal prep.

