

When you’re craving a dish that perfectly balances sweet and savory, Honey Butter Chicken is the answer you’ve been searching for. This delightful twist on a classic favorite brings together succulent chicken pieces drenched in a rich honey sauce with just the right hint of garlic. Every bite bursts with comfort and a gentle crunch from the golden-brown coating, making it an instant crowd-pleaser. Whether you’re cooking for family dinner, meal prepping for the week, or just treating yourself to a flavorful lunch, this recipe proves that beginner-level cooking can yield restaurant-worthy flavors. The tender chicken thighs or lean chicken breasts soak up that luscious honey butter glaze, leaving you licking your plate clean and scheming your next bite.
What makes this recipe truly shine is its simplicity and speed. With just 15 minutes of hands-on preparation, a quick 20 minutes of cooking time, and a 5-minute rest phase, you’ll have dinner on the table in under an hour. Designed as a beginner-friendly dish, it requires common pantry staples—flour, garlic, a squeeze of apple cider vinegar, and a touch of soy sauce—all transforming into a harmonious sauce that clings to each savory morsel. At around 480 calories per serving, Honey Butter Chicken is a comforting, balanced meal. Perfect for a cozy weeknight supper or a lively weekend lunch, this dish scores high on taste, ease, and those feel-good vibes you crave when comfort food calls your name.
KEY INGREDIENTS IN HONEY BUTTER CHICKEN
Before we jump into the cooking process, let’s get familiar with the star players in this dish. Each ingredient works together to create that glorious sweet, savory, and slightly tangy profile you’ll love.
- Boneless, skinless chicken thighs or breasts
These are the canvas for our sauce. Thighs bring juiciness and richer flavor, while breasts offer a leaner bite. Either one will soak up the sauce beautifully.
- Salt and pepper
The simplest seasoning that enhances the chicken’s natural taste and ensures each bite is perfectly seasoned from the inside out.
- All-purpose flour
Creating a light dredge, the flour helps build a crispy exterior that locks in moisture and gives contrast to the luscious sauce.
- Olive oil
A heart-healthy fat for pan-frying, it heats quickly and provides a neutral base that lets the other flavors shine.
- Unsalted butter
For that decadent, creamy richness, butter melds with honey to form a glossy sauce that coats the chicken in each luxurious bite.
- Honey
This natural sweetener brings floral notes and a sticky glaze that’s signature to this recipe’s comforting charm.
- Garlic
Minced garlic infuses the sauce with its unmistakable aroma and savory depth, curling around each piece of chicken.
- Apple cider vinegar
A touch of zing that cuts through the sweetness, balancing the sauce with gentle acidity.
- Soy sauce
Adds umami complexity and a subtle savory backbone, ensuring the sauce isn’t overly sweet.
- Crushed red pepper flakes (optional)
For those who like a kick, a pinch of heat wakes up the palate and complements the sweet and savory notes.
- Fresh parsley
A bright, herbal garnish that adds a pop of color and a clean finish to each serving.
HOW TO MAKE HONEY BUTTER CHICKEN
In this section, we’ll walk through each step of turning raw ingredients into a mouthwatering plate of Honey Butter Chicken. Follow along carefully to create a perfectly golden crust and a sauce that clings just right, ensuring every bite is packed with flavor.
1. Season and Dredge the Chicken
Season the chicken thighs with salt and pepper to taste, ensuring each piece is evenly coated. Next, place your all-purpose flour in a shallow dish and dredge each chicken piece by pressing gently into the flour until fully covered. Give each piece a little shake to remove excess flour, which helps create a light, crispy coating.
2. Heat the Pan and Sear
In a large skillet over medium-high heat, pour in the olive oil. Let it shimmer—this indicates it’s hot enough. Carefully add your floured chicken pieces, making sure they’re not crowded. This initial sear locks in juices and builds that golden crust.
3. Cook Until Golden Brown
Allow the chicken to cook for about 6–8 minutes on each side without moving them too much. This ensures a deep golden color and a fully cooked interior. Use a spatula to flip gently, then transfer the cooked chicken to a plate and set aside.
4. Build the Honey Butter Sauce
Reduce the heat to medium and add the butter to the same skillet. As soon as it melts, stir in the honey, minced garlic, apple cider vinegar, soy sauce, and optional crushed red pepper flakes. Use a wooden spoon to combine everything into a smooth, glossy sauce.
5. Simmer and Thicken
Let the sauce simmer for a few minutes, stirring occasionally. You’ll notice it thickening slightly and the garlic turning fragrant—this is the signal that your flavors are melding perfectly.
6. Coat the Chicken
Return the chicken pieces to the skillet and toss them in the honey butter sauce. Make sure each piece is fully coated, turning them gently so the sauce clings to every nook and cranny.
7. Finish with a Final Simmer
Allow the chicken to simmer in the sauce for another 5 minutes. This final step ensures the meat is heated through and each bite is infused with that sweet-savory goodness.
8. Garnish and Serve
Slide the chicken onto your serving dish and sprinkle generously with freshly chopped parsley. The bright green flecks add a fresh note to each succulent piece.
SERVING SUGGESTIONS FOR HONEY BUTTER CHICKEN
After you’ve mastered the cooking, the fun part is deciding how to present this comfort-food superstar on your table. Whether you’re hosting a casual family dinner or simply indulging in a cozy meal for one, the right accompaniments and plating style can elevate the experience even more. Think about textures and flavors that complement the sticky, sweet honey butter glaze and ensure each bite remains balanced. You can keep it simple or go all-out with garnishes and side dishes—either way, your table will be filled with smiles and satisfied hums.
- Serve over fluffy white rice to soak up every drop of the sauce. Pile the chicken on top of a steaming bed of rice, then drizzle any extra glaze around the edges for an Instagram-worthy presentation.
- Pair with creamy mashed potatoes for a classic comfort-food combo. The silky potatoes provide the perfect canvas for the sauce, creating a hearty, soul-warming meal.
- Add a side of steamed vegetables like broccoli or snap peas for a pop of color and nutrition. The mild veggies and crisp-tender texture help balance the richness of the honey butter.
- Transform into a savory wrap by layering sliced chicken, crisp lettuce, and a few extra drizzles of sauce in a warm tortilla. It’s a fun, portable twist that’s perfect for lunches on the go.
HOW TO STORE HONEY BUTTER CHICKEN
Storing your Honey Butter Chicken properly ensures you can enjoy its delicious flavors even days after cooking. Whether you’re planning to meal prep or simply saving leftovers for a quick dinner, the key is to maintain moisture and prevent the sauce from breaking down. Use airtight containers and keep temperature control in mind. Below are a few smart storage methods and tips to help your dish stay as fresh as possible.
- Refrigeration in an airtight container
Transfer cooled chicken and sauce into a sealed container. Store it in the fridge for up to 4 days. This prevents air exposure and keeps the sauce from drying out.
- Freezing in individual portions
For longer storage, divide the chicken into single-serve containers and freeze for up to 2 months. Thaw overnight in the refrigerator before reheating to maintain texture and flavor.
- Reheating on the stovetop
Gently warm leftover chicken and sauce in a skillet over low heat. Stir occasionally to recoat the chicken and revive the creaminess of the butter without scorching.
- Reheating in the microwave
Place chicken and sauce in a microwave-safe dish, cover loosely, and heat in 30-second intervals, stirring in between. This helps the sauce stay smooth and prevents hot spots.
CONCLUSION
Honey Butter Chicken is proof that you don’t need fancy ingredients or hours of prep to create a dish that feels indulgent and heartfelt. From the tender chicken percolating in that glossy honey butter glaze to the burst of garlic and tangy apple cider vinegar, this recipe covers all the flavor bases in an approachable way. Whether you stick to chicken thighs for rich juiciness or opt for lean breasts, every element—from the simple seasoning of salt and pepper to the flourish of parsley—works in harmony. With a total prep time of just 15 minutes, 20 minutes on the stove, and a brief 5-minute rest, you’ll wonder why you ever hesitated to try this at home. This beginner-friendly recipe not only brings comfort food vibes but also shines as a make-ahead meal that reheats seamlessly for lunches or quick dinners.
Feel free to print this article and stash it in your recipe binder—or bookmark it for those evenings when you need a little kitchen confidence boost. There’s also a handy FAQ section below where you can find answers to common questions and troubleshooting tips to ensure flawless results every time. If you give this Honey Butter Chicken a try, let me know how it turned out! Drop a comment, share your tweaks, or ask for help if any step feels tricky. Your feedback and stories bring this recipe to life, making our cooking community a little warmer—and a lot more delicious. Enjoy every sweet, savory, sticky bite!
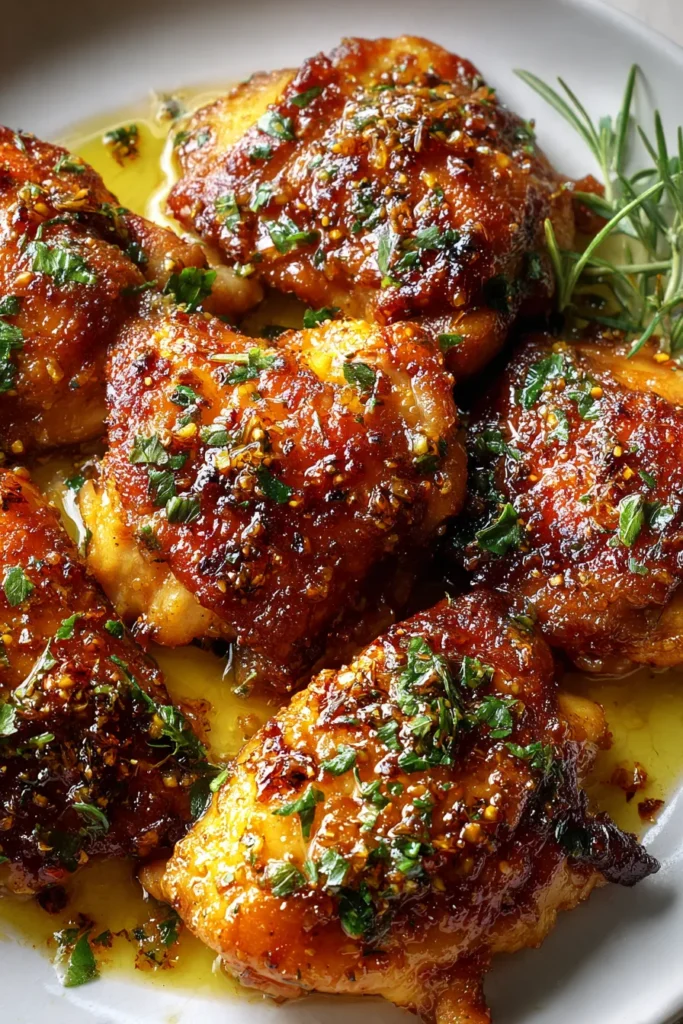

Honey Butter Chicken
Description
This Honey Butter Chicken features succulent chicken drenched in a rich honey sauce with a hint of garlic, making every bite bursting with flavor and comfort.
Ingredients
Instructions
-
Season the chicken thighs with salt and pepper to taste. Dredge each chicken piece in the flour, making sure they are fully coated. Shake off any excess flour.
-
In a large skillet over medium-high heat, add olive oil and let it heat up. Once the oil is hot, add the chicken pieces to the skillet.
-
Cook the chicken for about 6-8 minutes on each side, or until they are golden brown and cooked through. Remove the chicken from the skillet and set aside.
-
In the same skillet, reduce the heat to medium, add the butter and let it melt. Stir in the honey, garlic, apple cider vinegar, soy sauce, and crushed red pepper flakes (if using).
-
Let the sauce simmer for a few minutes, occasionally stirring, until it thickens slightly and the garlic is fragrant.
-
Return the cooked chicken to the skillet and toss it in the honey butter sauce until the chicken is fully coated.
-
Allow the chicken to simmer in the sauce for another 5 minutes to ensure it's heated through and well-flavored.
-
Garnish with freshly chopped parsley before serving.
Note
- Chicken thighs are preferred for juiciness, but breasts work if you prefer leaner meat.
- Adjust the amount of crushed red pepper flakes according to your spice preference.
- You can substitute apple cider vinegar with white vinegar or lemon juice for a different tang.
- Serve over rice, mashed potatoes, or vegetables for a complete meal.
- This dish is perfect for meal prep as it reheats wonderfully.

