

Every bite of these No Bake Orange Creamsicle Truffles feels like a mini vacation for your taste buds, transporting you to sun-drenched afternoons and ice cream truck memories. We begin with a base of golden Oreo cookies, pulsed until they’re nothing but fine, buttery crumbs, then bring them together with just-softened cream cheese that gives the center its dreamy, velvety texture. A dusting of fresh orange zest and a drop of orange extract infuse that classic creamsicle tang, while a hint of vanilla adds warmth and depth, rounding out the sweet-sour dance on your palate. As you dunk each little orb into melted white chocolate, the exterior cools into a silky shell that snaps with satisfying precision, revealing the luscious interior. Garnishing with extra zest or playful orange sprinkles elevates these truffles from simple treats to elegant little gems that brighten any dessert table.
One of the things I adore most about these truffles is how effortless they are to whip up, even if you’ve never made candy before. With just a food processor, a freezer or fridge space, and a microwavable bowl or double boiler, you can create professional-looking chocolates in your own kitchen without breaking a sweat. While the dough cools for just half an hour, you can catch up on your favorite podcast, set the table, or sneak in a quick dance party. Whether you’re preparing sweet favors for a bridal shower or surprising someone special with a homemade treat, these truffles arrive looking like they belong in a bakery window. They’re wonderfully forgiving: too soft? Give them a few extra minutes in the fridge. Want more citrus punch? Stir in an extra pinch of orange zest before rolling. It’s a recipe that feels like a friendly pat on the back, proving that simple ingredients can lead to remarkable results.
KEY INGREDIENTS IN NO BAKE ORANGE CREAMSICLE TRUFFLES
Before diving into the step-by-step process, let’s celebrate the handful of star players that bring these truffles to life. Each ingredient contributes its own unique role—some add structure, others bring flavor, and a couple lend that signature crisp coating.
- Golden Oreo crumbs: These buttery cookie crumbs form the base of the truffle dough, offering a sweet, neutral foundation that lets the bright orange notes shine.
- Cream cheese: Softened to perfection, this tangy, creamy element binds the crumbs into a smooth, pliable dough that melts in your mouth.
- Orange zest: Freshly grated from the peel, the zest delivers vibrant citrus oils and aromatic flair, intensifying that beloved creamsicle experience.
- Vanilla extract: A classic flavor booster, vanilla warms and rounds out the sweet-and-tart duo for a more balanced profile.
- Orange extract: A little goes a long way—this concentrated essence punches up the orange flavor so each truffle bursts with sunshine.
- White chocolate: Melted to a glossy finish, high-quality white chocolate encases the truffle centers in a crisp shell that adds sweetness and a satisfying snap.
- Orange sprinkles or zest (optional): For a finishing flourish, these decorative accents bring extra color, texture, and citrusy zing.
HOW TO MAKE NO BAKE ORANGE CREAMSICLE TRUFFLES
Let’s walk through how these delightful treats come together in just a few simple steps. From pulverizing cookies to dipping in glossy white chocolate, each technique is straightforward and kid-friendly—perfect for home cooks looking for fun, no-fuss desserts.
1. In a food processor, pulse the golden Oreos until they form fine, even crumbs. This ensures a smooth truffle center without any large chunks. Transfer the crumbs into a large mixing bowl.
2. Add the softened cream cheese, orange zest, vanilla extract, and orange extract to the bowl. Use a sturdy spatula or your hands to mix until a homogenous, dough-like consistency is achieved. It should be soft but firm enough to roll.
3. Using a small cookie scoop or lightly greased hands, form the dough into 1-inch balls. Place each ball on a parchment-lined baking sheet, spacing them evenly.
4. Chill the truffle balls in the refrigerator for 20–30 minutes, or until they’re firm to the touch. This makes dipping easier and helps the centers hold their shape.
5. While the truffles are chilling, melt the white chocolate in a microwave-safe bowl in 20-second intervals or over a double boiler, stirring until completely smooth and glossy.
6. Using a fork or dipping tool, dip each chilled truffle into the melted white chocolate, ensuring a full coating. Gently tap the fork on the bowl’s edge to remove any excess chocolate.
7. Return the coated truffles to the parchment-lined baking sheet. If you’d like, sprinkle each one with orange sprinkles or extra zest before the chocolate sets for a charming finish.
8. Let the truffles set at room temperature for about 15–20 minutes, or speed things up by refrigerating them for 10–15 minutes.
9. Once the chocolate is firm, serve these little bites of summer immediately, or store them in an airtight container in the refrigerator until you’re ready to share.
SERVING SUGGESTIONS FOR NO BAKE ORANGE CREAMSICLE TRUFFLES
When it comes to plating and sharing these bright, citrusy truffles, your creativity can shine just as much as the flavors. Whether you’re aiming for a casual afternoon tea or an elegant dessert spread, here are some ideas to make your presentation pop.
- Tiered Dessert Stand: Arrange the truffles on multiple levels of a tiered stand with a few fresh orange slices or mint sprigs between tiers. This creates an eye-catching focal point at parties.
- Individual Paper Cups: Place each truffle in a small, decorative paper or foil candy cup. Choose colors that complement the orange hue—think soft pastels or crisp white—for a refined look.
- Citrus Platter: Slice a few oranges and lay the rounds flat on a serving platter. Nestle the truffles directly on top of the slices to echo the flavor and make the colors pop.
- Edible Flower Garnish: Serve with a few edible flower petals (marigold, pansy, or nasturtium) arranged around each truffle on a plate. This adds an elegant, garden-fresh touch.
HOW TO STORE NO BAKE ORANGE CREAMSICLE TRUFFLES
Proper storage ensures that each bite of these truffles retains its snap, creaminess, and vibrant orange flavor. Follow these guidelines to keep them tasting their absolute best.
To keep your treats in peak condition, place them in a single layer within an airtight container. Use parchment or wax paper between layers if you need to stack. Store the container in the refrigerator for up to one week—this chills the filling and chocolate shell, maintaining that irresistible snap.
- Refrigerator Storage: Store in an airtight container on a middle shelf where temperatures stay consistent. Proper sealing prevents the truffles from absorbing any refrigerator odors.
- Freezer Extension: For longer storage, freeze truffles in a well-sealed container for up to one month. Thaw in the refrigerator for a few hours before serving to preserve texture.
- Individual Wrapping: If you plan to gift them, wrap each truffle in decorative foil or place it inside a mini cellophane bag before popping it into a box or basket.
- Avoid Humidity: Keep truffles away from high-humidity environments. Excess moisture can cause the white chocolate shell to bloom (develop a dull, whitish surface).
CONCLUSION
These No Bake Orange Creamsicle Truffles are proof that summery flavors and simple techniques can come together in a single, unforgettable bite. From the buttery crunch of golden Oreo crumbs to the silky tang of orange-cream filling and the crisp embrace of white chocolate, each layer plays its part in a harmonious dessert that feels both playful and sophisticated. Whether you’re a beginner looking to venture into homemade candies or a seasoned home cook craving a fun twist on classic treats, this recipe offers the perfect balance of ease and elegance. Feel free to print this article and save it for later—you’ll want it handy the next time you need a quick, crowd-pleasing dessert.
I hope this guide has inspired you to roll up your sleeves and bring a burst of citrus sunshine to your kitchen. Below this article, you’ll find a handy FAQ section to answer common questions and troubleshoot any truffle-making adventures. If you give this recipe a try, I’d love to hear how it went—drop a comment with your thoughts, share any personal tweaks you made, or ask for help if you hit a snag. Your feedback and questions help turn this recipe into a lively conversation among friends, and there’s nothing sweeter than that!
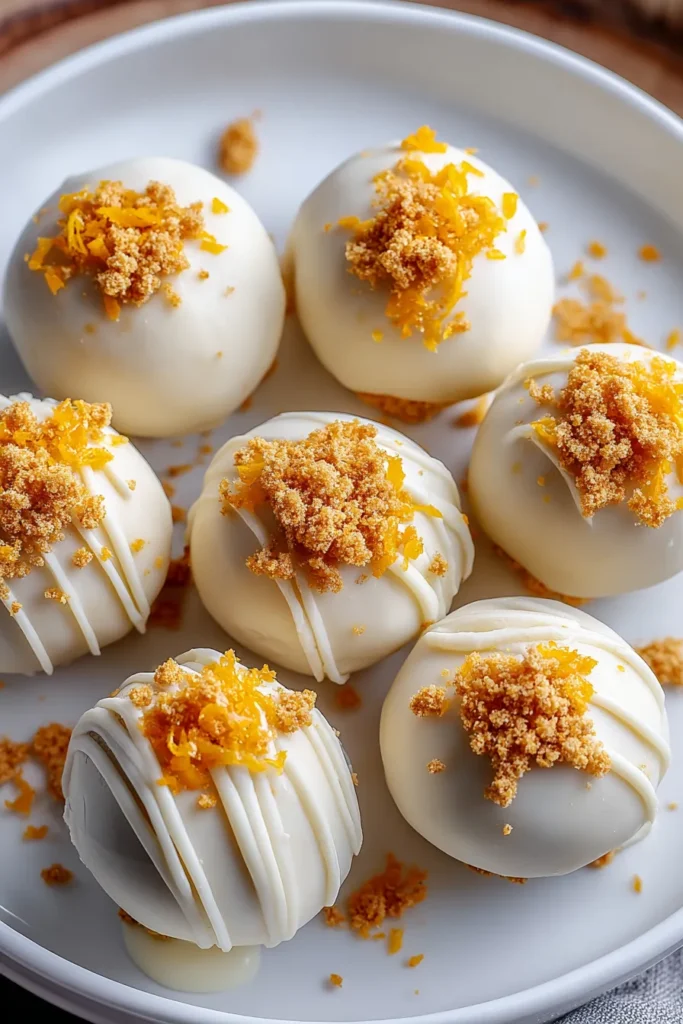

No Bake Orange Creamsicle Truffles
Description
With a perfect blend of sweet golden Oreos and creamy orange flavors, these no-bake truffles are a delightful treat for any occasion. They’re simple to make and absolutely irresistible!
Ingredients
Instructions
-
In a food processor, pulse the golden Oreos until they form fine crumbs. Transfer the crumbs to a mixing bowl.
-
Add the softened cream cheese, orange zest, vanilla extract, and orange extract to the crumbs. Mix until well combined and a soft, dough-like consistency is achieved.
-
Using a small cookie scoop or your hands, form the mixture into 1-inch balls and place them on a parchment-lined baking sheet.
-
Chill the truffle balls in the refrigerator for about 20-30 minutes, or until they are firm enough to handle.
-
While the truffles are chilling, melt the white chocolate in a microwave-safe bowl or double boiler. Stir until smooth.
-
Dip each truffle into the melted white chocolate, ensuring it’s completely covered. Use a fork to lift the truffle out, allowing any excess chocolate to drip off.
-
Place the coated truffles back on the parchment-lined baking sheet. If desired, garnish with orange sprinkles or extra orange zest before the chocolate sets.
-
Let the truffles set at room temperature or refrigerate them for faster setting.
-
Once the chocolate coating is firm, serve the truffles or store them in an airtight container in the refrigerator until ready to enjoy.
Note
- For a sweeter truffle, consider adding an extra tablespoon of powdered sugar to the dough mix.
- Experiment with flavored extracts like lemon or lime for a different citrus twist.
- These truffles make great gifts; package them in decorative boxes for an elegant presentation.
- Always ensure the white chocolate is of high quality for the best taste in your truffles.
- The truffles can be made a day ahead and stored, making them perfect for party preparation.

