

Protein-Packed No-Bake Crunchy Healthy Butterfingers bring together creamy peanut butter and crispy rice cereal for a satisfying, protein-rich snack that’s ready in under an hour. This no-bake treat combines the sweetness of honey and vanilla with the crunch of dark chocolate for a chewy, crunchy bite you’ll want to devour straight from the freezer (or share, if you must!).
Key Ingredients
Let’s break down the star players that make these bars so irresistible:
- 1 cup natural creamy peanut butter: Provides a rich, nutty base and healthy fats to keep you energized.
- 1/4 cup honey: Adds natural sweetness and helps bind the mixture together.
- 2 tablespoons coconut oil: Creates a smooth, pourable texture and firms up in the freezer.
- 1 teaspoon vanilla extract: Enhances overall flavor with warm, aromatic notes.
- 1/2 teaspoon sea salt: Balances sweetness and brings out the peanut butter’s depth.
- 1/2 cup vanilla protein powder: Boosts protein content and adds a hint of creamy vanilla taste.
- 1 cup crispy rice cereal: Delivers light, airy crunch for that satisfying bite.
- 1/2 cup dark chocolate chips: Coats the bars in a bittersweet shell that shatters delightfully.
- 1 tablespoon coconut oil: Mixed with the chocolate to ensure a glossy, smooth coating.
How To Make Protein-Packed No-Bake Crunchy Healthy Butterfingers
Ready to whip up these bars? You’ll be surprised how simple the process is—just a few melting, mixing, and setting steps, and you’ll have bars firm enough to slice yet tender enough to bite into. The key is to ensure each component is fully combined and chilled properly for that classic crunchy-chewy contrast.
1. Line an 8×4 inch loaf pan with parchment paper, allowing excess to hang over the edges for easy removal.
2. In a medium microwave-safe bowl, combine peanut butter, honey, 2 tablespoons coconut oil, vanilla extract, and sea salt. Microwave in 30-second intervals, stirring after each until the mixture is melted and completely smooth.
3. Stir in the vanilla protein powder until fully incorporated, scraping the sides of the bowl to avoid lumps.
4. Gently fold in the crispy rice cereal with a spatula until every piece is evenly coated in the peanut butter mixture.
5. Transfer the mixture to the prepared pan and press firmly into an even layer using the back of a spoon or your fingers.
6. Place the pan in the freezer and let the bars set for at least 20 minutes until firm to the touch.
7. While the base chills, melt the dark chocolate chips with 1 tablespoon coconut oil in a double boiler or microwave in 20-second bursts, stirring until silky smooth.
8. Lift the set mixture out of the pan using the parchment overhang, then slice into individual bars.
9. Dip each bar into the melted chocolate, letting any excess drip off, and place on a parchment-lined tray.
10. Chill the dipped bars in the refrigerator for 10 minutes or until the chocolate is fully set, then enjoy!
Serving Suggestions
These bars shine in any snack lineup, whether you’re refueling after a workout or indulging in a guilt-free dessert. Serve them slightly chilled so they retain their crunchy exterior and chewy center. Ready for some ideas to make snack time even more delightful?
- Breakfast Boost: Pair with a cold glass of milk or a smoothie for a quick, on-the-go protein punch.
- Party Platter: Arrange on a decorative tray alongside fresh berries and cheese cubes for a crowd-pleasing snack station.
- Lunchbox Treat: Wrap individually in parchment and pack with fruit slices for a balanced midday pick-me-up.
- Coffee Companion: Serve alongside your morning brew; the sweet-salty contrast pairs perfectly with hot coffee or tea.
Tips For Perfect Protein-Packed No-Bake Crunchy Healthy Butterfingers
Nailing that perfect texture every time is easier than you think! With a few simple tweaks from my own kitchen adventures, you’ll have bars that are crunchy on the outside and chewy on the inside. Whether you’re customizing flavors or making these vegan-friendly, these tips will keep your snack game strong and your taste buds cheering.
- Store in an airtight container in the refrigerator for up to one week to maintain freshness and chewiness.
- Swap honey for maple syrup and choose a plant-based protein powder for a fully vegan version.
- For extra crunch, stir in 1/4 cup chopped peanuts or almonds along with the rice cereal.
- Use flavored protein powders like chocolate or peanut butter to add a new dimension to each batch.
How To Store It
Proper storage ensures these bars stay fresh, crunchy, and delicious. Because they’re no-bake, they rely on chilling rather than heat, so keeping them cold is key. Follow these methods to enjoy your bars at their very best:
- Refrigerator: Place bars in a single layer or separated by parchment paper in an airtight container; they’ll last up to one week.
- Freezer: Layer bars between parchment sheets in a freezer-safe container for up to one month—just thaw in the fridge before eating.
- Room Temperature for Short-Term: If serving immediately, you can leave bars at room temperature for up to 2 hours without losing firmness.
- Grab-and-Go Packs: Keep a few in individual mini bags or wraps in the fridge so you can grab a protein boost anytime.
Frequently Asked Questions
Here are answers to some common questions we get about these crunchy, no-bake bars:
- Q: How long does it take to prepare and set these Protein-Packed No-Bake Crunchy Healthy Butterfingers?
A: Active prep time is about 15 minutes, plus at least 20 minutes of freezing and another 10 minutes in the refrigerator, totaling roughly 45 minutes from start to finish.
- Q: Can I make these bars vegan?
A: Yes. Swap honey for maple syrup and use a plant-based protein powder. Ensure your chocolate chips are dairy-free or use a vegan chocolate alternative.
- Q: What’s the best way to melt the chocolate for dipping without seizing?
A: Use a double boiler or microwave in 20-second bursts, stirring thoroughly each time. Adding coconut oil before melting helps stabilize the chocolate and promote a glossy finish.
- Q: How should I store the finished bars, and how long will they keep?
A: Store them in an airtight container in the refrigerator for up to one week. For longer storage, freeze for up to one month and thaw in the fridge before serving.
- Q: Can I customize the crunchiness or flavor?
A: Absolutely. Stir in chopped nuts for extra crunch or use different protein powder flavors—chocolate, peanut butter, or vanilla chai—to mix things up.
- Q: What protein powder-to-liquid ratio works best?
A: The recipe’s 1/2 cup protein powder with about 1¼ cups of liquid ingredients yields a firm yet pliable mixture. Adjust with extra oil or powder as needed for consistency.
- Q: Can I prepare the base ahead of time and add chocolate later?
A: Definitely. Make the peanut butter–protein–cereal base, freeze or refrigerate, then slice and dip in chocolate whenever you’re ready for a fresh batch of bars.
What Makes This Special
These Protein-Packed No-Bake Crunchy Healthy Butterfingers stand out thanks to their perfect blend of textures—creamy peanut butter, airy crispy rice, and a snappy chocolate shell. They’re simple enough for anyone to whip up, yet customizable for endless flavor twists. Feel free to print this article and save it for later snack emergencies. Tried them already or have a question? Drop a comment below—I’d love to hear how your bars turned out or help troubleshoot any kitchen hiccups!
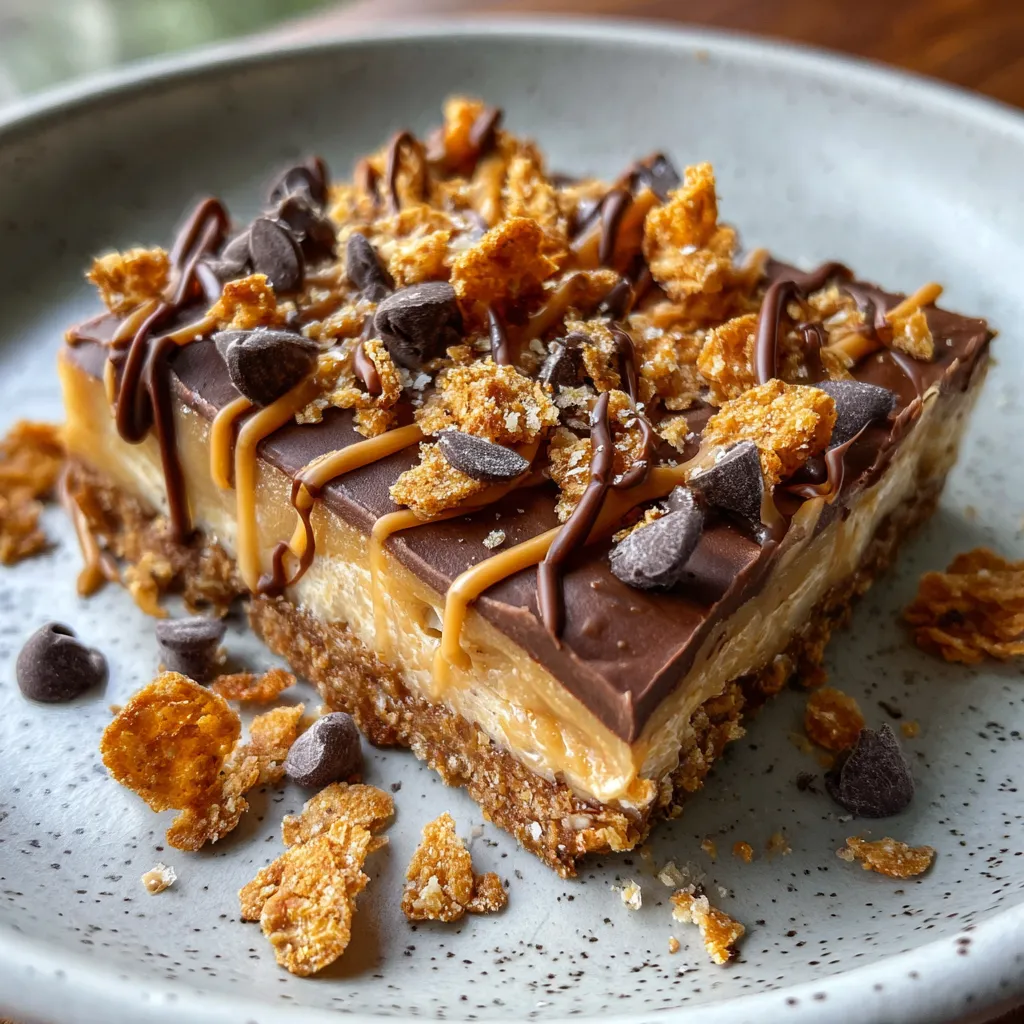

Protein-Packed No-Bake Crunchy Healthy Butterfingers
Description
Smooth peanut butter and honey blend with vanilla protein powder and crisp cereal, forming no-bake bars that freeze into firm, chewy squares—then dunked in silky dark chocolate for a crunchy, protein-packed bite.
Ingredients
Instructions
-
Line an 8x4 inch loaf pan with parchment paper.
-
In a medium microwave-safe bowl combine peanut butter honey 2 tablespoons coconut oil vanilla extract and sea salt and microwave in 30-second intervals stirring until melted and smooth.
-
Stir in protein powder until fully incorporated.
-
Fold in crispy rice cereal until evenly coated.
-
Press the mixture firmly into the prepared pan using the back of a spoon.
-
Place the pan in the freezer for at least 20 minutes to set.
-
Meanwhile melt dark chocolate chips and 1 tablespoon coconut oil in a double boiler or microwave in 20-second bursts stirring until smooth.
-
Remove the set mixture from the pan and cut into bars.
-
Dip each bar into the melted chocolate allowing excess to drip off and place on a parchment-lined tray.
-
Chill in the refrigerator for 10 minutes or until the chocolate is set then serve.
Note
- Store in an airtight container in the refrigerator for up to one week
- Swap honey for maple syrup and use plant-based protein powder for a vegan version
- For extra crunch stir in chopped peanuts or almonds along with the rice cereal
- Use flavored protein powders like chocolate or peanut butter to customize the taste

